EasyManua.ls Logo

OVE MADISON 60 User Manual

OVE MADISON 60
36 pages
To Next Page IconTo Next Page
Page #1 background imageLoading...
Page #1 background image
12015-09-23
2800 Etienne Lenoir, Laval
Québec H7R 0A3 Canada
Purchase date: _________________________ Product Tracking Reference: ________________________
Questions, problems, missing parts?
Before returning to your retailer, call our customer service department at
1-866-839-2888, 9 a.m. - 5 p.m., EST, Monday - Friday
MADISON 60
78 3/4”
[2000]
Rough-in
60”
[
1524]
Wall-to-Wall
58 3/16”
[
1478]
Opening
24 13/16”
[630]
7 1/16”
[180]
CSA Markings
27 1/2”
[699]
32 5/8”
[829]
Measures: inch [millimeter]
Question and Answer IconNeed help?

Do you have a question about the OVE MADISON 60 and is the answer not in the manual?

OVE MADISON 60 Specifications

General IconGeneral
BrandOVE
ModelMADISON 60
CategoryBathroom Fixtures
LanguageEnglish

Summary

Safety Information

Handle Tempered Glass With Caution

Handle tempered glass carefully to prevent shattering into small pieces.

Heavy Product Installation

Requires at least two people for proper and safe installation due to weight.

Installation Cautions

Remove parts carefully, inspect for damage, contact customer service if needed.

Preparation

Parts Verification

Verify all parts against lists; do not assemble if parts are missing or damaged.

Wall to Wall Measures

Required Wall Distance

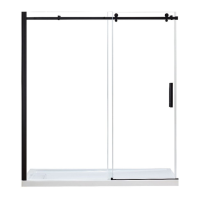
Ensure the wall-to-wall distance is between 1478mm (58 3/16") and 1493mm (58 3/4").

Fixed Panel Installation

Mount Fixed Panel

Position the fixed panel (C) into the installed clamp and guide.

Support Bar Installation

Drill Holes and Install Anchors

Drill holes, insert wall anchors (AA), and secure anchor fittings with screws (CC).

Re-attach Bar and Fix to Wall

Re-attach stoppers (E) and anchors (D) to bar (F), then fix bar to wall.

Secure Panel to Support Bar

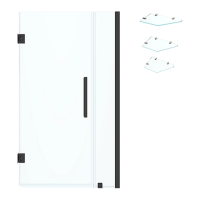
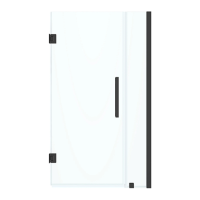
Attach fixed panel (C) to support bar (F) using brackets (G) and hex screws.

Door Panel Installation

Install Bottom Seal Strip

Insert the bottom seal strip (O) onto the door panel (J).

Hang Door Panel

Hang the door panel (J) on the support bar (F) and guide (Q).

Cabinet Installation

Secure Panel and Track

Drill panel (T), then secure track (B) with screws (GG), fittings (II), and caps (HH).

Secure Wall Track

Reattach and secure the wall track (B) with screws (EE), avoiding overtightening.

Insert Glass Shelves

Insert the glass shelves (U) into the installed shelf supports.

Handle Installation & Sealing

Apply Silicone Sealant

Apply sealant around fixed components for water-tightness; allow 24 hours to dry.

Related product manuals