7
NOTE:
Before programming the opener, check to make sure there
are no objects in the garage door opening.
INTRODUCTION
Now that the garage door opener is installed, follow the
steps in this manual to program the opener so that the door
opens and closes properly and all remote devices operate
correctly. The following steps are a guide to setting opener so
it functions properly.
The following steps list the order of programming the
opener’s functional settings for use.
1. “TRAVEL LIMITS”
2. “FORCE CONTROL”
3. “REMOTE PROGRAMMING”
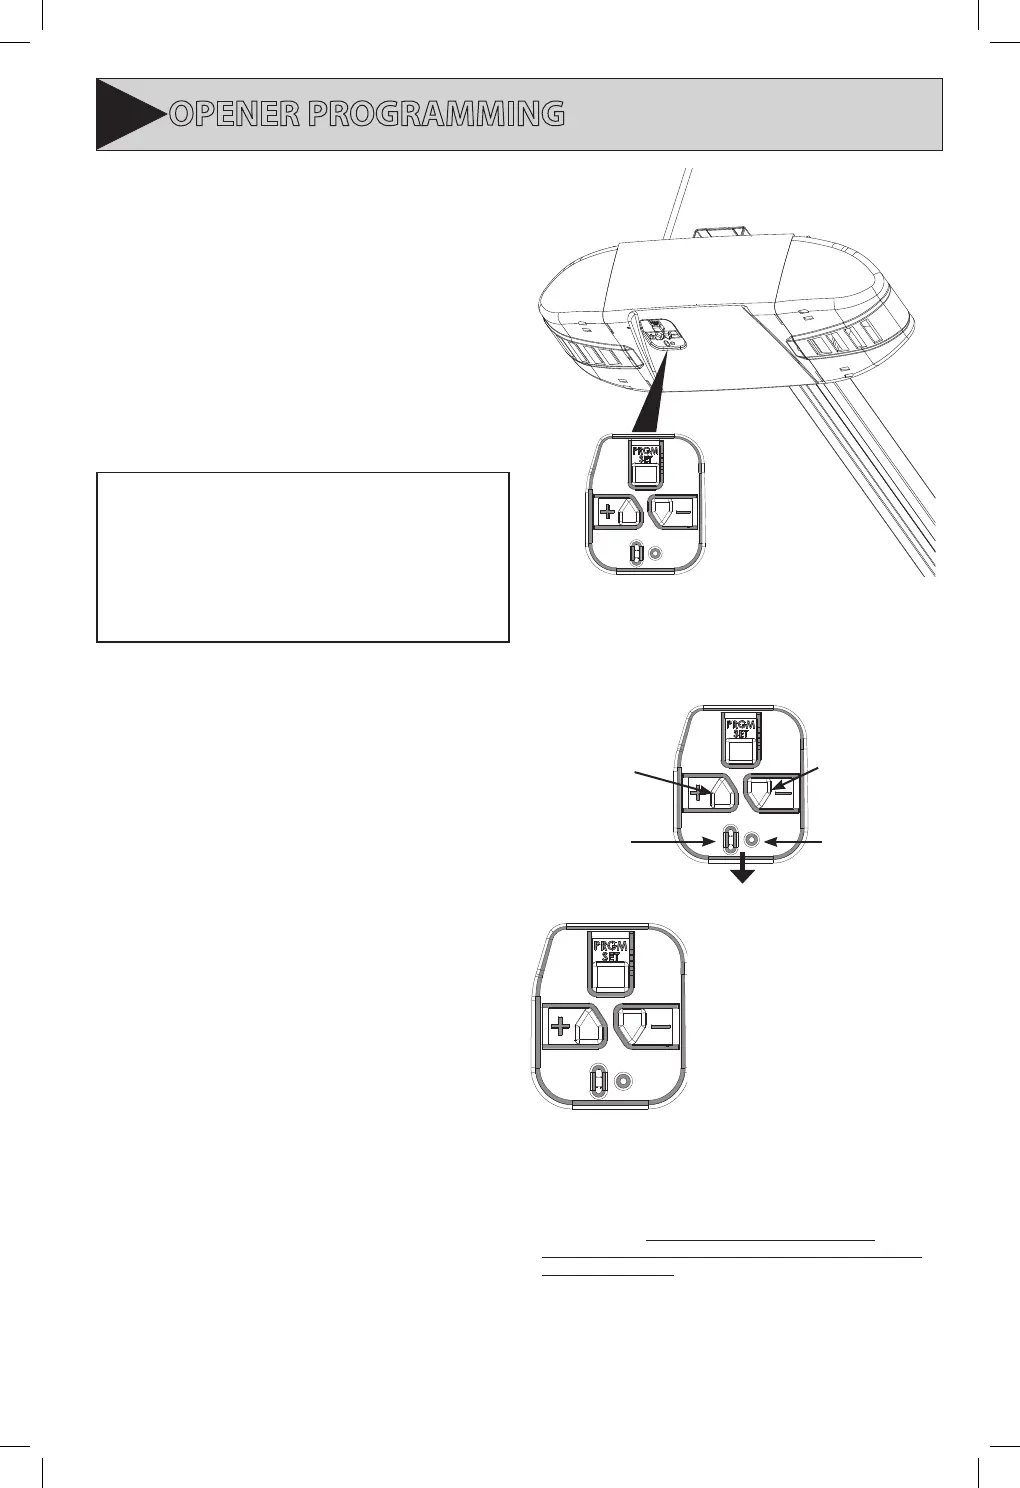
OVERVIEW OF POWERHEAD CONTROLS
This section describes the programming functions of the
opener. Use the following information to understand the
buttons and LED indicators used to program functions.
Powerhead: There are 3 programming buttons and 2 LED
lights on the powerhead. Each of the buttons are used to
enter and complete the setup programming. The LED lights
indicate status or a function change by illuminating ON, OFF,
or ON FLASHING.
There are 3 programs:
1. Door Travel Limits.
This program is used to set how far the door travels up
and down.
2. Force Setting Program.
This program controls the force applied during the
closing and opening of the door. They are factory set
and will rarely require adjustment.
3. Remote Programs (default menu)–only required for
added remote control transmitters.
Describes how to program remotes to sync with
additional remote control devices, wall consoles,
keypads and the powerhead.
NOTE: The 3 programming buttons are for programming ONLY.
These buttons can NOT be used to operate the opener once the
Required Programming section has been successfully completed.
Term Denitions:
Travel Limits Programmable setting to adjust how far door
travels up or down.
Force Control refers to how much power is needed to
move (open/close) a particular door and does NOT require
programming.
Remote Programming synchronizes remote devices
(remote and keypad) with the powerhead.
+/-: Moves door up or down during
programming and advances
through menus.
PRGM SET: Enters into and selects
programming menus.
• Justremember—the pointed end of the button (like an
arrowhead) points in the direction the carriage will move when
that button is pushed.
NOTE:
Each programming step has a 30 second time limit for completion
after the function is initiated. After 30 seconds, two LED’s will illuminate RED
indicating time has expired and the step must be re-started. Restart the step
as many times as necessary to complete the programming.
DOOR
ORIENTATION
Standing under the opener’s powerhead – facing the door – looking
up – this is the view you will see of the programming buttons and
LEDs.
OPENER PROGRAMMING
3
Long LED
Indicator
Round LED
Indicator
Program
Open Travel
Button
Close Travel
Button
LEDs: Indicates various
programming modes and trouble
codes.
 Loading...