10400557-002 ©2014 Overland Storage, Inc. Page 4 of 5
Optional Sliding Rail Kit Instructions
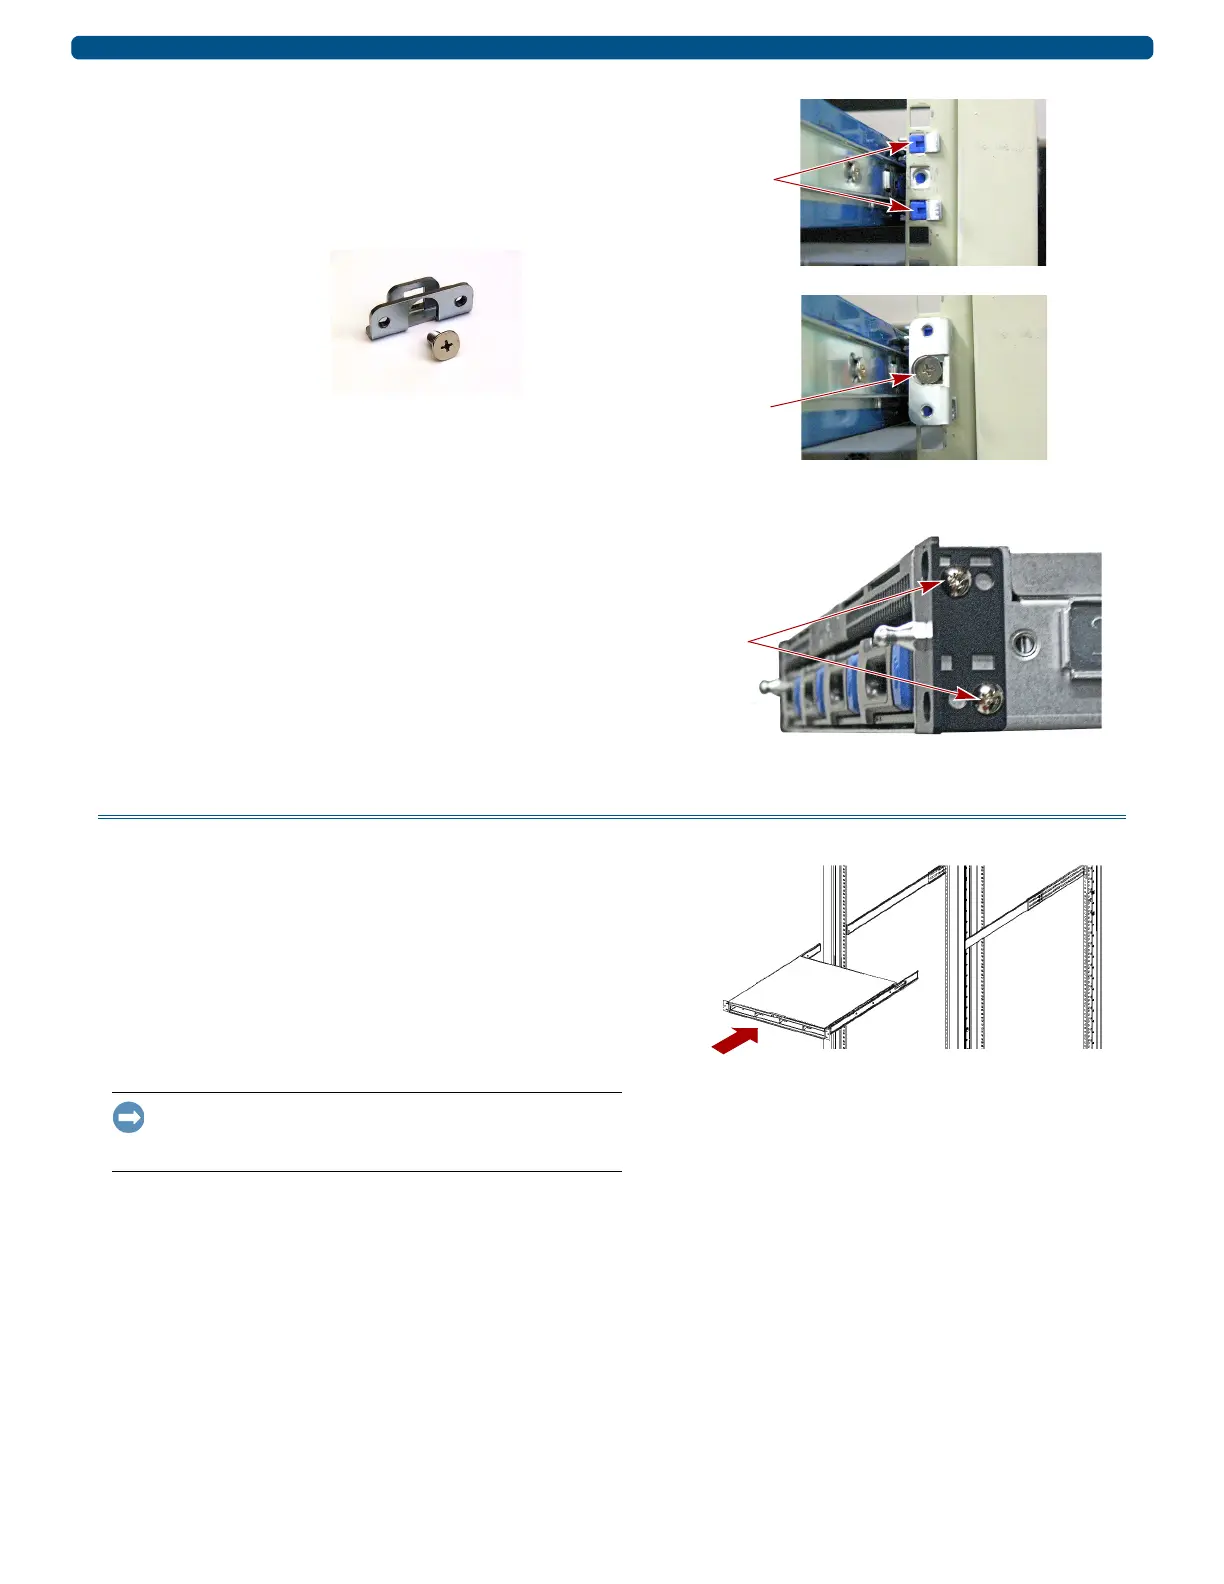
Install Lock-down Brackets on Rack
1. To install the server in the rack, first attach lock-down
brackets to the rack.
Facing the rack, place a bracket around the rail
anchors and align the center hole of the rail mounting
with the center hole of the bracket
2. Use the supplied screw in the center hole to secure the
lock-down bracket to the rack.
3. Repeat Steps 1–2 on the other side of the rack.
Install Ear Brackets on Server
1. Starting on the right side, fit the ear bracket where the
fixed bracket was removed from the chassis, then use two
screws to secure the ear bracket to the chassis.
2. Repeat Step 1 for the left ear bracket.
Install the Chassis
Install in Rack
1. Using the mechanical lifter, position the appliance in
front of the rack.
2. Insert the inner rails into the outer rails and slide the
unit into the rack.
3. Using the four retained screws, secure the SnapServer
in front of the rack.
4. For thicker racks: Using the two supplied screws,
secure the rear ends of the slide rails to the rack rails.
IMPORTANT: If this is a new appliance install, continue with
the SnapServer XSR 40 Quick Start Guide instructions for
connecting and configuring the appliance.
Lock-down Bracket
and Screw
 Loading...