OWC MerCury raCk PrO IntrOduCtIOn
1.4.1 Buttons
The “Power On/Off” and “Set/Mute”
buttons are inside the front door on
the left side. The SET/MUTE button
is used for setting the RAID modes
(covered in Section 1.7, RAID Set-
tings) and disabling the audible
alarm when there is a drive failure.
2
1.4.2 LED Drive Bay Indicators
Each drive bay has a multicolor LED indicator.
Power:
•Off = power off
•Blue = power on
•Pink = power on (advanced format drives)
Access:
•Flashing purple = drive being accessed
Rebuild:
•Blinking red = rebuilding RAID array
•Solid red = faulty drive
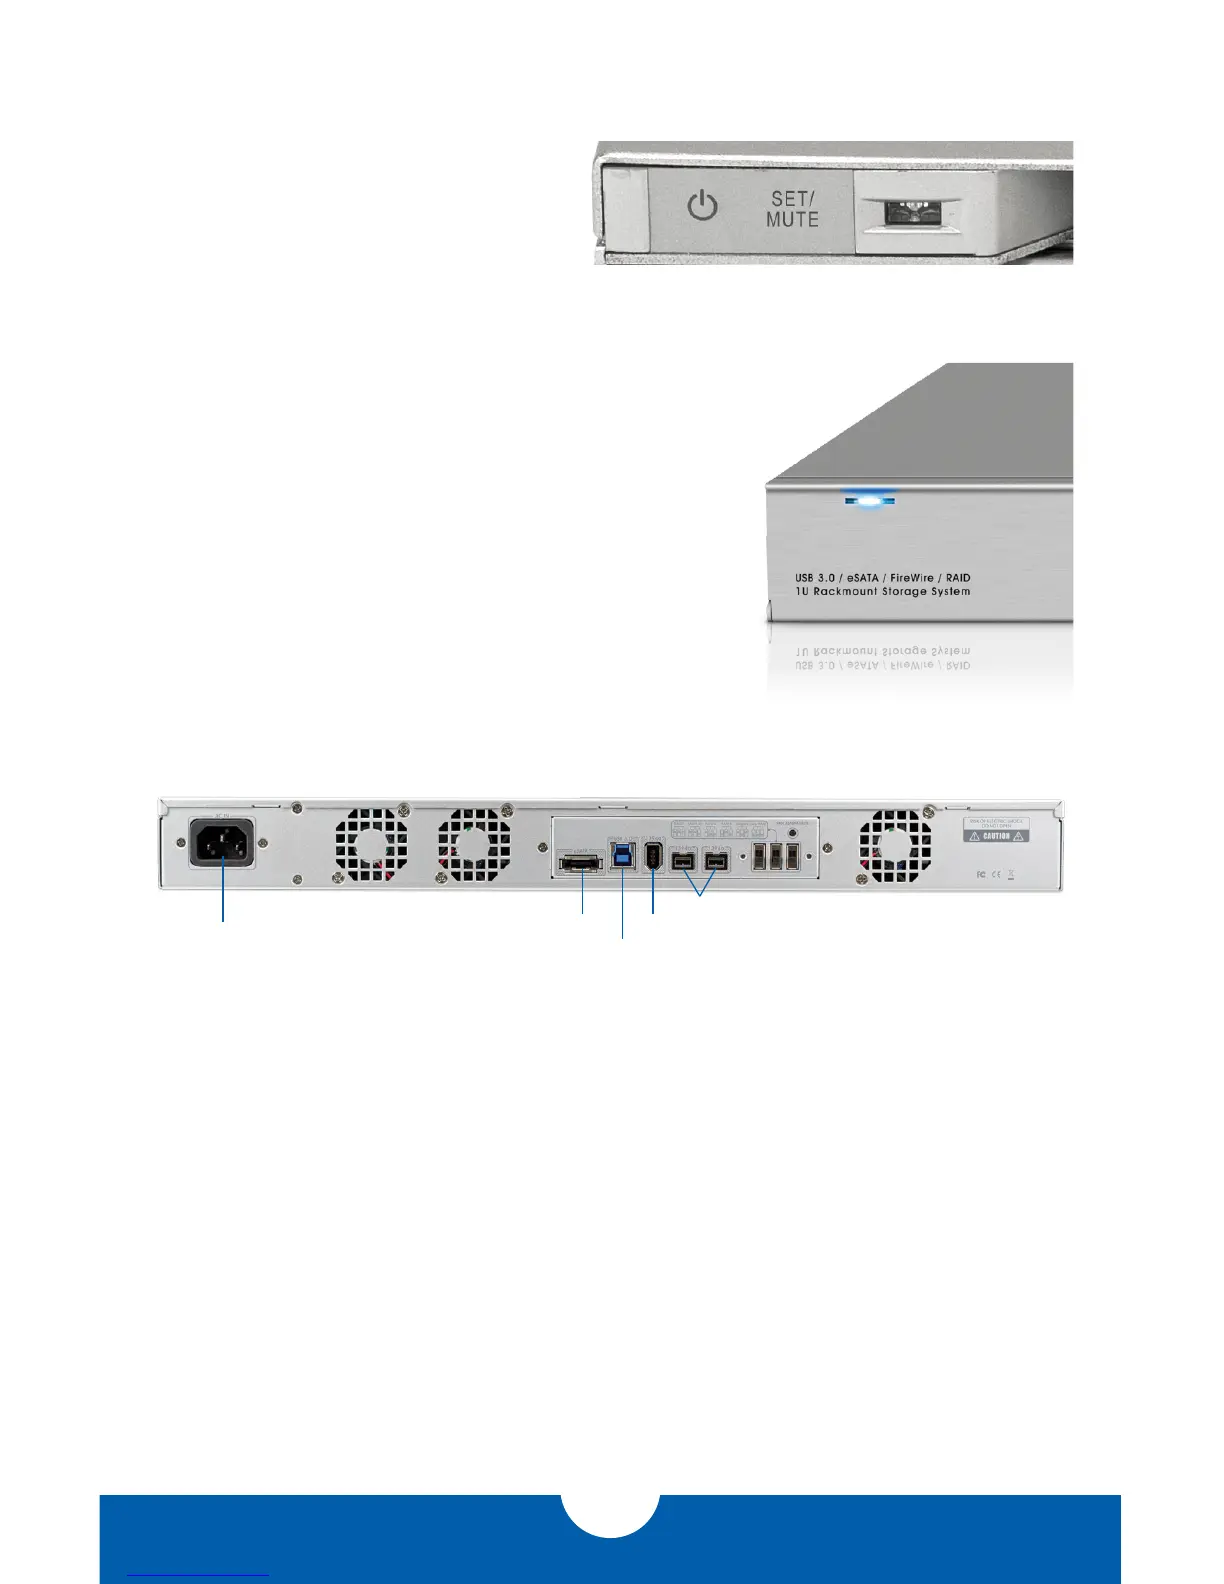
Power Input
eSATA
FW400
USB 3.0
FW800
1.5 REAR VIEW
1.5.1 Connection
1. Plug the power cable into the wall and into the OWC Mercury Rack Pro.
2. Connect the eSATA, FireWire 800, FireWire 400, or USB 3.0 cable – appropriate for the
interface that your computer supports – into the drive and computer. (eSATA or USB
3.0 interfaces are recommended for maximum performance)
NOTE:
•Only one interface (eSATA, FW800, FW400, USB 3.0) at a time can be used. When more
than one interface cable is connected, the fastest interface has priority.
•For the safe removal of your drive and to assure that no data is lost, always eject or un-
mount the drive from your operating system before powering off.
•In order for the computer to access volumes larger than 2TB, the operating system
needs to support large volumes (e.g., Windows Vista or Mac OS X 10.4 and above).
 Loading...