Page #8OWC Mercury Optical Drives Installation Manual
Insert the 4 Torx T-8 screws into the OWC Mercury Optical drive and place their
grommets over the screw heads. Once again, the locations are:
• Two are half-moon shaped and go on the left side of the drive (they are the ones
that are compressed to hold in place when the lid is closed).
• One is a standard round washer that goes at the front right of the drive, right next to
the hard drive.
• One is a captive grommet, which is round and ts into a hole at the top right of the
CD bay.
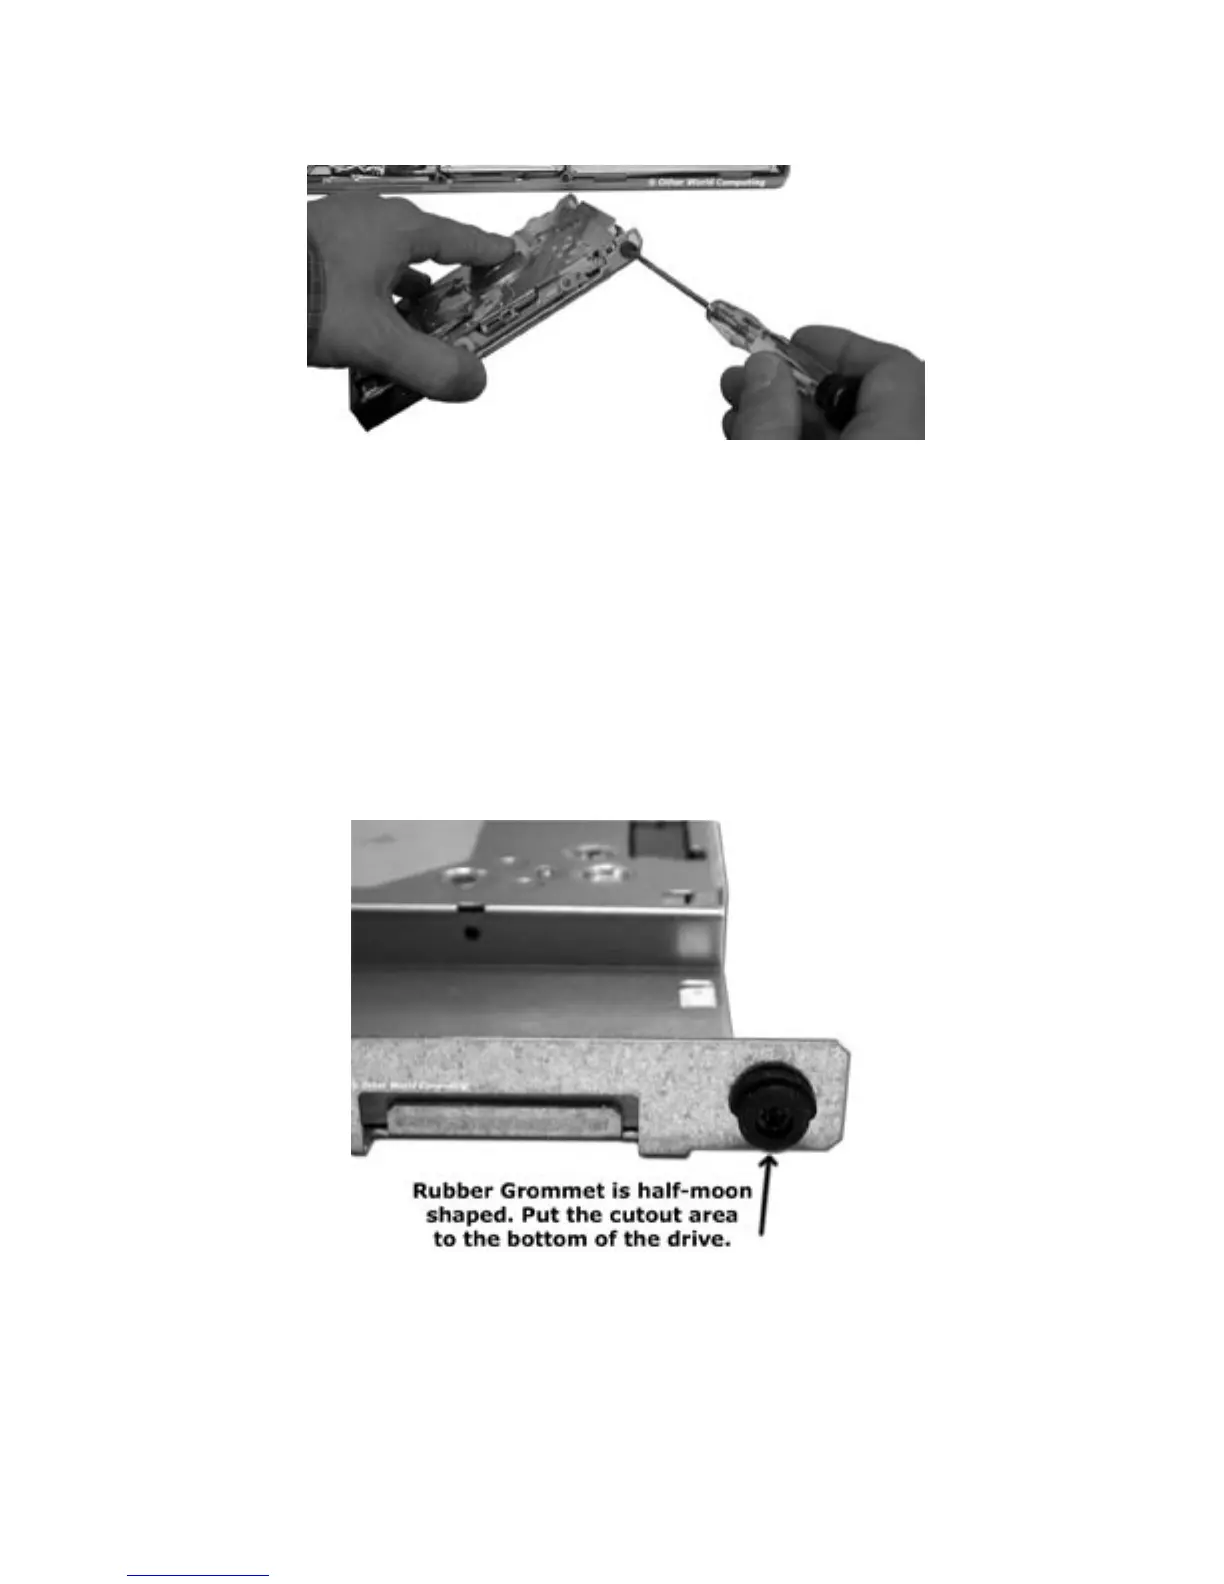
The two grommets / washers on the right side are universal in orientation, because
they are round. The two grommets on the left side are half-moon shaped and the moon
(larger portion) should be facing up as shown in this picture. The drive slides down onto
the smaller portion of the grommet and if improperly installed, the case will not close on
the PowerBook.