Do you have a question about the OWI Edge and is the answer not in the manual?
Consists of a warning about reproduction rights and caution about device handling to prevent damage.
Specifies the minimum OS, CPU, memory, disk space, and display for Windows XP setup.
Steps to install the USB driver for the Robotic Arm Edge.
Guide through the initial steps of installing the USB driver via the Found New Hardware Wizard.
Steps for browsing and selecting the correct driver location for the USB device.
Verifying the driver path and allowing the wizard to search for the USB driver.
Handling Windows Logo testing warnings and completing the USB driver installation.
Navigating to "My Computer" from the Start menu for program installation.
Locating and opening the CD-ROM drive containing the program installation files.
Selecting the specific folder for the Robotic Arm Edge program on the CD.
Initiating the program installation by clicking the setup executable.
Confirming the installation of required runtime files for the program.
Proceeding with the installer after reading the welcome screen.
Providing user information for the software installation.
Accepting the default installation folder for the Robotic Arm Edge software.
Confirming the default shortcut folder for the program.
Reviewing the installation settings before proceeding.
Waiting for the software files to be installed on the computer.
Closing the Adobe Flash Player setup window after completion.
Completing the Robotic Arm Edge installation process.
Lists the system requirements for setting up the Robotic Arm Edge on Windows Vista.
Steps for installing the USB driver when using Windows Vista.
Guide through the initial steps of installing the USB driver via the Found New Hardware Wizard.
Choosing search options for the driver, including not searching online.
Browsing to find the driver software location on the CD-ROM.
Confirming the driver path and choosing to install the driver software.
Waiting for driver installation, closing the success dialog, and confirming installation.
Navigating to the "Computer" option from the Start menu in Windows Vista.
Accessing the CD-ROM drive to find the program installation files.
Selecting the appropriate folder on the CD containing the program.
Executing the setup application to begin program installation.
Selecting "Allow" to proceed with the program installation under User Account Control.
Advancing through the installer after the welcome screen for the program.
Entering user details as prompted by the installer.
Confirming the installation directory for the Robotic Arm Edge software.
Specifying the folder for program shortcuts.
Reviewing the installation configuration before starting the process.
Monitoring the file installation progress for the Robotic Arm Edge program.
Closing the installation successful dialog for the Adobe Flash Player component.
Finalizing the Robotic Arm Edge software installation.
Instructions on how to launch the Robotic Arm Edge application from the desktop.
Describes clicking "PLAY" to enter the main program interface.
Explains how to choose a play mode from the main menu.
Overview of controls for operating the robotic arm using keyboard or mouse input.
Identifies key areas like control mode, write data, file, and program tools.
Details on inputting movement data and timing in the write data area.
Explains how to manage program files: creating, opening, saving, and closing.
Explanation of tools for executing, stopping, rewinding, and deleting programs.
Guides on using control buttons to set movement duration for the arm.
Shows where the programmed movement time is displayed on the interface.
Explains how data is written into the data box after pressing ENTER.
Selecting additional motor gears and changing their movement data.
Confirming data entry and updating the data box with new movements.
Inserting new movement data into the program sequence using the INSERT function.
Modifying the duration for specific motor movements in the program.
Confirming the insertion of data into the data box.
Overwriting existing movement data by selecting the OVERWRITE option.
Adjusting the time duration for selected motor movements.
Finalizing changes by pressing ENTER, which automatically reverts OVERWRITE to ADD TO LIST.
Selecting the PROGRAM mode from the main menu to start programming.
Starting the programming process by selecting motors and setting movement times.
Troubleshooting steps for when the PC with USB connection is unresponsive in Windows XP.
First step in troubleshooting is to access "My Computer".
Accessing system properties by right-clicking and selecting "Properties".
Navigating to the "Hardware" tab within System Properties.
Opening the Device Manager to view and manage hardware devices.
Locating the USB Device in Device Manager and initiating driver update.
Redirecting to previous instructions for solving USB connection issues.
First step for Vista troubleshooting: accessing "My Computer".
Accessing system properties via right-click and selecting "Properties".
Navigating to the System Protection settings.
Continuing the process after the User Account Control prompt.
Accessing the Hardware tab to manage system devices.
Opening the Device Manager to manage hardware.
Locating the USB device and initiating the driver update process.
Selecting the manual driver search option, directing to specific instructions.
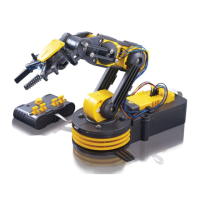
| Type | Robotic Arm |
|---|---|
| Control | Wired Remote Control |
| Number of Motors | 5 |
| Lifting Capacity | 100g |
| Axis of Movement | 5 |
| Degrees of Freedom | 5 |
| Gripper | Yes |
| Wrist Motion | Yes |
| Elbow Motion | Yes |
| Base Rotation | Yes |
| Material | Plastic |
| Batteries Included | No |
| Power Source | Batteries |
| Height | 380 mm (15 inches) |
| Weight | 1.5 lbs |