ONLINE MANUAL
Scan this QR Code with your
mobile device to take you to
the online manual.
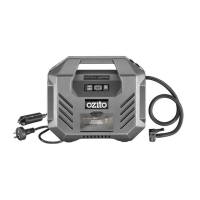
1 AC Power Cord
2 Power Mode Switch
3 Target Pressure Buttons
4 LCD Screen
5 Run / Pause Button
6 Accessories Compartment
7 Air Hose
8 Valve Caps x 4
9 Carry Handle
10 12V DC Cord Compartment
FRONT VIEW
BACK VIEW
ACCESSORIES
KNOW YOUR PRODUCT
1. ADAPTORS & ACCESSORIES
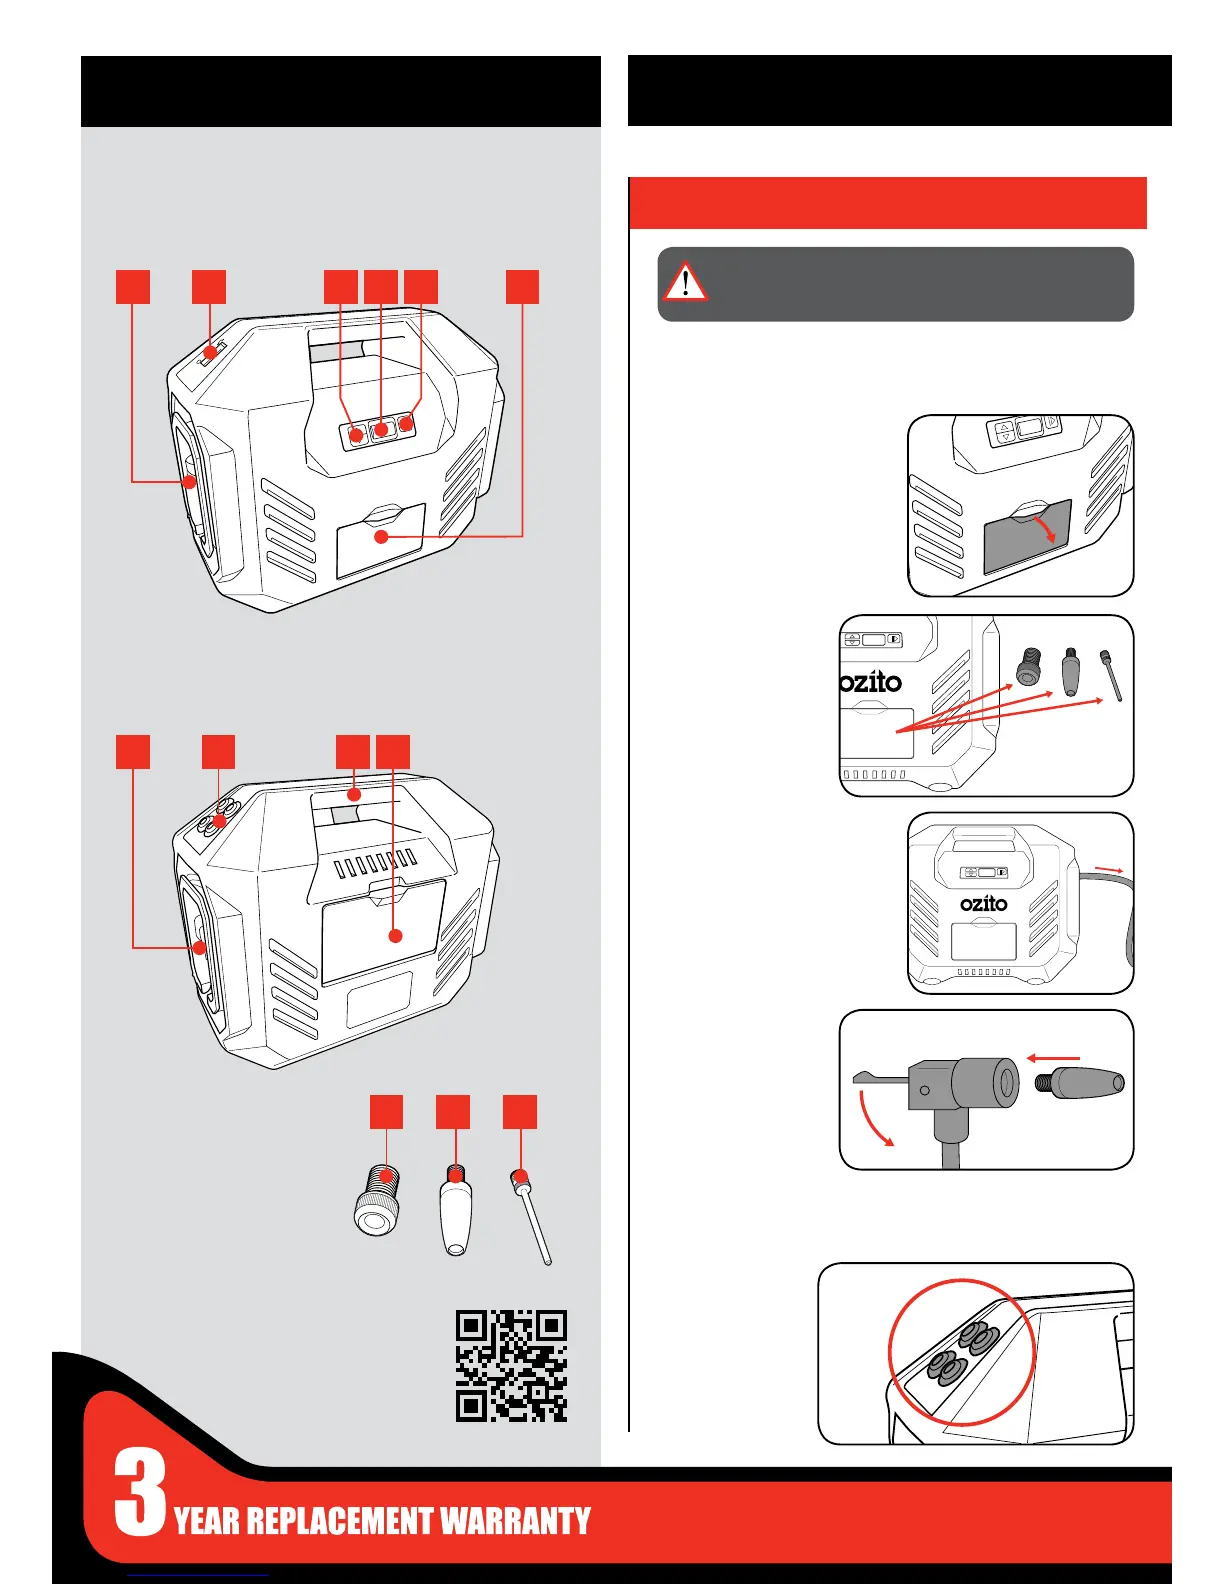
SETUP & PREPARATION
11 Presta Adaptor
12 General Purpose Adaptor
13 Ball Adaptor
Attaching Adaptors
Valve Caps
1 Open the compartment at the
front of the compressor.
1 Remove the valve
cap from the right
side of the carry
handle.
2 Remove the desired
adaptor for the
ination task.
4 Insert the adaptor
into the hose nozzle
and lock by pushing
down the locking
lever.
3 Unreel the air hose at the right
side of the unit and unlock by
lifting the locking lever.
The inator unit has 3 adaptors to allow a range of functions. All the
adaptors are secured in the compartment at the front of the unit.
WARNING: ENSURE THE TOOL IS SWITCHED OFF AND
DISCONNECTED FROM THE POWER SUPPLY BEFORE
PERFORMING ANY OF THE FOLLOWING STEPS.
1
7
131211
8 9 10
2 3 4 5 6
The unit is supplied with 4 valve caps incase one is lost or broken.