ONLINE MANUAL
Scan this QR Code with your
mobile device to take you to
the online manual.
3. When the oat switch is
about 30° higher than
horizontal (start up level) or
above the handle, the pump
will turn ‘on’ and operate
4. When the oat switch is 30°
lower than the horizontal or
below the handle, the pump
will turn ‘off’.
2. To set the pump to switch off
at a higher water level, insert
the oat switch cable into
the adjuster
Note: There must be a
minimum of 100mm of cable
from the adjuster to the oat.
1 When the oat switch cable
is able to move freely, the
pump will function down to
a water depth of 50mm and
automatically shut off
1 To adjust the the feet simply fold the legs DOWN for dirty water
2 To adjust the the feet simply fold the feet UP for clean water
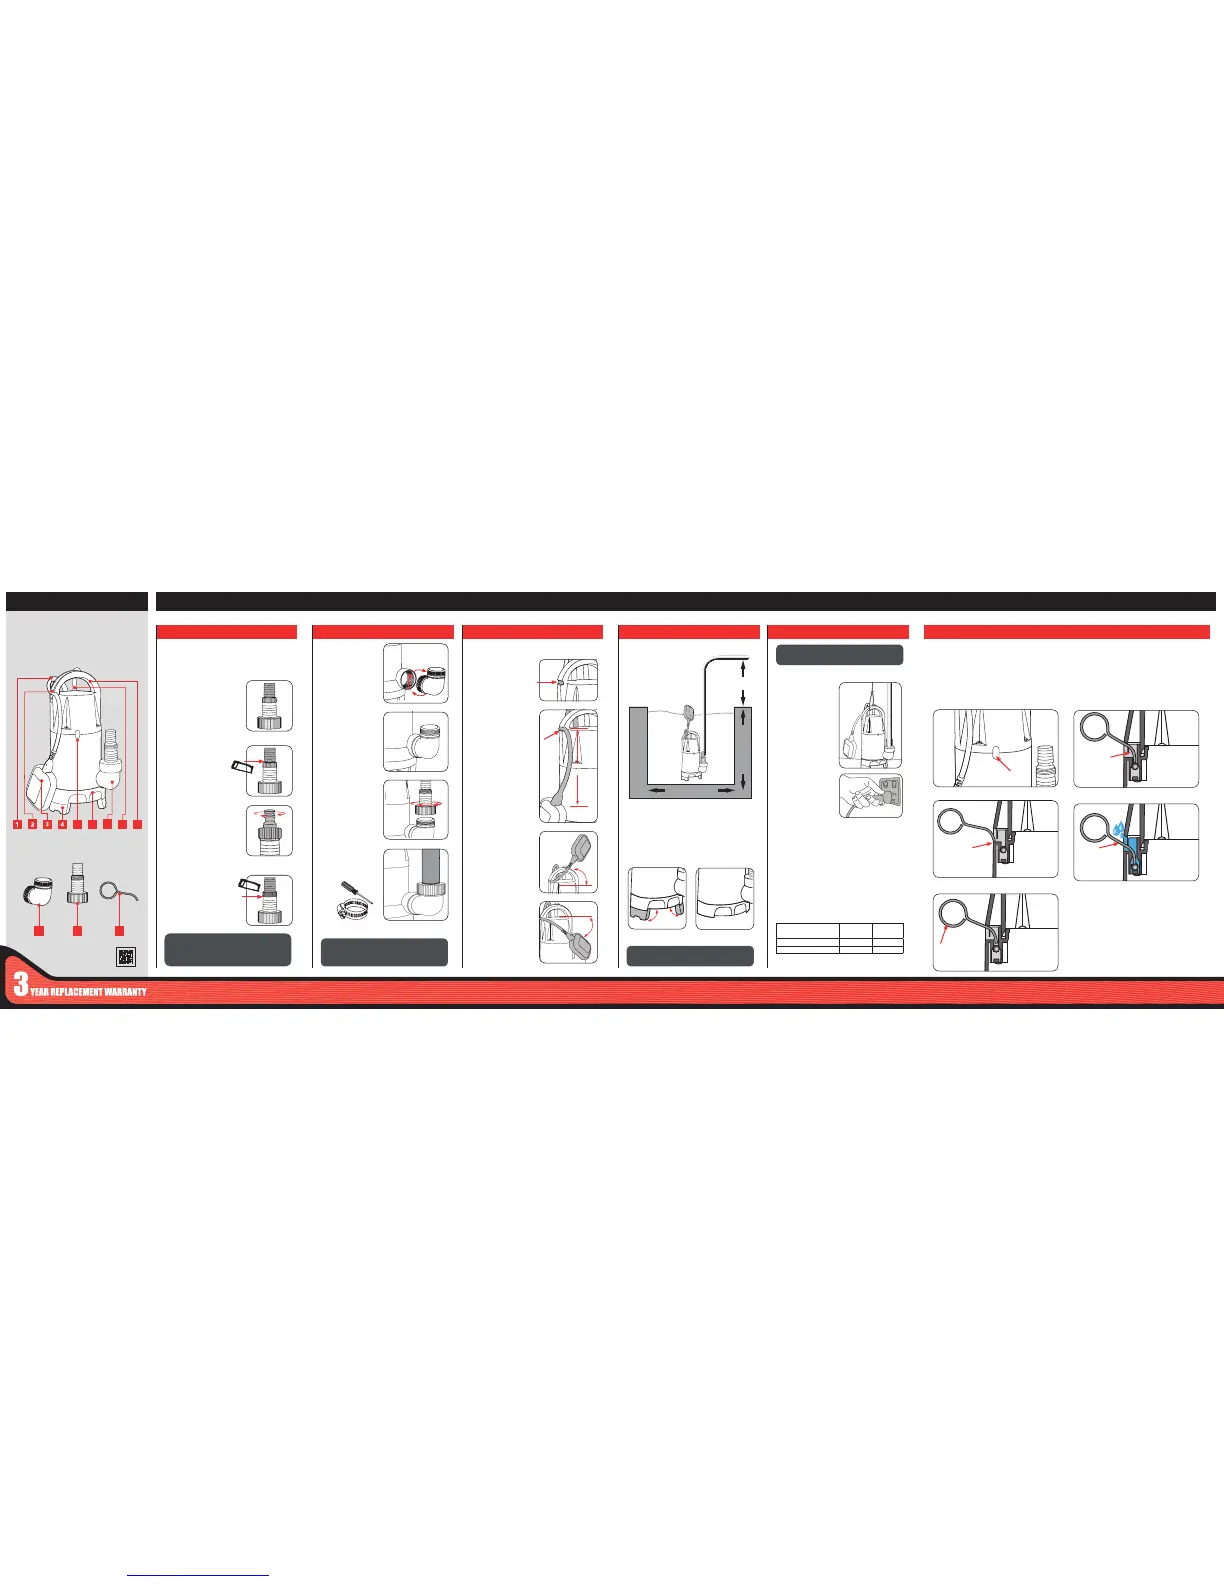
1. Float Switch Cable
2. Float Switch Adjustor
3. Float Switch
4 Foldin g Legs
5 Air Bleed Valve
6 Suction Base
7 Oulet
8 Power Cable
9 Handle
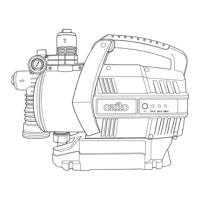
SUBMERSIBLE PUMP
KNOW YOUR PRODUCT
PSCD-750
1. UNIVERSAL ADAPTOR 2. L-SHAPE CONNECTOR 3.
FLOAT SWITCH
4.
SETUP
5. OPERATE 6. AIR BLEED VALVE
Preparing the Universal Adaptor
The universal adaptor is designed to t various sizes of pipes and
ttings.
1. Ensure the distance from the lowest to the highest point that you
wish to distribute the water does not exceed 7 metres
2. Ensure that the container is large enough to allow the oat
switch to move freely and function effectively, A minimum area
of 50cm is required on either side of the pump.
3. Screw the prepared
universal adaptor clockwise
onto the L-shape connector
Note. The hose/tube/
tap adaptor should not be
connected at this stage.
4. Securely attach the hose/
tube/tap adaptor to the
universal adaptor, t hose
clamps if you are using
exible hose or tube, and
tighten well.
2. Make sure the L-shape
connector is rmly
tightened so that the
O-ring is compressed
between the pump
housing and the
L-shape connector.
This ensures no leakage
will occur at this point.
CAUTION: NEVER CARRY, LIFT OR PULL UP THE
PUMP BY THE POWER CORD. THIS WILL DAMAGE
THE CORD AND PUMP.
IMPORTANT: BEFORE SUBMERGING THE PUMP IN
WATER, UNWRAP THE POWER CABLE AND ENSURE
THE PLUG IS CLEAR OF ANY DAMP LOCATIONS.
CAUTION: THIS PRODUCT IS INTENDED FOR
PUMPING WATER IN A HOME DOMESTIC
APPLICATION. DO NOT USE IT FOR CORROSIVE,
ABRASIVE, EXPLOSIVE OR DANGEROUS LIQUIDS.
10. L-Shape Connector
11. Universal Adaptor
12. Air Bleed Valve Tool
ACCESSORIES
SETUP & PREPARATION
OPERATION
Thepumpisttedwithaoatswitch,whichcontrolshow
the pump switches on and switches off.
The pump has 3 folding legs that can be folded down to
increase the height of the pump when standing in water
that has particles or debris at the bottom.
Tota25mm(1’’)tapadaptor
(temporary application only)
1. Cut the universal adaptor using a
hack saw
2. It is now ready to be tted with a
25mm (1’’) screw on tap adaptor
(not included).
Tota32mm(1¼’’)
rigidpipeorexibletubing
(temporary or permanent application)
. Cut the universal adaptor using
a hack saw. It is now ready to be
tted with a 32mm (1¼’’) rigid pipe
or exible tubing (not included).
Tota25mm(1’’)rigidpipeor
exibletubing
(temporary or permanent application)
. No cutting of the universal adaptor
is required. It is ready to be tted
with a 25mm (1’’) rigid pipe or
exible tubing (not included).
1. Screw the L-shape
connector into the pump
housing by rotating in a
clockwise direction
Ensure the pump is disconnected from the power supply
before performing any of the following operations.
5 6 7 8 9
11 1210
PUSH
100mm
minimum
30°
CLEAN WATER
DIRTY WATER
30°
MIN. 50x50CM
MAX. IMMERSION
7 METRES
MAX. HEAD
8 METRES
3. The pump must not be placed into mud or on debris greater then
30mm depth. When used in dirty water it is recommended to place
the pump on a clean hard surface such as a concrete block orh
avoid the pump becoming clogged.
1. Immerse the pump in the
water. For deep water, use
a rope (not included) and
secure it to the handle. Set
the pump in the desired
position within the work area
or tank.
1. Insert the Air bleed valve cleaning tool (supplied) into the
whole on the side of the pump
2. Push the tool in as shown below
4. Push the tool in as shown below
3. Push the tool in as shown below
5. Hold down and ush with water
. Cleaning the Air Bleed Valve
The air bleed valve must be kept clean for correct operation in
automatic, unattended operation for reliable priming. The valve
should be cleaned if required. When immersed in water air bubbles
should be visible coming out of the hole in the side of the pump
while the trapped air is being purged. If no air bubbles are seen
the valve may be blocked. Clean by inserting the air bleed valve
tool into the hole to push the ball in the valve down and unblock,
then ush with clean water. Cleaning steps as shown below
2. Insert the plug into the mains
power socket. Avoid using
extension cords as this can
lead to a voltage drop which
may cause power loss and
overheating. Switch on the
mains power to commence
operation.
3. To stop operation, turn off the mains power. The pump will also
stop operation automatically once the oat switch reaches the
minimum water depth..
Priming
When immersed and ON the pump will need to prime and purge
the air inside the pump before water ows at the outlet. This an
take up to 20 seconds. If operating the pump manually tilting the
pump to allow some air to escape from the base can help. Air
also escapes from the Air Bleed Valve. When pumping the water
pressure will shut this valve off.
NOTE: TO USE THE PUMP IN PERMANENT
INSTALLATIONS WITH RIGID PIPES, INSTALL
A NON-RETURN VALVE TO AVOID THE WATER
FLOWING BACK THROUGH THE PUMP WHEN IT
HAS STOPPED.
This pump must be used with a residual current device with
rated residual current of 30mA or less.
Manual Mode Minimum
Start Water
Depth
Stop Water
Depth
Legs Folded-Clean Water
60mm 5mm
Legs Extended-Dirty Water 85mm 30mm
INSERT
TOOL HERE
INSERT
TOOL HERE
& PUSH IN
PUSH IN
AND DOWN
HOLD
DOWN
PUSH UP
Manual Mode
If you wish to use the pump down to minimum water depth, the
oat switch will need to be operated manually. The pump can
be manually turned “ON” by lifting the oat switch to the
required level.
 Loading...