5
STEP 1:
PREPARE THE WINDOW
Lowersashmustopensucientlytoallowaclear
vertical opening of 14 inches (355.6 mm). Side
louvers and the rear of the AC must have clear air
spacetoallowenoughairowthroughthecondenser
for heat removal. The rear of the unit must be
outdoors, not inside a building or garage.
MOUNTING HARDWARE:
3/4" (or 1/2")
Screws (7 pcs)
Lock Frame
(2 pcs)
Sash Lock
(1 pc)
Window
Sash Seal
Foam (1 pc)
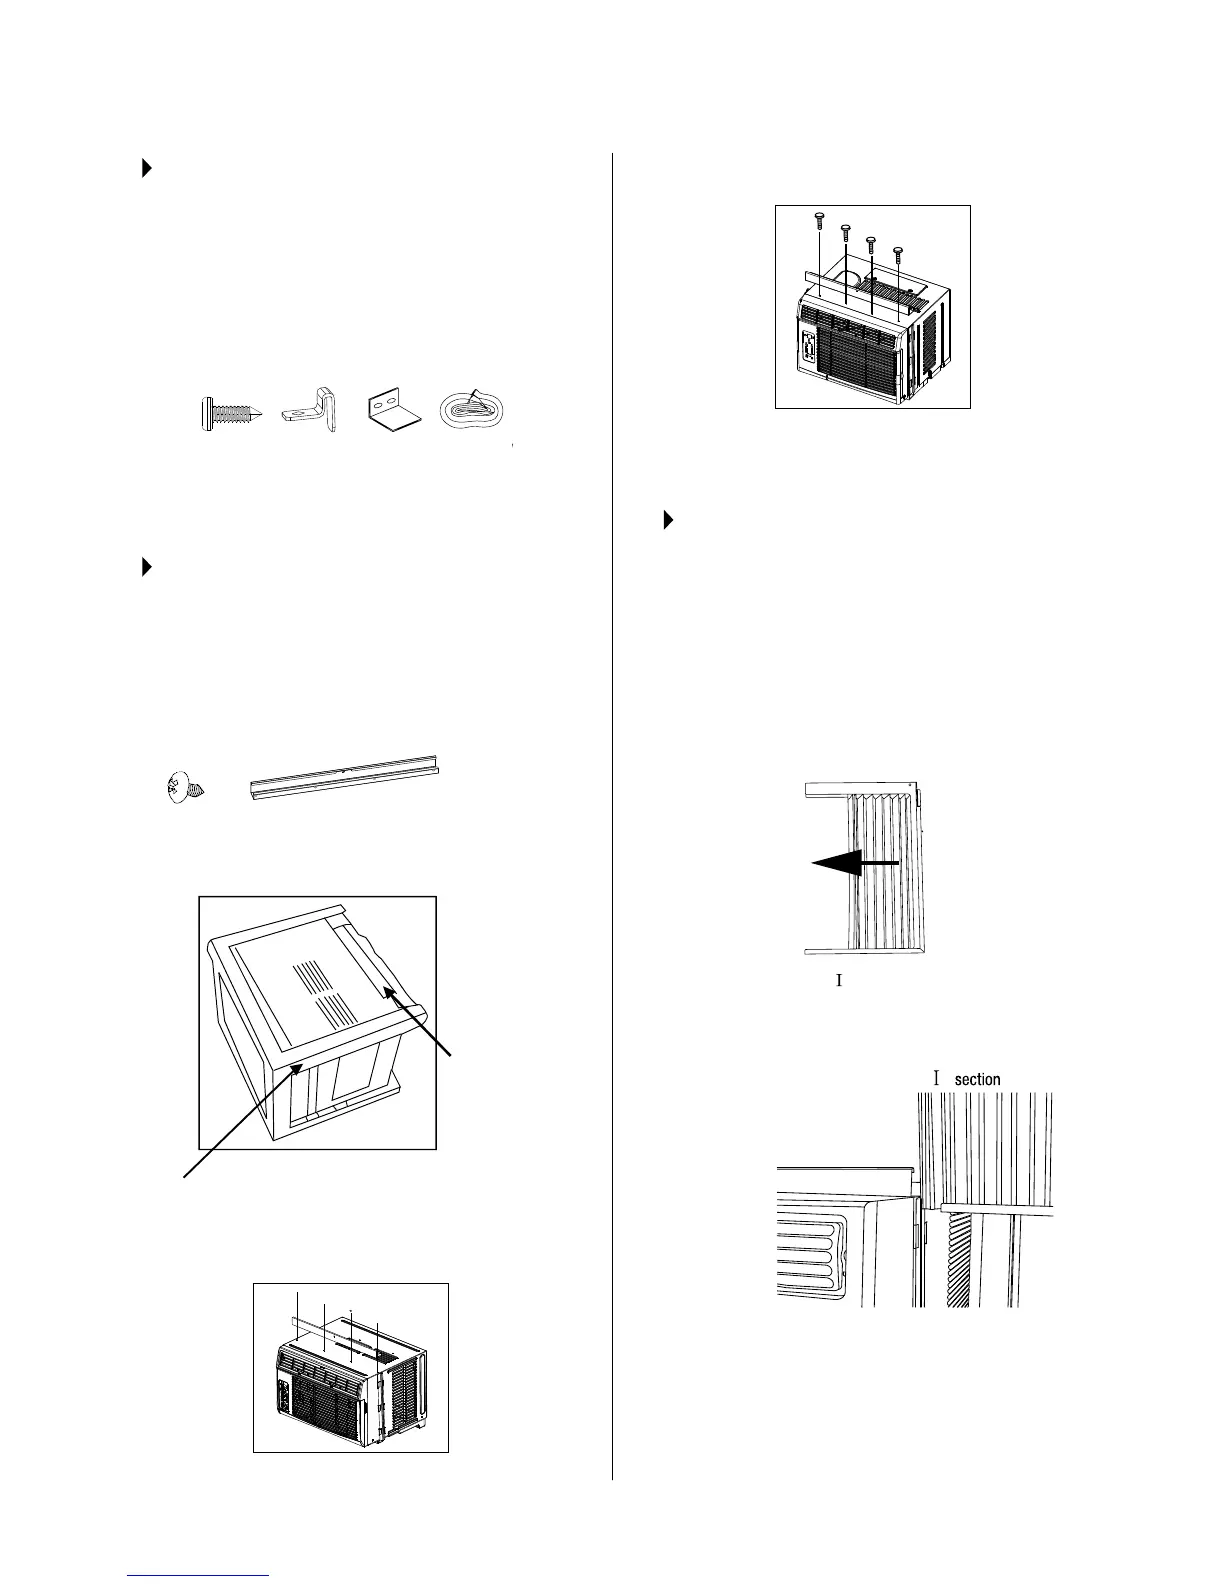
STEP 2:
PREPARE AIR CONDITIONER
A. Remove the air conditioner from the carton and
placeonaatsurface.
B. Removetoprailfromtherearofthepackaging
material as shown in Fig. A.
TOP RAIL HARDWARE:
3/8" Screws
C. Align the hole in the top rail with those in the top of
the unit as shown in Fig. B.
D. Securethetoprailtotheunitwiththe3/8″screws
as shown in Fig. C.
NOTE: For safety reasons, all four (4) screws MUST be
securely fastened.
STEP 3:
INSTALL THE ACCORDION PANELS
NOTE: Top rail and sliding panels on each side are
osettoprovidetheproperpitchof5/16″tothe
rear. This is necessary for proper condensed water
utilizationanddrainage.Ifyouarenotusingthe
side panels for any reason, this pitch to the rear must
be maintained.
A.Placeunitonoor,abenchoratable.Holdthe
accordionpanelinonehandandgentlypullback
thecentertolltheopenend.SeeFig.1.
B. Slide the free end “ ” section of the panel directly
into the cabinet as shown in Fig. 2. Slide the
panel down. Be sure to leave enough space to slip
the top and bottom of the frame into the rails on
the cabinet.