INSTRUCTION AND PARTS LIST SI-8/31/2011
Supersedes Instruction and Parts List SI-4/29/2011
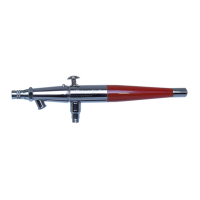
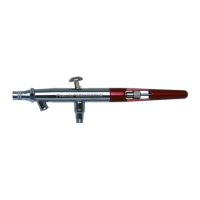
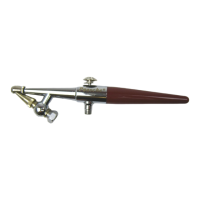
SI Airbrush
for Hobbies & Crafts
Single Action / Internal Mix
WARNING: Spray materials may be harmful if inhaled or allowed to
come into contact with the skin or eyes. Consult the product label
and Material Safety Data Sheet supplied for the spray material.
Follow all safety precautions. CAUTION: Well Ventilated Area
Required to remove fumes, dust or overspray. Secure airhose to
Airbrush finger tight for safety and to prevent air leaks.
M a x i m u m A i r P r e s s u r e 7 5 P . S . I .
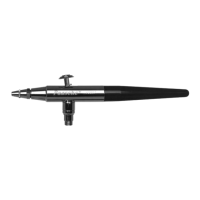
No. Part No. Description
1. XI-41 Needle Protecting Cap
2. VLH-1, 3 or 5 Head
3. VLT-1, 3 or 5 Tip
4. SA-210A Shell Assembly
5. MU-612 PTFE Packing & Packing Nut
(sold as set)
6. SI-10 Trigger
7. SI-9 Handle
No. Part No. Description
8. 3A-4 “O” Ring
9. SI-7 Needle Chuck
10. SI-8 Needle Locknut
11. MIL-9 Valve Casing
12. VL-214 Valve Plunger (with A-53)
13. A-53 Valve “O “ Ring (pack of 6)
14. A-22 Air Valve Spring
15. A-23R Air Valve Nut
16. SIN-1, 3, or 5 Needle
17. VL-54 Reamer (Optional)
Printed in the U.S.A.
Paasche Airbrush Company
4311 North Normandy Avenue
Chicago, IL 60634-1395
Phone: 773-867-9191 • Fax: 773-867-9198
Website: paascheairbrush.com
E-Mail: info@paascheairbrush.com
INTRODUCTION:
The SI Airbrush is simple in design and operation. Ideal for Hobbyists and
Crafters that are just learning to use an Airbrush. Available off the shelf as size
#3 with size #1 and #5 components available for your assembly. PTFE
Packings.
OPERATING INSTRUCTIONS:
Adjustments in the flow of color are made by turning the Needle Chuck
(#9) in to decrease, or out for increased flow. To spray, press the Trigger (#6).
To disassemble, loosen the Needle Locknut (#10) by holding the Needle Chuck
(#9) firmly so it will not turn. Unscrew the Needle Chuck from the Handle (#7)
and remove the Handle. Now carefully remove the Needle (#16) and then the
Finger Button Assembly. The Head (#2) and Tip (#3) may now be removed.
Reassembly should always be done with care, especially when reinserting the
Needle. Reverse the procedure used for disassembly. After the Needle has
been gently pushed forward into the tip, assemble the Needle Chuck (#9) and
screw it in firmly. Hold the Needle Chuck while screwing the Needle Locknut
(#10) down to lock the needle. Caution should always be used when reinserting
the Needle - too much pressure can damage the tip.
ADJUSTING OR REPLACING WORN PACKING WASHER:
1. If PTFE Packing & Packing Nut (#5) become worn or loose they must be tightened or
replaced.
2. When replacing your PTFE Packing press Packing into the Packing Nut (#5).
Use a small screwdriver to tighten packing nut into shell until it is tight then
back out one-half turn, may vary.
3. Now insert Trigger and then Needle - you should feel a slight resistance to the
needle as it goes through packing. If too loose or too tight adjust the Packing
Nut with screwdriver until you feel some slight resistance. Replace the Needle
Chuck and the Needle Locknut.
Head Sizes - Patterns - Fluid Thickness
Size 1 - Tip size .022 inches or .55mm
- Used for fine detail. Pencil Line to 1'' patterns
- Paint must be thinned further than 3 & 5 heads
Working Pressures:
• Operating pressures 20-55 PSI; Maximum pressure 75 PSI
• 20-30 PSI is best for detail spraying w/ properly thinned paint
• Use the higher pressures for thicker material where fine detail is not critical or thin the paint to allow lower pressures.
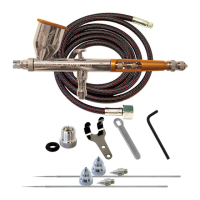
Equipment Set-up:
The Airbrush is held in the same manner as a pen, with the index finger comfortably over the Trigger.
1. Attach airhose to air supply and to airbrush. If using a regulator, set pressure between 20 -30 PSI.
2. Attach the color cup or bottle assembly to color socket.
3. Spray with needle protecting cap #1 on or remove it for finer detail spraying.
Size 3 - Tip size .029 inches or .73mm
- Less detail than the size 1 head. 1/32'' to 1-1/2'' patterns
- Can spray slightly thicker paint than size 1 head
Size 5 - Tip Size .042 inches or 1.06mm
- Less detail than the size 3 head. 1/16'' to 2'' patterns
- Can spray slightly thicker paint than size 3 head