EasyManua.ls Logo

PAC SWI-JACK User Manual

PAC SWI-JACK
8 pages
To Next Page IconTo Next Page
Page #1 background imageLoading...
Page #1 background image
1
06-08-09
SWI-JACK
Universal Steering Wheel Control Interface
Before You Start
A. Is this product compatible with the vehicle?
• See application guide (separate sheet) for listing of vehicles and connection information. If not, please visit
http://www.pac-audio.com/swixprogramming/swixprogramming.asp for the most current list of compatible
vehicles.
B. Prepare for the installation.
• If possible, install the SWI-JACK while you are installing the new head unit. Keep in mind you may need to plug in
the factory stereo to locate certain wires; therefore do not complete the head unit installation until the SWI-JACK is
working properly.
• Plan a general installation location for both the SWI-JACK plug and the control body. Keep in mind that the sup-
plied wire harness is two feet long, and the 1/8" plug harness is three feet long.
• Use a multimeter or approved measuring device for checking vehicle circuits.
Pacific Accessory Corporation
SEEK
PRESET
AM FM
VOLUME
PLAY
MUTE
Power
Jack for the SWI-JACK
Steering wheel
audio control wire
To Kenwood or
OEM wired
remote control input
Installation Instructions
For Alpine, JVC, Clarion, Kenwood,
Valor, OEM & Blaupunkt OEM
Steering Remote Ready Radios
For Alpine, Clarion JVC, or Valor radios, connect the SWI-JACK 1/8" plug into the radio's Steering Wheel input
jack on back of radio or wire harness. For Kenwood, or OEM radios, connect the blue/yel wire to the Remote Input wire
(blue/yel for Kenwood, gray for OEM) of radio.
Blaupunkt radios with optional wireless remote inputs are supported by the SWI-JACK, however we do not
supply any connectors or support for Blaupunkt. It is up to the consumer or installer to supply this connector. Use
vehicle Connector Chart and use VW connector as reference. Connect the SWI-JACK's blue/yel wire to pin #11 of VW
connector. The connector you obtain may come with two of three pieces, however the connector (usually green) should
show pin #11 on it.
Question and Answer IconNeed help?

Do you have a question about the PAC SWI-JACK and is the answer not in the manual?

PAC SWI-JACK Specifications

General IconGeneral
BrandPAC
ModelSWI-JACK
CategoryAutomobile Accessories
LanguageEnglish

Summary

Before You Start

Product Compatibility Check

Verify if the product is compatible with your vehicle using the application guide.

Installation Preparation

Plan installation location and check vehicle circuits with a multimeter.

Wiring Connections

Connect Ground Wire

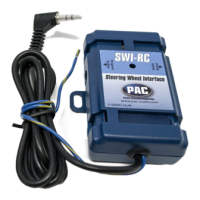
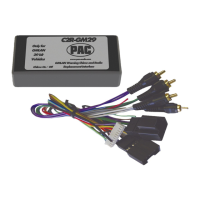
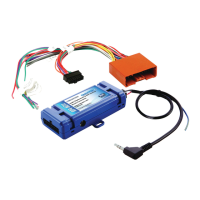
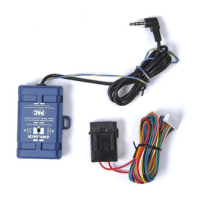
Connect the BLACK wire of the SWI-JACK to ground (-).

Connect Switched Power

Connect the RED wire of the SWI-JACK to switched +12V.

Connect Interface Wire

Connect the appropriate interface wire (WHITE, YELLOW, ORANGE, or GREEN).

Additional GM Wiring (Version #4)

Connect the BLUE serial data wire for specific GM vehicles with airbags.

Wire Loop Modifications

Cut BROWN or VIOLET wire loops as instructed by the application guide.

Programming the SWI-JACK

Setting the Interface Version Number

Select the correct version number for your vehicle and radio type.

Entering Programming Mode

Press and hold the mode button, then turn the vehicle ignition to ON.

Clearing Memory

Release the programming button to clear memory, indicated by the LED turning off.

Selecting Version Number via Button Presses

Press the programming button multiple times to match the desired version number.

Completing Version Programming

Turn vehicle ignition to OFF to finalize the version programming sequence.

Programming Head Unit Functions

Initiating Function Programming

Turn the vehicle ignition to the ON position to begin programming head unit functions.

Learning Steering Wheel Buttons

Press and hold steering wheel buttons (e.g., TEMP UP) to learn their functions.

Confirming Programmed Functions

The LED will turn on, indicating the function is programmed successfully.

Programming Fan Controls

Repeat button learning steps for FAN UP and FAN DOWN functions.

Skipping Button Functions

Press programming/mode button to skip functions if the vehicle lacks certain buttons.

Learning Additional Buttons

Press and hold the programming/mode button to learn additional buttons.

Programming Details and Radio Select Switch

Program Function Order

Program functions in the specific order shown in the chart for correct operation.

Radio Select Switch Operation

Set the Radio Select switch according to the vehicle and radio manufacturer.

Advanced Programming and Confirmation

Learning or Skipping Functions

Decide whether to learn the current function or skip it.

Learning Individual Buttons

Press and hold the steering wheel button for the desired function within 7 seconds.

Skipping Unused Functions

Press the programming/mode button to skip functions not needed.

Finalizing Programming Sequence

Wait for LED confirmation indicating the end of programming.

Testing and Vehicle Compatibility

Testing SWI-JACK Functions

Test heater and audio controls to ensure proper operation after installation.

Known Incompatible Vehicles List

List of vehicles that may not be compatible or require special setup.

Resistor Kit Usage

Guidance on using the resistor kit for vehicles with specific button wiring.

Troubleshooting Guide

Vehicle Not Listed

Guidance for vehicles not found in the compatibility chart or on the website.

No Power or Programming Issues

Solutions for no power or failure to enter programming mode.

Unintended Control Operation

Fixes for the interface controlling the stereo without button presses.

LED Behavior During Programming

Troubleshooting issues related to LED indicators during programming.

Radio Power/Operation Issues

Address RAP mode and car power issues for GM vehicles.

Version Number Programming Failure

Solutions if unable to program the interface version number.

Programming Timeout Issues

What to do if programming takes too long or fails.

Steering Wheel Turned Control Issue

Fix for unintended control when steering wheel is turned.

Related product manuals