ILK 22/33/44/55/66 INSTALLATION MANUAL
Revision 1.6 - 35 -
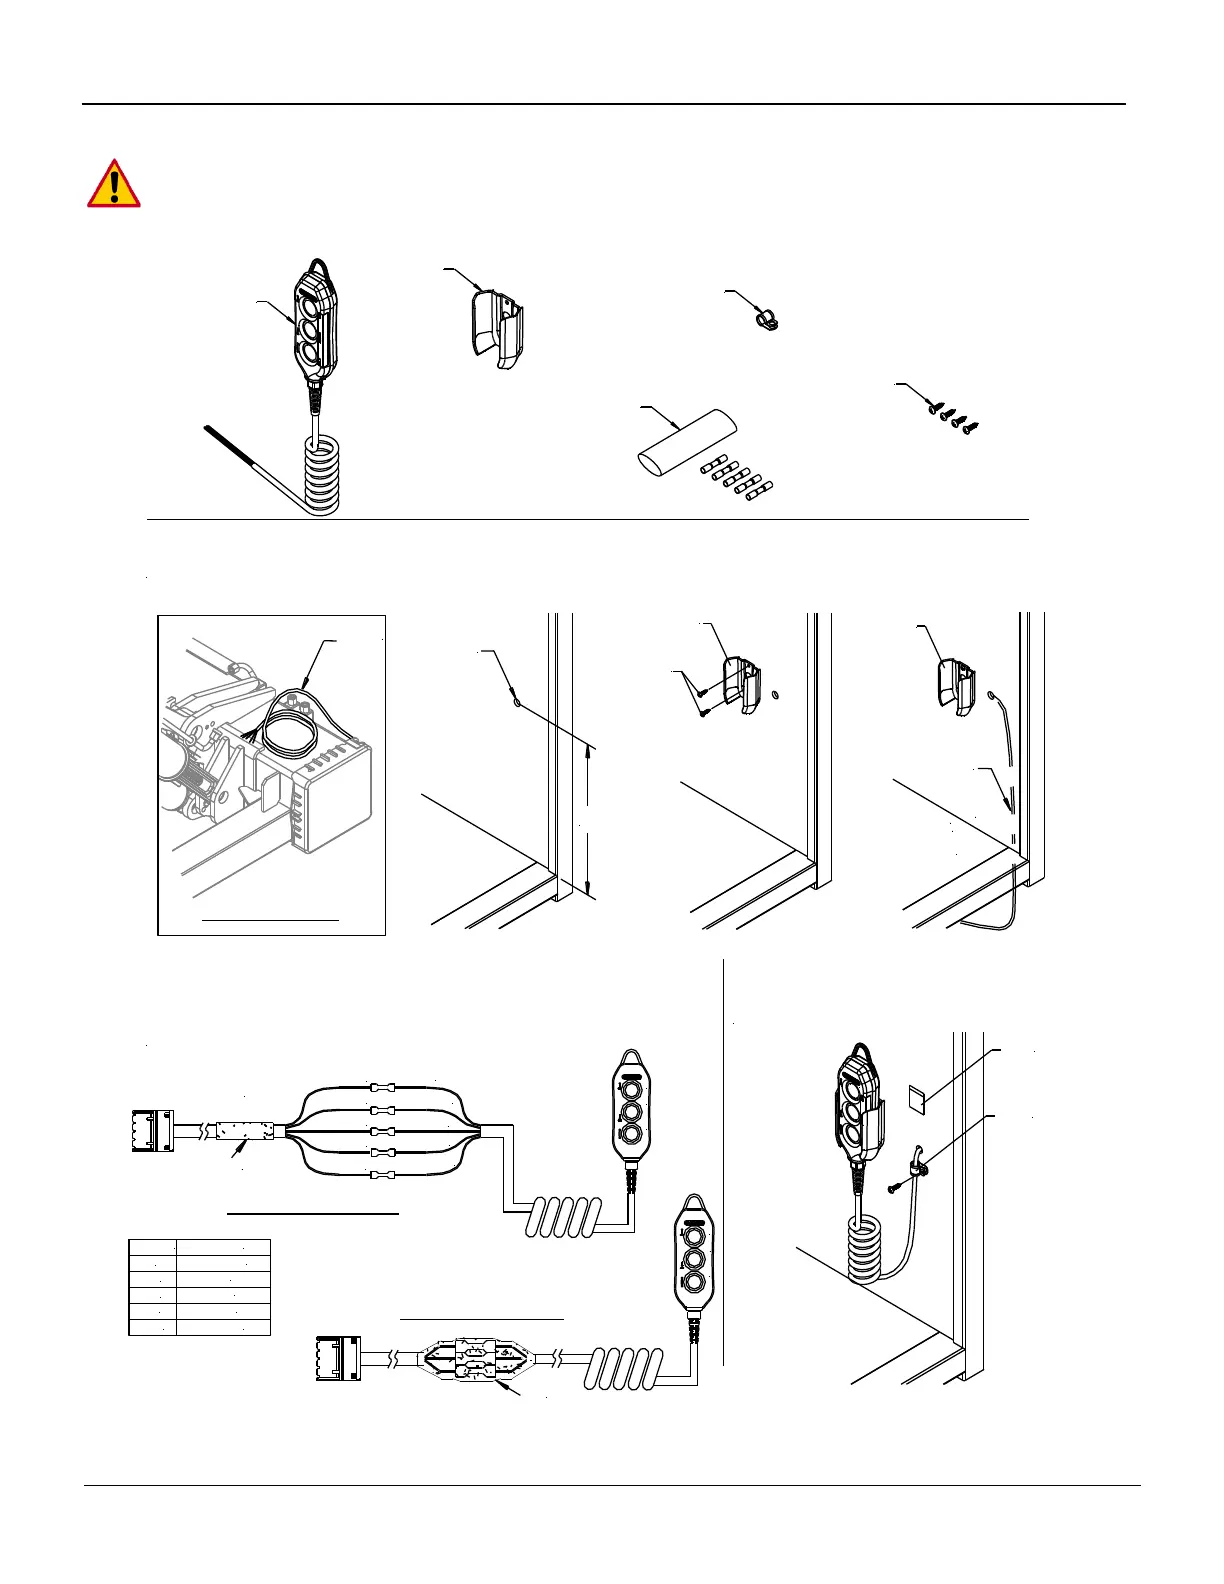
6.3 Remote Hand Control Installation
Hand Controls are NOT weatherproof and have to be stored inside body in holster or in
weatherproof box (PALFINGER Liftgates option). For “Refer”, Flatbed installations or stored
in cab solutions we recommend “plug & socket” option.
Steps:
1. Locate the J31 (5-Wire Harness) on the right side of the liftgate. Drill a ø3/8" hole on the surface for cable routing. Install the control holster
next to the drilled hole. Route the J31 harness from the liftgate up through the ø3/8" hole inside the vehicle body.
24"
Route J31 harness up
inside of body
Right (Curb)Side of Liftgate
J31
Harness
(5-Wire)
2. Use the provided splicing kit to connect the J31 wires to the 3-button control wires.
First add the 2:1 heat shrink over one of the harnesses. Second use the butt splice
heat shrink connectors provided. Crimp the corresponding wires from each harness
together as shown per wire number. Apply heat to each individual butt connector
to seal . Finally, slide the 2:1 heat shrink over the spliced wire and seal.
3. Test each function to verify the control is functioning
as intended. Use the provided wire clamp to secure the
control harness from any tugging. Apply the decal within
the vicinity of the control. Installation complete.
ø3/8"
Hole
Holster
Pan Head
Screws
Holster
3.2(White)
4 (Red)
5.2(Yellow)
6.2(Black)
14.2(Green)
3.2 (1)
4(Green/Yellow)
5.2 (4)
6.2 (3)
14.2 (2)
Heat
Shrink
J31 Wire Harness
Heat
Shrink
3.2
4
5.2
6.2
14.2
Wire No. Function
12V (Hot)
Up
Down
Tilt Up
Tilt Down
TILT
DOWN
UP
TILT
DOWN
UP
3-Button
Hand Held
Remote
Holster
WIre
Clamp
#10 Pan Head
Screw
Wire Splice
Kit
Decal
Clamp
Wiring Remote and J31 harness
Use heat shrink to seal all splice
 Loading...