Do you have a question about the Panasonic AG-DP800 and is the answer not in the manual?
Avoid using the product in locations with significant vibration to prevent operational issues.
Operate within 32°F to 104°F (0°C to +40°C) to ensure proper function and longevity.
Minimize exposure to rain, high humidity, and dust to prevent internal condensation and failures.
Avoid pointing the lens or eyepiece directly at the sun to prevent internal damage.
Handle the product with care, avoiding drops, impacts, or inserting objects into open compartments.
Be aware of strong electrical/magnetic fields that may interfere with picture or sound quality.
Use S-VHS or VHS tapes up to 160 minutes; 180-minute tapes are not guaranteed.
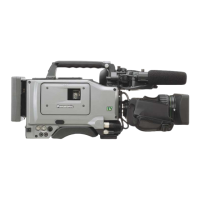
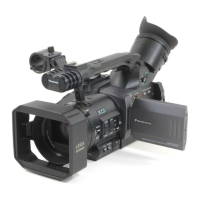
Basic operational buttons and switches for audio, light, and reset functions.
Controls for gain, white balance, and output signal selection.
Various switches for power, shutter, modes, and audio/video I/O.
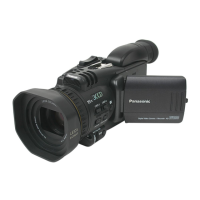
Controls related to lens operation and viewfinder adjustments.
Input/output connectors for power supply and video signals.
Controls affecting the viewfinder's display, indicators, and overlays.
Detailed connectors for lens, genlock, video out, and sync adjustments.
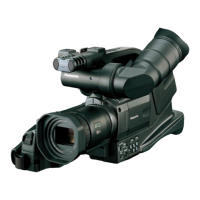
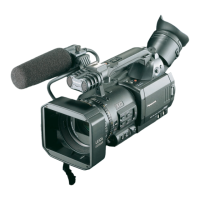
Ergonomic points and attachment locations for viewfinder and microphone.
Key buttons for tape handling like rewind, stop, play, and eject.
Buttons for VTR control, monitor selection, and menu navigation.
Buttons for initiating menu settings and selecting options.
Visual indicators for Dolby NR, audio levels, and operating modes.
Displays for tape counter, battery level, and system warning messages.
Explanation of various LED indicators on the viewfinder.
Normal character displays shown on the viewfinder.
Character displays that appear when settings or conditions change.
Adjusting the speed of the automatic iris.
Switch to select automatic or manual iris adjustment.
Controls the zoom electrically via servo or manually.
Adjusting the strap for a comfortable hand fit.
Used for checking recordings and establishing pause mode.
Starts or stops VTR recording control.
Rings for adjusting focus and zoom manually.
Controls for manual iris adjustment and flange back setting.
Selects between servo-controlled or manual zoom operation.
Procedure for aligning and securing the lens to the camera.
Steps for aligning and clamping the viewfinder onto the camera.
Instructions for removing the original microphone and attaching the holder.
Instructions for connecting and using the AU-BP402 battery pack.
Instructions for powering the unit using the AU-B110 AC adaptor.
Instructions for attaching and using Anton/Bauer battery packs.
Instructions for mounting Sony NP-1 battery holders.
Connecting to a back-up VTR for power supply via the VTR cable.
Procedure for automatically adjusting the black balance.
Procedure for automatically adjusting the white balance using a white object.
Step-by-step guide for normal recording operations.
Instructions for performing simple editing functions during playback.
Steps for selecting audio input and adjusting audio levels.
How to activate and resume from the power save mode.
Operation for reviewing recorded footage.
Steps for performing basic playback functions.
Automatic S-VHS/VHS identification and tracking adjustment.
Selecting audio output and monitoring channels.
Functions for cueing, reviewing, and displaying still pictures.
Overview of the main menu structure and its items.
Settings for the viewfinder display options.
Settings related to camera image parameters.
Settings for pre-configured scene files.
Settings for VTR operational modes.
Settings for date and time.
Settings for time code generation and format.
Settings for audio input and processing.
Settings for battery type selection.
System diagnosis and initialization options.
Pin assignments for audio input and external DC input connectors.
Pin assignments for the 26-pin VTR connector.
Guidelines for using a phantom microphone with the unit.
Basic inspection and adjustment steps for common symptoms.
Information on condensation formation and its effects on the unit.
General maintenance advice and procedure for head cleaning.
Technical specifications for the camera unit.
Technical specifications for the viewfinder.
Technical specifications for the VTR unit.
Technical specifications for video and audio systems.
Details on input/output connectors and included accessories.
| Type | Camcorder |
|---|---|
| Recording Format | DVCPRO HD, DVCPRO50, DVCPRO, DV |
| Audio Recording System | PCM Digital Recording |
| Frequency Response | 20 Hz - 20 kHz |
| Microphone | Stereo microphone |
| Aperture | F1.6 |
| Image Sensor | 1/3-inch CCD |
| Sensor Size | 1/3-inch |
| Recording Media | DVCPRO HD/DVCPRO50/DVCPRO/DV tape |