36
Returning the unit to its factory status
The unit’s settings can be returned to the factory statuses.
Two methods can be used: One method returns all the
settings to the factory statuses, and the other returns only
the [SETUP] menu settings to the factory statuses.
1 Set the MENU button to ON.
Press the MENU button to light its indicator.
2 Set PRESET MEMORY/MENU 10 button
(SYSTEM) to ON.
When the button is pressed and its indicator is lighted,
the [SYSTEM] menu is displayed on the LCD panel.
[1]CAMERA CTL ▼
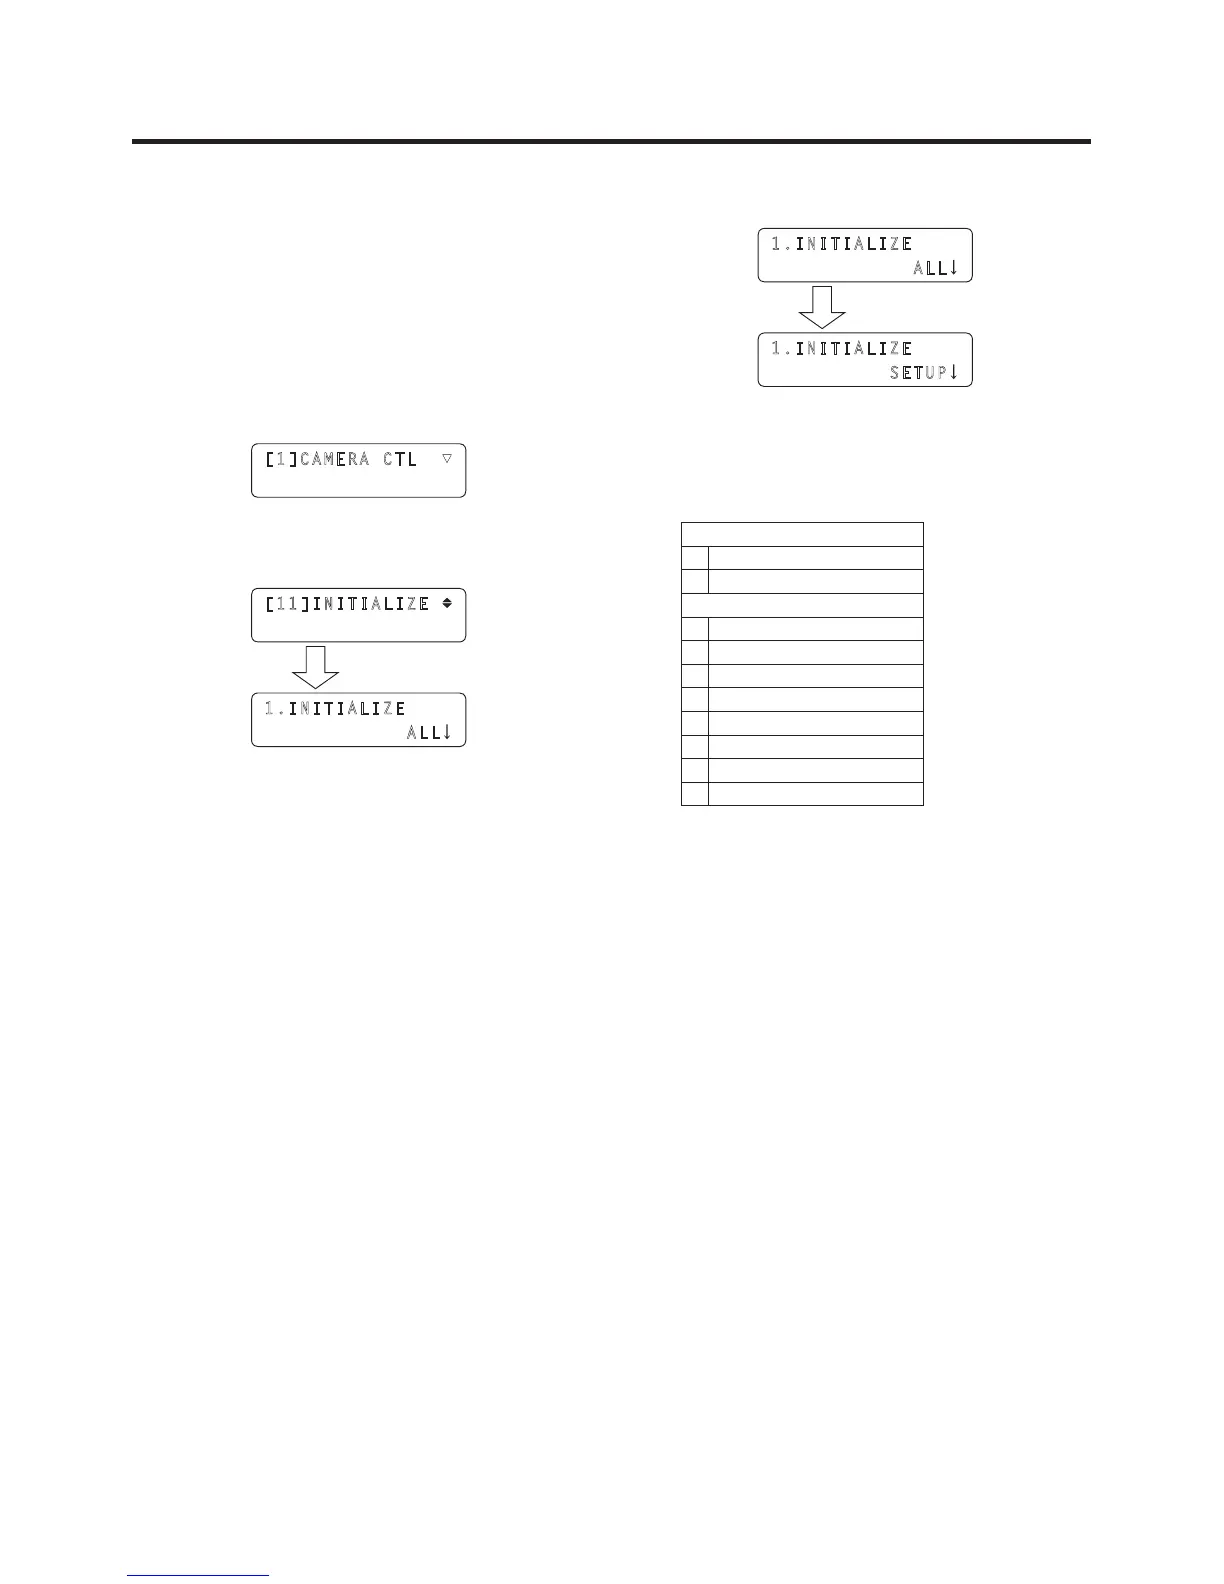
3 Turn the F1 dial to display the INITIALIZE
menu, and press the F1 dial.
[11]INITIALIZE
1.INITIALIZE
ALL
Press the F1 dial.
4 Turn the F2 dial to select the initializing mode.
1.INITIALIZE
SETUP
1.INITIALIZE
ALL
Turn the F2 dial.
ALL:
The settings controlled by the unit are returned to the
factory statuses.
SETUP:
Only the settings on the menus below are returned to
the factory statuses.
[CAMERA] menu
[2]POWER
[3]TALLY
[SETUP] menu
[1]USER
[2]SW LINK
[3]SW DISP
[4]OPERATE
[5]PRESET
[8]GPI
[9]LCD BL
[10]MENU CTL
5 Press the F2 dial to initialize the settings.
 Loading...