Before Installation/Avant I'installation/
Antes de la instalacion
Consult
a
professional
for
installation.
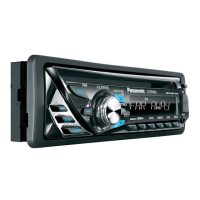
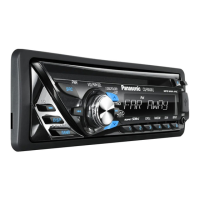
• Verify the radio using the antenna and speakers before
installation.
Entrez en
contact
avec
un
specialiste
pour
Ie montage.
• Verifiez I'autoradio avant de proceder
au
montage.
Para realizar la
instalacion
consulte
a
un
profesional.
• Verifique
el
funcionamiento de la radio empleando la antena
y los altavoces antes de realizar la instalaci6n.
• Mounting angle right to left : horizontal
front to rear : 0 - 30°
• Angle de montage lateral : horizontal
longitudinal : 0
a30°
• Angulo
de
montaje
Lado
a
lado
: horizontal
Delante a atras : 0 - 30°
Dashboardrrableau
de
bordrrablero
de
instrumentos
THICKNESS/EPAISSEUR/GROSOR
MIN.
4.75 mm {3/16"}/{3/16 po}/{3/16"}
MAX.
5.56 mm {7/32"}/{7/32 po}/{7/32"}
--11- \
~
153
mm{2
3/32"}
---..1
J
{2
3/32 po}
.--J
{2
3/32")
l~m
{75/32"}
{7 5/32 po}
{75/32"}
Before Wiring/Avant
Ie
cablage/
Antes de realizar las conexiones
Please refer
to
the "WARNING" statement above.
Exclusively operated with 12 V battery with negative
(-)
ground.
Connect the power lead (red) very last.
Connect the battery lead (yellow)
to
the positive (+) terminal
of the battery or fuse block terminal (BAT).
Strip about 5 mm {1/4"} of the lead ends for connection.
Apply insulating tape
to
bare leads.
Reportez-vous aI' "AVERTISSEMENT" ci-dessus.
Alimentez I'appareil exclusivement par la batterie de 12 V
avec sa polarite negative
(-)
mise ala masse.
Raccordez
Ie
fil d'alimentation (rouge) en dernier.
Connectez
Ie
fil (jaune) ala borne positive (+) de la batterie
ou
ala borne (BAT) de la
boHe
afusibles.
Denudez les extremites de
fil
de 5 mm {1/4 po} environ pour
la connexion.
Recouvrez les fils nus d'un ruban isolant.
Consulte el apartado "ADVERTENCIA" arriba mencionado.
Conecte exclusivamente una alimentaci6n de baterfa de 12 V
con el negative
(-)
a tierra.
Conecte el cable de la alimentaci6n (rojo)
en
ultimo lugar.
Conecte el cable de la baterfa (amarillo) al terminal positivo
(+) de la baterfa 0 al terminal (BAT) del bloque de fusibles.
Pele unos 5
mm
{1/4"} de los extremos del cable para
efectuar la conexi6n.
Ponga cinta aislante
en
los cables desnudos.
Panasonic
Consumer
Electronics
Company,
Division
of
Panasonic
Corporation
of
North America
One Panasonic
Way,
Secaucus,
New Jersey 07094
http://www.panasonic.com
Panasonic Sales Company,
Division
of
Panasonic Puerto
Rico, Inc.
("PSC")
Ave.
65 de Infanteria,
Km.
9.5
San Gabriel Industrial Park,
Carolina, Puerto Rico 00985
http://www.panasonic.com
Panasonic Canada Inc.
5770 Ambler Drive,
Mississauga, Ontario
L4W 2T3
http://www.panasonic.ca
©2007 Matsushita Electric Industrial Co., Ltd. All Rights Reserved.
YGFM294416 FT1007-0
Printed
in
China
Imprime
en
Chine
Impreso
en
China
 Loading...