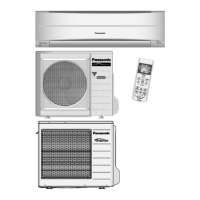
This document is an operating manual for a Panasonic Air Conditioner, covering models CS-RE9PKR, CS-RE12PKR (Indoor Unit) and CU-RE9PKR, CU-RE12PKR (Outdoor Unit).
Function Description
The Panasonic Air Conditioner is designed to provide comfortable indoor climate control through various operating modes:
- AUTO: For user convenience, automatically adjusting settings to maintain a comfortable environment.
- HEAT: To enjoy warm air, providing heating functionality.
- COOL: To enjoy cool air, offering cooling functionality.
- DRY: To dehumidify the environment, reducing humidity levels.
- FAN: To circulate air in the room without heating or cooling.
- POWERFUL: To reach the desired temperature quickly, engaging a high-power mode that automatically stops after 20 minutes.
- QUIET/ECONOMY: To enjoy quiet operation and save electrical consumption. This mode reduces airflow noise and, in economy mode, saves power by setting the room temperature 3°C higher automatically. Brightness of all indicators will be dimmed in economy mode.
The unit also features a timer function, allowing users to set ON or OFF timers at different preset times. It supports two sets of ON and OFF timers (C1 and C2) that can be programmed to repeat daily.
Important Technical Specifications
The manual provides operating conditions based on temperature ranges for both indoor and outdoor units, specified in Dry Bulb Temperature (DBT) and Wet Bulb Temperature (WBT) in degrees Celsius (°C).
COOL Mode:
- Indoor Unit: Max DBT 32°C, Max WBT 23°C; Min DBT 16°C, Min WBT 11°C.
- Outdoor Unit: Max DBT 46°C, Max WBT 26°C; Min DBT 5°C, Min WBT -°C (not specified for minimum WBT).
HEAT Mode:
- Indoor Unit: Max DBT 30°C, Max WBT -°C (not specified for maximum WBT); Min DBT 16°C, Min WBT -°C (not specified for minimum WBT).
- Outdoor Unit: Max DBT 24°C, Max WBT 18°C; Min DBT -15°C, Min WBT -18°C.
The remote control operates within an 8-meter range from the indoor unit. It uses AAA or R03 batteries (x2).
Usage Features
Quick Guide:
- Inserting the batteries: Pull out the back cover of the remote control, insert two AAA or R03 batteries, and close the cover.
- Clock setting: Press CLOCK, set the time using the arrow buttons, and confirm.
- Basic operation: Select the desired mode (AUTO, HEAT, COOL, FAN, DRY) and press POWER to start/stop the operation. The OFF indication on the display signifies the unit is off.
- Temperature selection: The selectable temperature range is 16°C to 30°C. The recommended temperature for energy saving is 26°C for COOL/DRY and 20°C-24°C for HEAT.
- Fan speed: The fan speed can be adjusted manually or set to AUTO.
- Horizontal airflow direction: Manually adjustable.
- Auto OFF/ON button: This button allows for manual control of the unit. Press once for AUTO mode, twice for COOL mode, three times for HEAT mode, and four times to turn off.
Remote Control and Indicator:
The remote control display shows the current settings, including temperature, mode, fan speed, and timer status. The indoor unit has indicators for TIMER (Green), QUIET/ECONOMY (Orange), and POWERFUL (Orange). Pressing and holding the remote control's POWER button for approximately 10 seconds displays the temperature setting in °F or °C. Pressing the AUTO OFF/ON button on the indoor unit restores the remote control to default settings.
Timer Function:
- To set an ON or OFF timer, select C1 or C2, set the desired time, and confirm.
- The timer can be cancelled manually or due to power failure.
- The actual start time may vary slightly (up to 35 minutes) from the set time to optimize the room temperature.
- The timer operation is based on the clock set in the remote control and repeats daily.
- QUIET, ECONOMY, and POWERFUL modes cannot be activated in all modes and cannot be selected at the same time.
Maintenance Features
Regular maintenance is crucial for optimal performance and energy efficiency.
Indoor Unit:
- Front panel: Wash gently with water and dry with a soft, dry cloth. Do not use hot water (over 40°C), benzene, thinner, scouring powder, or strong soap.
- Unit body: Wipe the unit gently with a soft, dry cloth.
- Air filters: Clean every 2 weeks. Wash/rinse the filters gently with water to avoid damage to the filter surface. Dry thoroughly under shade, away from fire or direct sunlight. Replace damaged filters.
- Anti-bacterial filter: Clean whenever necessary. Wash gently with water to avoid damage. Dry thoroughly under shade. Do not rub with a sponge. Replace every 10 years or if damaged.
- For seasonal inspection after extended non-use: Check for obstructions at air inlet and outlet vents. Ensure no refrigerant leakage. Confirm proper drainage.
- For extended non-use: Operate in FAN mode for 2-3 hours to remove moisture. Turn off the power supply and unplug. Remove the remote control batteries.
Safety Precautions:
The manual outlines various safety precautions, categorized as WARNING (death or serious injury) and CAUTION (damage to property).
- Indoor unit and outdoor unit: This appliance is not intended for use by persons with reduced physical, sensory, or mental capabilities unless supervised. Children should be supervised. Do not insert fingers or other objects into the air conditioner. Do not touch the outdoor unit during lightning. Do not expose yourself directly to cold air for a long period. Do not sit or step on the unit.
- Power supply: Do not modify the cord, use an unspecified cord, or share the power outlet with other appliances to prevent overheating and fire. Do not operate with wet hands. Do not pull the power plug. If the power cord is damaged, it must be replaced by the manufacturer or service agent.
- Remote control: Do not allow infants and small children to play with the remote control or swallow batteries. Do not use rechargeable (Ni-Cd) batteries. Remove batteries if the unit is not going to be used for a long period. New batteries of the same type must be inserted following the polarity.
Troubleshooting:
The manual includes a troubleshooting guide for common issues and their causes, such as mist from the indoor unit, water flowing sound, indoor fan stops, and power indicator blinking. It also provides steps for checking the unit before calling for servicing, including verifying power supply, remote control functionality, and filter cleanliness. If an error code (e.g., H19) appears, consult an authorized dealer.
Information on Disposal:
The manual provides information on the disposal of old equipment and used batteries, indicating symbols for separate collection in the European Union. The "Pb" symbol on batteries indicates the presence of lead. Users are advised to contact local authorities or dealers for proper disposal information.