Do you have a question about the Panasonic CU-4KE24NBU and is the answer not in the manual?
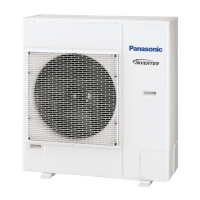
Lists the outdoor unit models covered in the manual.
Lists the indoor units compatible with the outdoor units.
Highlights critical information regarding refrigerant R410A.
Details critical safety warnings for service procedures.
Details important safety cautions for service procedures.
Lists further safety warnings for service.
Lists further safety cautions for service.
Provides detailed specifications for each unit.
Details specifications for major components like compressor and fan motor.
Lists specifications for other components like sensors.
Shows dimensional drawings for the CU-3KE19NBU outdoor unit.
Illustrates the refrigerant flow for the CU-3KE19NBU outdoor unit.
Provides important guidelines for insulating refrigerant tubing.
Presents cooling and heating performance charts for various conditions.
Shows wiring diagrams for the CU-3KE19NBU outdoor unit.
Details the operational logic for various modes like HEAT and COOL.
Explains how defrost operation is detected and released.
Advises on safety precautions before performing service.
Explains how error lamps indicate unit malfunctions.
Provides procedures for checking the outdoor unit system.
Details how to check the defrost operation.
Lists common problems and inspection points for unit parts.
Provides detailed inspection procedures for specific components.
Outlines troubleshooting steps for the fan motor.
Explains the properties and composition of R410A refrigerant.
Lists essential checks and tools for R410A servicing.
Lists specific tools required for servicing R410A systems.
Provides instructions for proper tubing installation.
Details the procedure for replacing a faulty compressor.
Outlines steps for detecting and repairing refrigerant leaks.
Explains how to charge refrigerant, especially when tubes are extended.
Provides guidance on converting existing systems to R410A.
Provides an overview of tools and materials for installation.
Lists tools needed for installation that are not included.
Lists the accessories provided with the unit.
Describes optional copper tubing kits for connecting units.
Specifies the type of copper tube and insulation material required.
Lists other materials needed for installation.
Advises on safe handling during unit transportation.
Provides guidance on selecting installation locations.
Offers precautions for connecting refrigerant tubing.
Highlights critical electrical shock hazards during wiring.
Provides safety notes for handling refrigerant during servicing.
Lists general safety precautions for installation and servicing.
Provides guidelines for selecting a suitable installation location for the indoor unit.
Lists locations and conditions to avoid for outdoor unit installation.
Lists recommended practices for outdoor unit installation.
Explains the purpose and installation of baffle plates.
Provides dimensions for air intake and discharge baffles.
Lists parts needed for baffle plate installation.
Details the steps for installing air intake and discharge baffles.
Lists important precautions to follow during baffle installation.
Shows outer dimensions for the CU-3KE19NBU outdoor unit.
Shows outer dimensions for the CU-4KE24NBU outdoor unit.
Shows outer dimensions for the CU-4KE31NBU outdoor unit.
Instructions for routing tubing and wiring.
Explains the flaring method for connecting refrigerant tubes.
Details the steps for performing a flare on copper tubes.
Provides precautions for tightening tube connections.
Details the procedure and torque specifications for tubing connections.
Explains the importance and method of insulating refrigerant tubing.
Instructions for taping refrigerant tubes and wiring.
Steps for sealing the installation hole.
Details the process of vacuum purging for air removal.
Defines pump-down and when it's applicable.
Outlines the steps for performing a pump-down operation.
Lists general safety and best practices for wiring.
Provides guidance on wire sizing and length based on codes.
Shows wiring diagrams for different unit configurations.
Details the procedure for connecting wires to terminals.
Specific wiring instructions for the outdoor unit and cable management.
Instructions for conducting a test run after installation.
Steps to check for proper tubing and wiring connections during test run.
| Brand | Panasonic |
|---|---|
| Model | CU-4KE24NBU |
| Category | Air Conditioner |
| Language | English |