65
11.4. Outdoor Unit
11.4.1. Selecting the Installation Location
Before choosing the installation site, obtain user approval.
• If an awning is built over the unit to prevent direct sunlight or rain, be careful that heat radiation from the condenser is not
obstructed.
• There should not be any animal or plant which could be affected by hot air discharged.
• Keep the spaces indicated by arrows from the wall, ceiling, fence or other obstacles.
• Do not place any obstacles which may cause a short circuit of the discharged air.
• If piping length is over the rated length, additional refrigerant should be added as shown in the table.
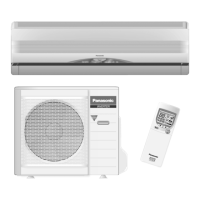
11.4.2. Installating the Outdoor Unit
• Fix the unit on concrete or rigid frame firmly and horizontally by bolt nut (ø10 mm).
• When installing at roof, please consider strong wind and earthquake. Please fasten the installation stand firmly with bolt or nails.
11.4.3. Connecting the Refrigerant Piping
1. Decide piping length and then cut by using pipe cutter. Remove burrs from cut edge.
2. Make flare after inserting the flare nut (locate at valve) onto the copper pipe.
3. Align center of pipe to valve and then tighten with torque wrench to the specified torque as stated in the table.
Model
Piping size Rated Length
(m)
Max. Elevation (m) Min. Piping
Length (m)
Max. Piping
Length (m)
Additional Refrigerant
(g/m)
Gas Liquid
E9GF / E12GF 3/8” 1/4” 7.5 5 3 15 20
E18GF 1/2” 1/4” 10 15 3 20 30
Model Piping size (Torque)
Gas Liquid
E9GF / E12GF 3/8” [42 N
O
m] 1/4” [18 N
O
m)
E18GF 1/2” [55 N
O
m] 1/4” [18 N
O
m)