22
11.3.2. Connecting The Piping
Connecting The Piping To Indoor Unit
Please make flare after inserting flare nut (locate at joint portion
of tube assembly) onto the copper pipe. (In case of using long
piping)
Connect the piping
• Align the center of piping and sufficiently tighten the flare nut
with fingers.
• Further tighten the flare nut with torque wrench in specified
torque as stated in the table.
Connecting The Piping To Outdoor Unit
Decide piping length and then cut by using pipe cutter. Remove
burrs from cut edge.
Make flare after inserting the flare nut (locate at valve) onto the
copper pipe.
Align center of piping to valves and then tighten with torque
wrench to the specified torque as stated in the table.
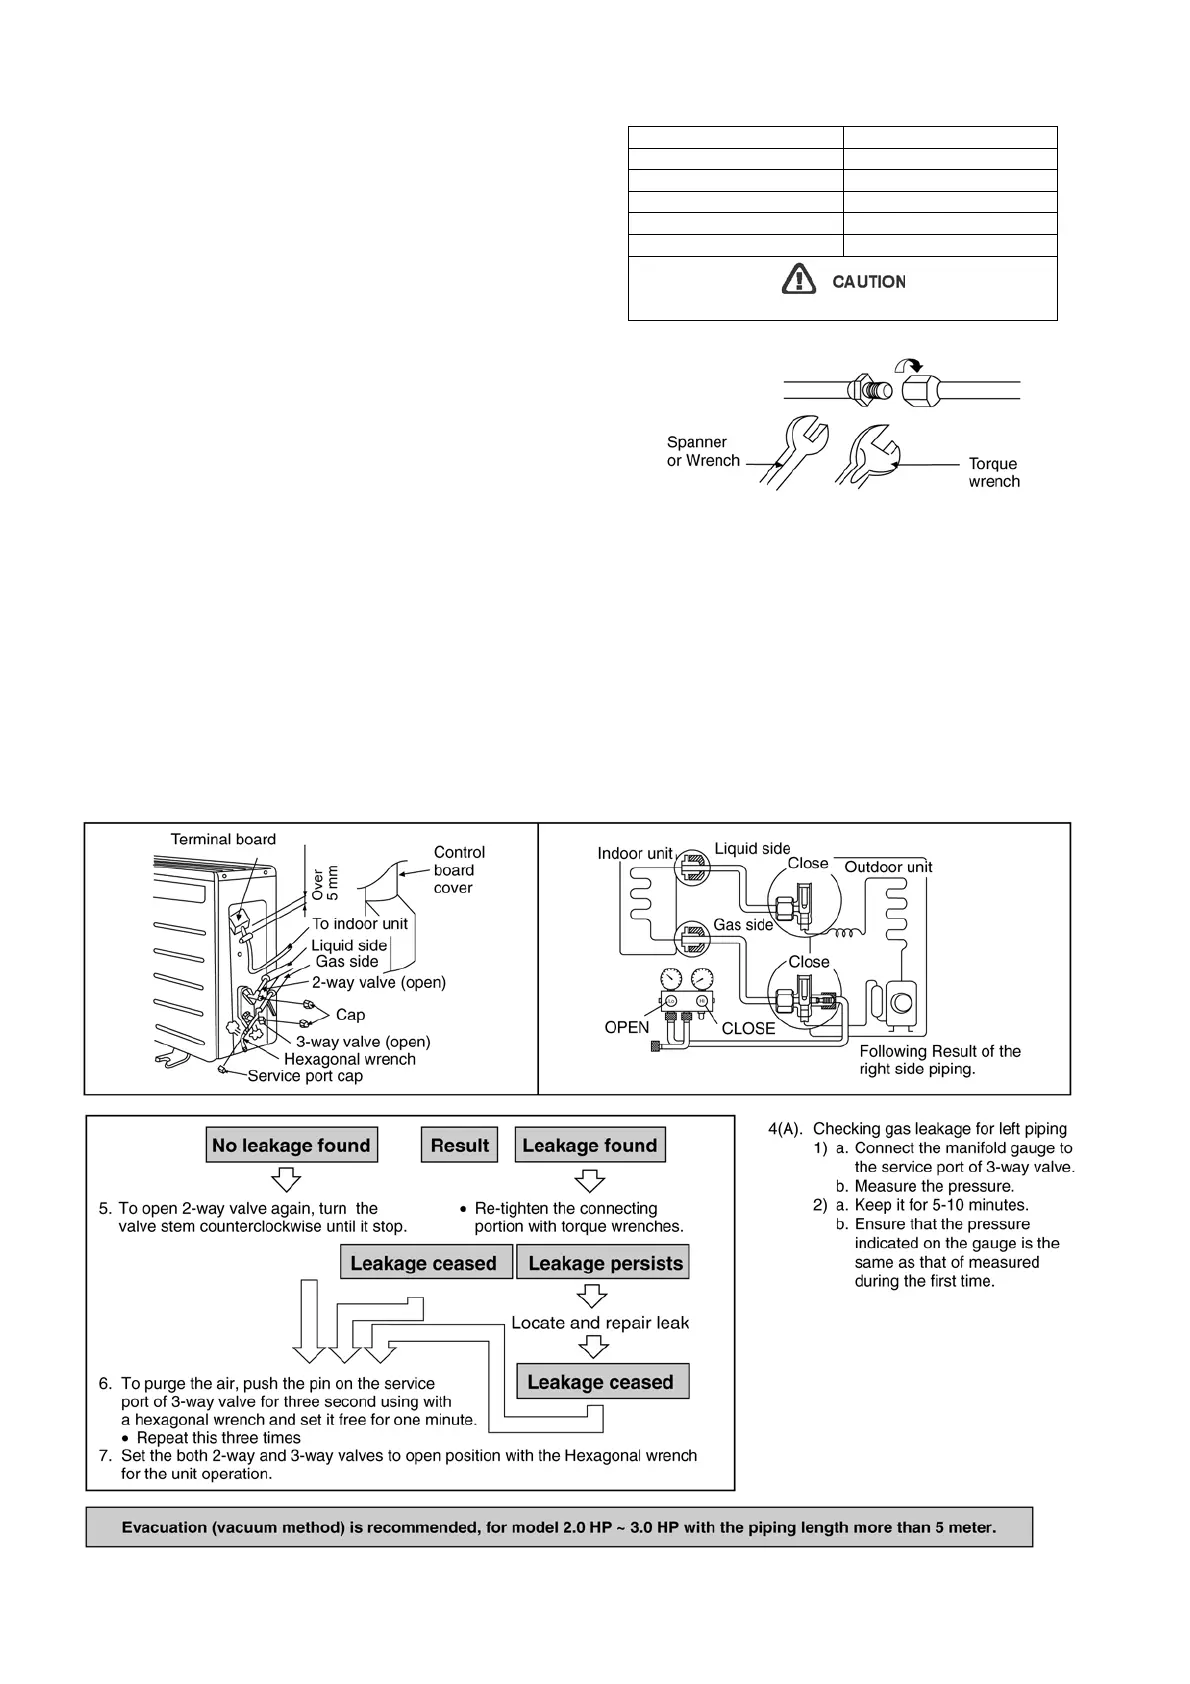
11.3.3. Air Purging Of The Piping And Indoor
The remaining air in the Refrigeration cycle which contains moisture may cause malfunction on the compressor.
1. Remove the caps from the 2-way and 3-way valves.
2. Remove the service-port cap from the 3-way valves.
3. To open the valve, turn the valve stem of 2-way valve counter-clockwise approx. 90° and hold it there for ten seconds, then
close it.
4. Check gas-leakage of the connecting portion of the pipings.
• For the left pipings, refer to item 4(A).
Piping size Torque
1/4” [6.35 mm] [18 N•m (1.8 kgf.m)]
3/8” (9.52 mm) [42 N•m (4.3 kgf.m)]
1/2” (12.7 mm) [55 N•m (5.6 kgf.m)]
5/8” (15.88 mm) [65 N•m (6.6 kgf.m)]
3/4” (19.05 mm) [100 N•m (10.2 kgf.m)]
Do not over tighten, over tightening cause gas leakage.