Do you have a question about the Panasonic Diga DMR-EH770 and is the answer not in the manual?
Details compatible HDD and disc types for recording and playback, including formats and features.
Explains the process of making recorded discs playable on other equipment, making them play-only.
Describes the process of making media like DVD-RAM recordable and permanently deletes all contents.
Lists playable discs such as DVD-Video, DVD-RW, CD, Video CD, and SVCD, and their content types.
Lists incompatible disc types and formats, including region-coded discs and AVCHD.
Shows if playback is possible based on TV type (PAL/NTSC) and recorded content.
Details requirements for USB memories, including mass storage class and USB 2.0 compatibility.
Specifies supported file systems (FAT 16 and FAT 32).
Explains what file formats (MP3, JPEG) can be played or copied to HDD, and the operations.
Explains how to select main or secondary audio for bilingual broadcasts during recording.
Details how aspect ratio is recorded, especially for 16:9 and 4:3 content.
Explains the setting required for high-speed copying from HDD to DVD-R.
Notes that "One time only recording" broadcasts cannot be recorded on certain discs.
Explains the need for finalising discs for playback on other DVD players.
Provides precautions for unit placement, ventilation, and protection from heat and condensation.
Explains VBR compression and how remaining time is displayed.
Details the automatic energy save mode for the HDD and its implications.
States Panasonic's non-responsibility for loss of recorded content or data.
Simple instruction on how to handle discs to avoid touching the recorded surface.
Advice on handling non-cartridge discs, focusing on preventing scratches and dirt.
Instructions on how to clean discs if dirt or condensation is present.
Lists important precautions for handling discs, such as avoiding labels and certain disc types.
Provides care instructions for the unit, including cleaning and environmental factors.
Details on batteries, usage, and signal sensor for the remote control.
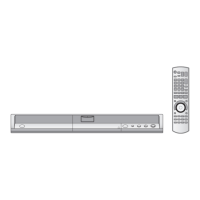
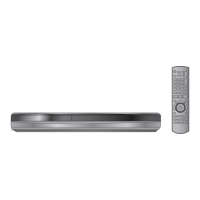
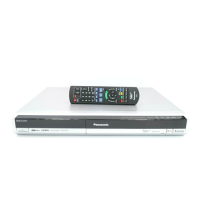
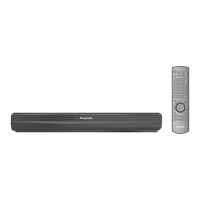
Identifies and explains the functions of the remote control buttons.
Instructions on how to open the front panel to access ports and the disc tray.
Steps for inserting and removing USB memory devices and precautions.
Explains the indicators on the unit's display for various functions like copying and recording.
Diagrams and instructions for connecting the unit to a TV via RF or Scart terminals.
Shows how to connect the unit to a TV and VCR using Scart and RF cables.
Illustrates connections for a TV with a digital/satellite receiver or decoder.
Details connections for a TV with both a VCR and a digital/satellite receiver.
Diagrams for connecting a TV using analog audio/video or S-Video terminals.
Explains how to connect a TV using component video for progressive output.
Instructions for connecting to amplifiers, including digital audio connections.
Details connecting via HDMI for high-quality digital video and audio, including HD output.
Explains the VIERA Link function for linked operations using HDMI cables.
Describes the Q Link function for linked operations using a Scart cable.
Lists features like easy playback, power link, and direct TV recording enabled by these functions.
How to use the TV remote to access the unit's FUNCTION MENU and select operations.
Explains how to use the TV remote to access the OPTION menu for disc playback control.
Details how to use the TV remote's control panel for playback operations like search and pause.
Instruction to power on the TV and select the correct input source before proceeding with setup.
Steps to power on the DVD recorder unit and initiate Q Link download if applicable.
Guide to selecting the TV aspect ratio (16:9, Pan & Scan, Letterbox) for optimal display.
Instructions on how to proceed with setting up the GUIDE Plus+ system if desired.
First step to access the GUIDE Plus+ system by pressing the GUIDE button.
How to enter the postal code for receiving location-specific TV programme data.
Prompts the user to confirm whether to proceed with or skip the GUIDE Plus+ setup.
Explains automatic and manual methods for downloading GUIDE Plus+ data.
Details how to edit the programme list, select stations, and set references.
Explains the Host Channel and how to change it manually if needed.
Instructions on entering or changing the postal code for correct regional data.
How to manually trigger the download of GUIDE Plus+ data.
Setting priority between GUIDE Plus+ data download and timer recordings.
How to connect for progressive video output via component terminals.
Steps to configure the unit's remote to control TV functions like power, input, and volume.
How to change remote control codes if other Panasonic devices interfere.
Instructions on how to test the remote control setup by checking TV operation.
How to select channels using the numbered buttons on the remote.
Explains how to choose recording quality and duration modes.
Simple steps to start recording using the REC button.
Steps to prepare the unit and television before starting a recording.
How to choose between the HDD or DVD drive for recording.
Instructions for inserting a disc into the DVD drive for recording.
Explains how the unit automatically selects the drive when a disc is inserted or the tray is closed.
How to pause recording temporarily.
How to stop the recording process.
Describes the disc format confirmation screen and how to remove discs.
Setting "Rec for High Speed Copy" to "On" before recording for faster copying.
How to set a specific time to stop recording manually.
Recording that automatically adjusts quality to fit remaining disc space.
How to play back content while another recording is in progress (chasing playback).
How to play back existing titles while a new recording is active.
How to set timer recordings by selecting programmes from the GUIDE Plus+ list.
General notes and restrictions related to recording, discs, and broadcasts.
Steps to prepare the unit and television before setting up timer recordings.
How to stop a recording that is currently in progress.
How to switch between views, select stations, and view programme information.
How to filter the program list by main category and sub category.
How to set timer recordings using SHOWVIEW numbers found in TV listings.
Steps for manually programming timer recordings by entering details like name, date, and time.
How to stop a recording that is currently in progress.
How to cancel timer recording standby mode.
How to view, modify, or remove programmed timer recordings.
Notes on TV system compatibility, recording standby, and overlapping programmes.
Explains how recording automatically switches to HDD if the DVD drive lacks space.
How to automatically overwrite old recordings with new ones on the HDD.
Explains how VPS/PDC ensures accurate recording start/end times, even with broadcast delays.
How to set timer recordings using the TV's Q Link function.
Steps to record content from digital/satellite receivers or decoders.
How to use EXT LINK for timer recordings from external equipment via Scart.
How to start playback of recorded titles or discs.
How to browse and select recorded titles using the Direct Navigator.
How to change the Direct Navigator display between thumbnail and table views.
How to sort titles in the Table Display for easier selection.
How to select the VIDEO content type within the Direct Navigator.
How to select a specific title for playback using the remote.
How to stop playback and resume later.
How to pause playback and resume.
How to fast forward or rewind playback.
How to skip to the next title, chapter, or track.
How to start playback directly from a specific title, chapter, or track.
How to play content at a quicker speed.
How to play video in slow motion.
How to advance playback frame by frame.
How to skip forward or backward by a specified time interval.
How to skip forward by approximately 30 seconds.
How to create chapters at specific points in a recording.
How to switch audio channels or soundtracks during playback.
Details file format requirements, folder structures, and limitations for DivX, MP3, and JPEG files.
Shows how folders should be structured for MP3 and still picture playback.
How to play DivX video content from discs, including selecting titles.
How to select the file type (DivX, MP3, JPEG) for playback from a disc.
How to use the tree screen to navigate through folders to find files.
Information on playing DivX Video-on-Demand content, including registration.
Steps to play MP3 files from discs or USB memory, including track selection.
How to navigate MP3 files organized into groups or folders.
How to play still pictures from discs or USB memory, including album selection.
Specific steps to play JPEG files from a USB memory device.
How to start an automatic slideshow of still pictures.
How to rotate still pictures for correct viewing orientation.
How to zoom in on still pictures to view details.
How to view properties like recording date and shooting date for still pictures.
How to switch between different folders containing still pictures.
Basic steps to navigate and interact with on-screen menus.
How to set soundtrack, subtitle, angle, and audio channel for discs.
Details on selecting audio signal type, frequency, bits, and channels.
How to choose the language for menus and on-screen messages.
How to change the playback sequence for repeat play, chapter, group, title, or track.
How to adjust sound effects like V.S.S. and Dialog Enhancer.
How to adjust picture quality using Playback NR and Progressive settings.
Explains how to view status messages and interpret information like remaining time and recording mode.
How to access editing functions by pressing DIRECT NAVIGATOR.
Selecting VIDEO content type to enable editing.
How to select a specific title for editing.
How to open the options menu for editing titles and chapters.
How to select chapters for editing operations.
How to return to the Title View from Chapter View.
Functions for deleting titles, setting properties, renaming, protecting, and dividing titles.
Functions for deleting, creating, and combining chapters within titles.
How to create a playlist by arranging existing chapters.
How copying a playlist results in a new title.
Step-by-step guide to creating playlists, including selecting titles and chapters.
Functions for deleting, renaming, copying, and moving playlists.
How to add, move, create, combine, or delete chapters within playlists.
First step to access picture editing features.
How to select PICTURE content type to enable editing.
How to select an album for editing operations.
How to select an album and picture for editing.
How to navigate between pages of titles or pictures.
How to select multiple items for editing operations.
Accessing album editing functions like slideshow, adding pictures, and creating albums.
Accessing still picture editing functions like deleting and protecting.
How to delete individual pictures or entire albums.
How to assign names to albums for better organization.
How to protect pictures or albums from accidental deletion.
Steps to add pictures to an album or create a new album.
How to copy pictures to DVD-RAM or HDD.
Step-by-step guide to deleting titles, albums, or pictures using the Delete Navigator.
How to delete titles or pictures while they are playing.
Overview of copying features like HDD to DVD copy and high-speed copy.
Notes on recording or playing while a copy operation is in progress.
Table showing estimated copying times based on speed and disc type.
Notes on bilingual audio selection and speed/mode settings for copying.
Explains how speed and recording modes affect copying, especially for high-speed copy.
Steps to initiate the copying process from HDD to DVD or other discs.
How to view title properties and sort the COPY Navigator list.
How to register titles and playlists into a list for copying.
How to select the source and destination drives for copying.
How to select the copy mode (VIDEO, PICTURE) and recording mode.
Steps to register individual titles, folders, or playlists for copying.
How to start the copying process after setting up the list.
How to stop the copying process.
How to delete or add items to the copying list.
How to cancel all registered copying settings and lists.
Explains icons and functions used in the COPY Navigator for clarity.
How to start copying titles from the disc's top menu.
How to set a specific time duration for copying content to the HDD.
How to initiate the copying process after setting the time and confirming.
How to register individual still pictures or folders for copying.
Steps to copy pictures using the copying list via advanced copy.
How to select the source and destination for copying pictures.
How to set the copy mode for pictures.
Instructions to copy all still pictures from a USB memory device to HDD or RAM.
How to select folders to access their contents for copying.
How to move up in the folder structure to select different directories.
Step to start playback on the VCR or other analog video source.
How to start recording from the analog source.
How to use DV Auto Rec for automatic recording from DV equipment.
Steps for manually recording analog video sources.
How to play music albums recorded from CDs onto the HDD.
Steps to record music tracks from a CD to the unit's HDD.
How to delete music albums or rename them.
How to set protection for DVD-RAM discs to prevent accidental deletion or changes.
How the write-protect tab on DVD-RAM cartridges works.
How to assign custom names to discs for easier identification.
How to delete all titles and playlists from the HDD or a disc.
How to format a disc or HDD to erase all contents, making it recordable.
How to select the background image for the DVD-Video top menu.
How to choose whether the top menu or content playback starts first.
Explains the finalisation process to make discs playable on other DVD players.
How to create a top menu for +RW discs for better compatibility with other equipment.
How to access the screen for entering names for titles, playlists, discs, or albums.
How to select characters using the remote control for text input.
How to open the FUNCTION MENU to quickly access main operations.
How to activate and deactivate the Child Lock to prevent unauthorized operation.
Basic steps to access and change settings via menus.
Lists settings categories (Tabs, Menus) and their factory presets.
Settings related to playback, including ratings, soundtrack, subtitle, and menus.
Settings for recording time in EP mode, aspect ratio, high-speed copy, and DVD speed.
How to set the aspect ratio for recordings and copies.
Setting to enable high-speed copying of titles from HDD to DVD discs.
Setting to adjust picture sharpness when recording.
Selecting the picture type shown when playback is paused.
Setting for seamless playback of playlist chapters or partially deleted titles.
How to select main or secondary audio for bilingual broadcasts during recording.
Settings for digital audio output via optical or HDMI terminals.
Selecting how audio with high sampling frequencies is output.
How to select Bitstream or PCM output for Dolby Digital signals.
Choosing audio type (Dolby Digital, LPCM) for XP mode recordings.
Selecting audio type for recording from DV input terminals.
How to choose the language for menus and on-screen messages.
Setting whether status messages are shown automatically.
Option to hide the grey background that appears during weak tuner reception.
Setting the TV aspect ratio to match the connected television for optimal picture display.
Enabling or disabling progressive video output for compatible TVs.
Setting the TV system (PAL, NTSC) to match the connected equipment or disc.
Settings for HDMI video format, aspect ratio, and digital audio output.
Enabling or disabling the VIERA Link function for integrated control.
Selecting the output type (Video, S-Video, RGB) for the AV1 terminal.
Settings for AV2 input and connection type, matching external equipment.
Setting for linked timer recordings with external equipment via Scart control signals.
Setting the unit's clock, including automatic and manual modes.
Options for reducing power consumption in standby mode.
Enabling quick startup for recording and GUIDE Plus+ display.
Information on registering the unit for DivX Video-on-Demand content.
Options to reset various settings to factory defaults or shipping conditions.
Procedures for manual tuning, auto-setup, and managing channel positions.
Detailed steps for changing channel assignments, names, fine tuning, and video system.
How to restart the automatic channel setup process.
Steps for manually setting the unit's clock if automatic adjustment fails.
Explains the DivX VOD authorization error and its cause.
Reasons for incomplete recording, such as copy protection or full storage.
Possible causes for playback failure, including TV system mismatch or disc issues.
Reasons why recording to a disc might fail, such as unformatted or incompatible discs.
Indicates insufficient HDD space for recording or copying, requiring deletion of titles.
Message for DivX VOD content that has reached its maximum number of plays.
Explains the display when the DVD drive is active or has issues.
Indicates when GUIDE Plus+ data is being downloaded.
Message indicating a potential hardware issue or purchased unit problem.
Message indicating items cannot be deleted from the disc.
Message indicating the disc may be dirty, scratched, or unplayable.
Message indicating the disc cannot be written to.
Indicates the unit is performing a recovery process after power interruption.
Message indicating the maximum number of timer programmes has been reached.
Message when an unformatted disc is inserted, requiring formatting.
Message when an incompatible disc or USB memory is used.
Error messages related to HDMI connection authentication issues.
Error messages related to HDMI connection authentication issues.
Indicates the unit is hot and has switched to standby for safety.
Messages indicating a general malfunction during recording, playback, or copy.
Indicates a unit malfunction with a service number that may require troubleshooting.
Indicates that the Child Lock function is activated.
Q&A on multi-channel sound, headphones, Scart vs. component connection, and progressive output.
Q&A on playing discs from other countries, region numbers, and general disc compatibility.
Q&A on recording from commercial sources, audio signals, bilingual broadcasts, and high-speed copying.
Q&A on GUIDE Plus+ availability, data updates, manual timer programming, and postal code changes.
Q&A on USB port usage, file compatibility, and copying to HDD.
Q&A on recording multiple CDs and transferring HDD music tracks.
Solutions for no power, unit not turning on, or automatic standby.
Troubleshooting for dim display, flashing time, incorrect time display, and U88 error.
Solutions for TV screen issues like no picture, distortion, or incorrect aspect ratio.
How to fix vertically stretched recorded titles, often related to aspect ratio settings.
Solutions for after-images or picture degradation during playback.
Addresses picture doubling issues with progressive output, suggesting interlace or checking connections.
Troubleshooting steps for when no image appears on the TV, checking connections and input settings.
Solutions for distorted pictures, including checking connections and TV system settings.
Troubleshooting for no sound, low volume, distorted sound, or incorrect audio type.
Solutions for when the unit cannot be operated, remote control issues, or slow HDD activation.
Steps to take if the disc cannot be ejected, including Child Lock and power issues.
Solutions for issues with tuning channels, checking connections and Q Link.
Reasons why channel presets cannot be downloaded from the television.
Factors contributing to slow startup, such as Quick Start settings or clock issues.
Reasons for recording failure, including disc issues, space limits, and copy protection.
Causes for copying failure, such as disc incompatibility, space limits, or title restrictions.
Troubleshooting for problems recording from external sources, checking connections and input channels.
Solutions for timer recording not working, including programme errors, standby status, and clock settings.
Explains why VPS/PDC might not work and how to ensure it functions correctly.
Reasons for lost recording data, such as power failure or disc damage.
Why the programme name might not match the recorded title, often due to broadcast changes.
Explains when high-speed copying might not be possible or reverts to normal speed.
Notes that loud disc rotation sounds during high-speed copying are normal.
Troubleshooting for DV automatic recording failures, checking connections and equipment.
Solutions for when playback fails to start, including disc issues and copyright protection.
Reasons why playback might stop unexpectedly, such as disc issues or copyright.
Explains why audio and video might pause between playlist chapters or during Quick View.
Solutions for DVD-Video not playing, including ratings, region numbers, and TV system settings.
Explains when soundtrack and subtitles cannot be selected, suggesting disc menus or settings.
Notes that subtitles are not recorded on the disc or need to be turned on.
Explains that angles can only be changed for scenes with multiple angles recorded.
Instructions on how to reset the ratings password.
Notes when Quick View function might not work, such as during recording.
Explains when the resume play function is cancelled.
Solutions for Video CD picture display problems, including TV system settings.
Notes that these functions do not work with finalised discs.
Reasons why editing might not be possible, such as insufficient HDD space.
Explains when chapter creation might not be possible due to power interruption or closeness of points.
Notes on deleting chapters, suggesting combining chapters if they are too short.
Explains that copyright-protected tracks cannot be copied.
Troubleshooting for Direct Navigator screen not displaying and long copy/delete times.
Reasons why USB memory contents might not be read, including format and connection issues.
Troubleshooting for GUIDE Plus+ system not receiving data, "No Data" display, or interrupted data transfer.
Steps to resolve issues with VIERA Link functionality, including cable checks and resets.
How to reset unit settings to factory defaults or shipping conditions.
How to reset the ratings level settings.
Instructions on how to recover the unit if it freezes due to safety device activation.
Definition of digital multi-channel audio data format.
Explains CPRM technology for protecting copy-once broadcasts.
Defines a decoder's role in restoring coded audio signals.
Explanation of DivX media technology for compressed video.
Description of Dolby Digital audio coding for multi-channel sound.
Process of remixing multi-channel audio into two channels for speaker systems.
Refers to the hard disk (HDD) and disc drives for reading and writing data.
Description of DTS surround sound system used in theaters.
Explains the difference between sound levels and compression.
Distinguishes between film and video sources for DVD-Video.
Process to make discs playable on other equipment, making them play-only.
Defines a place on the HDD or disc where data groups are stored, especially for JPEG files.
Process of making media like DVD-RAM recordable, permanently deleting contents.
Explains frames and fields in video signals and their effect on picture quality.
Defines a hard disk drive as a mass data storage device.
Explains HDMI for uncompressed digital video and audio transmission.
Explains JPEG for compressing still pictures with minimal quality loss.
Defines LPCM as uncompressed digital audio signals.
Describes MPEG2 as a standard for video compression used in DVD and broadcasting.
Explains MP3 audio compression for efficient audio file sizes.
Describes Pan&Scan and Letterbox methods for fitting 16:9 images onto 4:3 screens.
Explains PBC for selecting scenes and using menus on Video CDs.
Distinguishes between interlaced and progressive video scan lines for resolution.
How to prevent accidental deletion by setting writing or deletion protection.
Explains RGB color signals for video transmission and higher quality images.
Defines sampling frequency as the number of audio samples taken per second.
Defines a thumbnail as a miniature picture used to display multiple images in a list.
Explains the 1080i high-definition image format using interlaced scan lines.
Explains the 1080p high-definition image format using progressive scan lines.
Explains the 720p high-definition image format using progressive scan lines.
Lists the supported recording systems like DVD-RAM, DVD-R, etc.
Details the types and speeds of recordable discs supported.
Provides approximate recording times for various modes and disc capacities.
Lists the types of discs that can be played, including formats and content.
Specifies the internal hard disk drive capacity.
Details the optical pick-up system with lens and wavelength information.
Provides Class 1 LASER product information.
Details the HDMI output support and its features.
Specifies supported video systems like PAL, NTSC, and SECAM.
Lists tuner systems and their corresponding channel coverage.
Specifies the DV input terminal type and standard.
Includes details on operating temperature, power supply, dimensions, and mass.
Safety advice on where to place the unit to prevent damage and ensure longevity.
Warning against using high voltage power sources to prevent fire.
Precautions for handling the AC mains lead to prevent electric shock or fire.
Warnings about preventing metal objects or liquids from entering the unit.
Advice against self-repair and instructions to contact authorized service centers.
Guidance on the proper disposal of used electrical and electronic equipment.
| Type | DVD Recorder |
|---|---|
| Hard Drive Capacity | 250 GB |
| Recording Format | DVD-RAM, DVD-R, DVD-RW, DVD+R, DVD+RW |
| Video Input | Composite, S-Video, Component |
| Video Output | Composite, S-Video, Component, HDMI |
| Weight | 4.5 kg |
| DV Input | Yes |
| EPG | Yes |
| Video Recording Format | MPEG-2 |
| Audio Recording Format | Dolby Digital |
| USB Port | Yes |
| Playback Format | DVD-Video, DVD-RAM, DVD-R, DVD-RW, DVD+R, DVD+RW, CD, CD-R, CD-RW |
| Audio Output | Digital Optical, Digital Coaxial |
| Tuner Type | Analog |
| Dimensions | 430 mm |
| Audio D/A Converter | 24-bit |