EasyManua.ls Logo

Panasonic DMR-E50K - User Manual

Panasonic DMR-E50K
64 pages
Print Icon
To Next Page IconTo Next Page
Loading...
Region number supported by this unit
Region numbers are allocated to DVD players and software
according to where they are sold.
The region number of this unit is “1”.
The unit will play DVDs marked with labels containing “1” or
ALL”.
1
ALL
2
4
1
Example:
This manual was
p
rinted with so
y
based ink.
®
DVD VIDEO RECORDER
Operating Instructions
Model No. DMR-E50
[For\U.S.A.]only]
The warranty can be found on page 56.
[For\Canada]only]
The warranty can be found on page 57.
Para la instalación y las operaciones básicas
del aparato, existe una guía en español en las
páginas 58 a 63.
RQT6920-P
P
Dear customer
Thank you for purchasing this product. For optimum performance
and safety, please read these instructions carefully.
Before connecting, operating or adjusting this product, please read
these instructions completely. Please keep this manual for future ref-
erence.
PC

Table of Contents

Questions and Answers

  • R
    Ronnie GoodwinAug 14, 2025
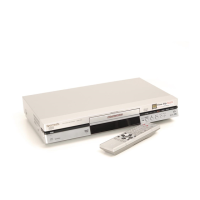
    What to do if images from Panasonic DMR-E50K do not appear on TV?
    • A
      Ashley WrightAug 14, 2025
      If the images from your Panasonic DVR do not appear on the television, ensure the television is correctly connected to the AUDIO/VIDEO, S-VIDEO OUT, or COMPONENT VIDEO OUT terminal on the unit. Also, verify that the television’s input setting (e.g., VIDEO 1) is correct. Check the settings on your television and also check the settings for 'TV Type', '4:3 TV Settings for DVD-Video' or '4:3 TV Settings for DVD-RAM' in the TV Screen menu. You may need a signal booster if the signals are being divided between the unit and the television.
  • C
    Charles CharlesAug 17, 2025
    Why Panasonic DMR-E50K DVR cannot record?
    • M
      morganchristopherAug 17, 2025
      If your Panasonic DVR is not recording, ensure you have inserted a disc that the unit can record onto. If the disc is unformatted, format it. Check if the write-protect tab on the cartridge is set to PROTECT. Also, the disc might be full or nearly full, so erase unneeded programs or use another disc. Note that you cannot record on finalized DVD-R discs. Ensure that the unit is on timer recording standby by pressing [Í, DVD POWER] to turn the unit off and make sure that 'F' is on.
  • T
    Tracy KramerAug 21, 2025
    Why Panasonic DMR-E50K DVR remote control doesn't work?
    • N
      nswansonAug 21, 2025
      If your Panasonic DVR remote control isn’t working, first ensure that the [DVD, TV] switch is set to 'DVD' when operating the unit, or to 'TV' when selecting the receiving channel for the television. If that doesn't solve the problem, try the following: * Replace the batteries with new ones. * Point the remote control at the remote control sensor on the main unit. * Remove any obstacles between the remote and the unit. * Change the manufacturer code. Some televisions cannot be operated even if you change the code. * If the remote control and main unit are using different codes, change the code on the remote control or main unit.
  • A
    Anthony MaldonadoAug 25, 2025
    What to do if Panasonic DMR-E50K is on but cannot be operated?
    • M
      Michael NealAug 25, 2025
      If your Panasonic DVR is on but cannot be operated, it could be due to several reasons. Some operations might be prohibited by the disc. If “U14” appears on the display, it indicates the unit is hot; wait for it to disappear. You can also reset the unit by pressing [Í, DVD POWER] to switch it to standby. If it doesn’t switch, press and hold [Í, DVD POWER] for about 10 seconds. Alternatively, disconnect the AC power supply cord, wait one minute, then reconnect it.
  • Q
    qparkerAug 27, 2025
    How to fix no sound on Panasonic DMR-E50K?
    • B
      barkermarkAug 27, 2025
      If you're experiencing no sound, low volume, or distorted sound with your Panasonic DVR, check the connections and the input mode on the amplifier if you have one connected. If distortion occurs, turn V.S.S. off. Press [AUDIO] to select the desired audio type. If you have used digital connection, set “Dolby Digital” to “PCM” or connect to other equipment using audio cables (analog connection). Note that you cannot change the audio type when a DVD-R is in the disc tray.
  • A
    Angela MillerAug 31, 2025
    Why Panasonic DVR has no power?
    • A
      Amy MurphyAug 31, 2025
      If your Panasonic DVR has no power and switches to standby mode, ensure the AC power supply cord is securely inserted into a known active AC outlet. This is a power saving feature that can be turned off in the settings (Set Up—Off Timer— Off). Press [Í, DVD POWER] to turn the unit on. If that doesn't work, one of the unit’s safety devices may have activated, so press [Í, DVD POWER] to turn the unit on.
  • L
    Laura WilsonSep 3, 2025
    What to do if Panasonic DVR play fails to start?
    • R
      Rebecca StevensSep 3, 2025
      If your Panasonic DVR fails to start play when you press [1] (PLAY), first ensure the disc is inserted correctly with the label facing up. This unit can only play DVD-RAM, DVD-R, DVD-Video, Video CD, CD and MP3 discs. If the disc is dirty, clean it. If condensation has formed, wait 1 to 2 hours for it to evaporate.
  • C
    cooperjeffreySep 6, 2025
    Why is there ghosting when progressive output is on Panasonic DVR?
    • S
      Sandra WarnerSep 6, 2025
      If you notice ghosting when progressive output is on with your Panasonic DVR, it may be due to the editing method or material used on the DVD-Video. To correct this, set “Progressive” to “OFF”. This should resolve the issue by using interlace output.
  • W
    William MyersSep 10, 2025
    How to fix dim display on Panasonic DVR?
    • P
      Philip RothSep 10, 2025
      If the display on your Panasonic DVR is dim, navigate to the Display menu and adjust the display’s brightness using the 'FL Display' setting.

Summary

Panasonic DVD VIDEO RECORDER Operating Instructions

Getting started

CAUTION! THIS PRODUCT UTILIZES A LASER.

Warning about laser radiation exposure and avoiding opening covers.

WARNING: TO REDUCE THE RISK OF FIRE, ELECTRIC SHOCK OR PRODUCT DAMAGE...

Safety warning about exposing the apparatus to rain, moisture, or liquids.

CAUTION: TO PREVENT ELECTRIC SHOCK MATCH WIDE BLADE OF PLUG TO WIDE SLOT, FULLY INSERT.

Safety instruction for proper plug insertion to prevent electric shock.

CAUTION! DO NOT INSTALL OR PLACE THIS UNIT IN A BOOKCASE...

Warning about ventilation and avoiding confined spaces to prevent overheating.

THE FOLLOWING APPLIES ONLY IN THE U.S.A. FCC Note

FCC compliance information regarding radio frequency energy and interference.

IMPORTANT SAFETY INSTRUCTIONS

Features

Overview of the unit's capabilities, including recording quality, access, and playback features.

STEP 1 Antenna and television connections

STEP 2 The remote control

STEP 3 Plug-in Auto Tuning

STEP 3 Plug-in Auto Tuning (Continued)

Adding and deleting channels

Instructions for adding or deleting channels via the unit's interface.

STEP 4 VCR Plus+ guide channel settings

STEP 5 Set up to match your television

Television operation

Instructions for controlling the television using the remote control.

Disc information

Discs you can use for recording and play

Lists types of discs supported for recording and playback.

Discs that cannot be played

Lists types of discs that are not compatible with the unit.

Control reference guide

Remote control

Diagram and list of remote control buttons and their functions.

Main unit

The units display

Explanation of the main unit's display indicators and symbols.

Recording television programs

Recording television programs (Continued)

Inserting discs

Instructions on how to insert discs into the unit.

Recording modes and approximate recording times in hours

Table showing recording modes and their approximate times.

Watching the television while recording

How to watch TV while recording programs.

Recording from a video cassette recorder

Instructions for recording from a VCR.

Recording the best quality pictures in the remaining time-Flexible Recording

Detailed guide on using Flexible Recording for best quality.

Playing discs

Playing discs (Continued)

When a menu screen appears on the television

How to navigate and operate menus displayed on the TV.

Position Memory

How to memorize and resume playback from a specific position.

Using the Direct Navigator

How to use the Direct Navigator to find and play recorded programs.

To erase a program that is being played back

Instructions for erasing a program that is currently playing.

Other methods of play

Starting play from a selected program, title, chapter, or track

How to start playback from a specific item.

Skipping a minute forward-CM Skip

How to use the CM Skip function to skip commercials.

Other methods of play (Continued)

Selecting an amount of time to skip-Time Slip

How to use Time Slip to skip back or forward in time.

Fast forward and rewind-SEARCH

How to use the SEARCH function for fast forward and rewind.

Quick View

How to increase playback speed while keeping audio synchronized.

Marking places to play again-MARKER

Marking positions directly

How to mark positions directly using the MARKER button.

Playing while you are recording

Simultaneous rec and play

How to play a previously recorded program while recording another.

Playing from the beginning of the program you are recording-Chasing Play

How to start playback from the beginning of a program being recorded.

Reviewing the recorded images while recording-Time Slip

How to review recorded images while recording using Time Slip.

Changing audio

Using the FUNCTIONS window

How to access main functions easily using the FUNCTIONS window.

Timer recording

Using VCR Plus+ codes to make timer recordings

How to use VCR Plus+ codes for easy timer recording.

Specify a time to stop recording

Instructions for setting a specific time to stop recording.

Timer recording (Continued)

Manually programming timer recordings

How to manually program up to 16 timer recordings.

Change or delete the program

How to change or delete existing timer programs.

Entering text

Creating play lists

Editing play lists

Editing play lists (Continued)

Add (maximum of 999 scenes)

Instructions for adding scenes to a play list.

Edit Scenes

Options for editing scenes within a play list.

Editing programs

Erase Program

Instructions for erasing programs and their associated play lists.

Editing programs (Continued)

Divide Program

Instructions for dividing programs and confirming the division point.

Disc setting

Erase all programs

Instructions for erasing all programs and play lists from a disc.

Format

Instructions for formatting DVD-RAM discs.

Finalize

Instructions for finalizing DVD-R discs for compatibility.

Disc setting (Continued)

Using on-screen menus

Using on-screen menus (Continued)

On-screen displays

Display examples

Examples of various on-screen displays with explanations.

Home Theater

Enjoying more powerful sound

How to achieve better sound quality with digital and analog connections.

Home Theater (Continued)

Connecting a cable TV box;satellite receiver

Detailed instructions for connecting cable TV or satellite receivers.

Connecting an amplifier or system component

Instructions for connecting amplifiers or system components.

Changing the remote control code

Changing the units settings

Set Up

Various setup options including timers, clock, and remote control codes.

Changing the units settings (Continued)

Video

Video settings including Still Mode, Black Level Control, and audio during search.

Audio

Audio settings including D. Range Compression, MTS, Dolby Digital, and DTS.

Clock settings

Manual Clock Setting

Instructions for manually setting the clock.

Auto Clock Setting

Instructions for automatic clock setting.

Reference (Continued)

Error messages

List of error messages and their solutions.

Troubleshooting guide

General troubleshooting tips for common problems.

Sound

Troubleshooting for sound-related issues like no sound or low volume.

Recording and timer recording

Troubleshooting for recording and timer recording issues.

On the units display

Explanations of error messages displayed on the unit itself.

Power

Troubleshooting for power-related issues.

Cannot record.

Specific troubleshooting steps for recording failures.

Operation

Troubleshooting for operational issues.

VCR Plus+ programming does not work properly.

Troubleshooting for VCR Plus+ programming errors.

Picture

Troubleshooting for picture-related problems.

Play

Troubleshooting for playback failures or interruptions.

Timer recording does not work properly.

Troubleshooting for timer recording malfunctions.

Maintenance

Instructions for cleaning and maintaining the unit.

Remote control

Troubleshooting for remote control not working or not operating TV.

Specifications

Limited Warranty (ONLY FOR U.S.A.)

Limited Warranty Coverage

Details of the limited warranty coverage for parts and labor.

Limited Warranty Limits And Exclusions

Exclusions and limitations of the warranty coverage.

Limited Warranty (ONLY FOR CANADA)

PANASONIC;TECHNICS PRODUCT-LIMITED WARRANTY

Details of the limited warranty for Panasonic/Technics products.

LIMITATIONS AND EXCLUSIONS

Limitations and exclusions of the warranty.

Instalación básica

Conexiones del televisor y de la antena

Diagram and instructions for connecting the TV and antenna.

Plug-in para Sintonización automática

Steps for automatic channel tuning.

Instalación básica (Continued)

Guía VCR Plus+ para ajuste de canales

Guide for adjusting channels for VCR Plus+ timer recording.

Instalación para ajustar su televisor

Instructions for adjusting the TV settings based on its type.

Grabación de programas de televisión

RAM DVD-R

Steps for recording TV programs onto a DVD-RAM disc.

Grabación de programas de televisión (Continued)

Reproducción durante la grabación

How to play recorded programs while recording.

Grabación y reproducción simultáneas

How to record and play simultaneously.

Revisión de imágenes grabadas durante la reproducción-Time Slip

How to review recorded images using Time Slip.

Reproducción de discos

RAM DVD-R DVD-V VCD CD MP3

Instructions for inserting discs and starting playback.

Cuando aparece una pantalla de menús en el televisor

Utilización del Navegador directo

How to use the Direct Navigator to find and play recorded programs.

Panasonic DMR-E50K Specifications

General IconGeneral
TypeDVD Recorder
Hard Drive Capacity80 GB
Video InputComposite, S-Video
TunerNTSC
Video Recording FormatMPEG-2
Audio Recording FormatDolby Digital
Video Recording ModesXP, SP, LP, EP
Video D/A Converter10-bit / 27MHz
Recording FormatDVD-RAM, DVD-R
Playback FormatDVD-Video, DVD-RAM, DVD-R
Audio InputAnalog Stereo
Audio OutputAnalog Stereo
Digital Audio OutputCoaxial, Optical
Audio D/A Converter24-bit

Related product manuals