ENGLISH
- 5
Preparing the Projection Lens
Attach the lens xing attachment after installing and adjusting the lens.
If the lens hood, which is an accessory of the projector, is already mounted, it must rst be removed.
Attention
z
The projection lens will be xed after attaching the lens xing attachment. Do not perform lens calibration or
lens adjustment after the lens xing attachment is attached.
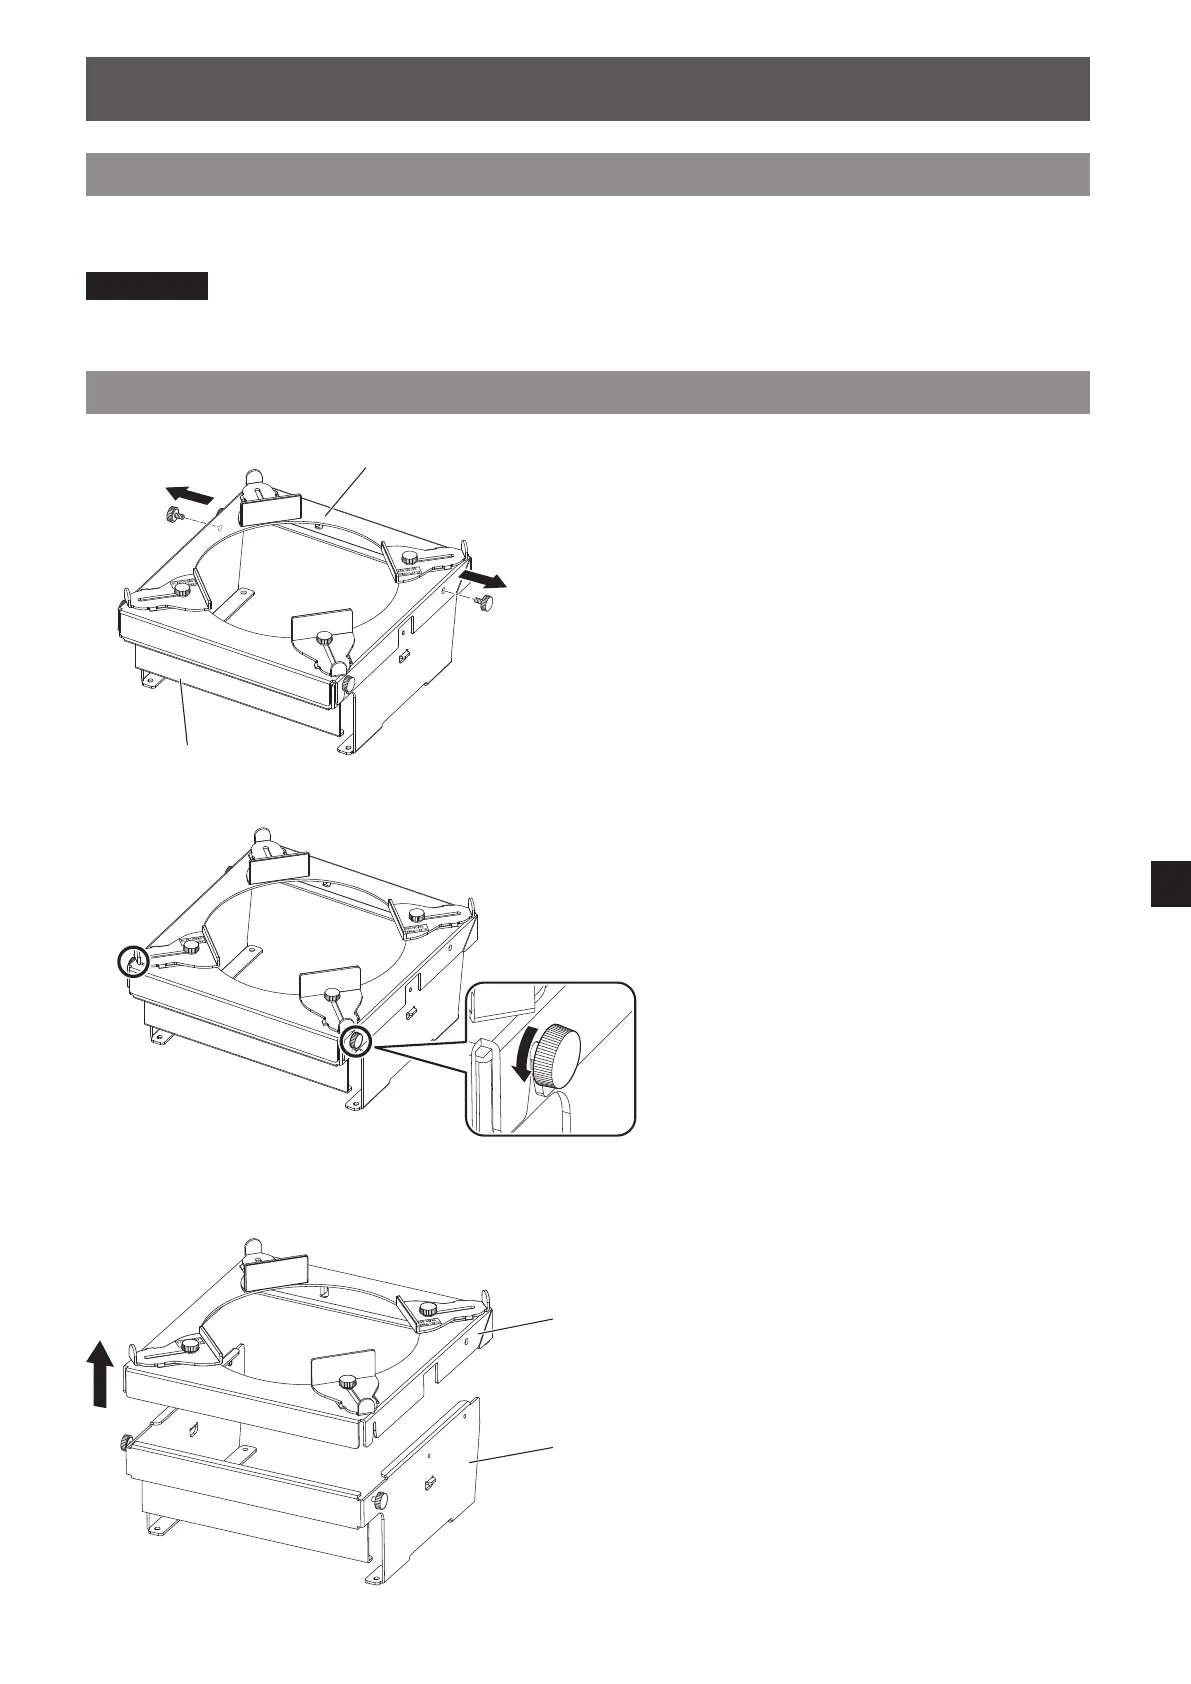
Preparing the Lens Fixing Attachment
Attaching
1) Remove the two upper thumbscrews (inserted
in round holes).
Lens xing attachment bracket
Lens xing attachment
mount bracket
2) Loosen the two lower thumbscrews (inserted
in slots).
3) Remove the lens xing attachment bracket as
shown in the gure.
Lens xing
attachment
bracket
Lens xing
attachment mount
bracket