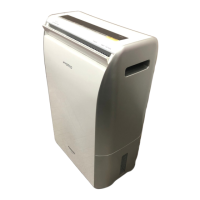
YHE15X
7
Check
If a problem occurs
Dehumidifying
louver
Flap
Handles (left
and right)
Cool air
outlet
Dry air
outlet
■ Viewing the humidity level
«Humidity indicator»
■ Viewing the current dehumidifying method
«
Hybrid indicator
»
■ If the Full Tank indicator is flashing
■ If the Alert indicator is illuminated
(page 17)
(page 16)
(pages 3,16)
● Low (red): When the humidity is low (Approx. 40% or less)
● Normal (green): When the humidity is normal (Approx. 40%
-60%)
● High (red): When the humidity is high (Approx. 60% or more)
● Green · Orange: Hybrid-type operation
(during dehumidifying and clothes drying)
● Green · Green: Compressor-type operation
(during cool air operation)
When the tank has filled with water, the Full Tank
indicator flashes and operation stops automatically.
→ Empty the water from the tank and then
replace the tank.
(page 13) (Operation will then restart.)
Timer button and
indicators (page 13)
Louver Direction button
and indicators (page 10)
Air Swing button
and indicators (page 10)
Cool button and
indicators (page 12)
Intelligent dryness
monitoring system
(page 8)
Dehumidify button
and indicators
(page 9)
ECO indicator
(page 8)
Dry Clothes button
and indicators
(page 8)
Power Off/On button
(pages 8, 9, 12)
Hybrid indicator
(see below)
Humidity indicator
(see below)
Alert indicator
(page 17)
Full Tank indicator
(see below, page 13)
6
operation panel
Part names
Points to note
operation panel
Moving the unit
Turn off the power and
empty the water from
the tank (page 13).
Hold the handles at the
left and right, and move
the unit without tilting it.
■ The unit can be moved
sideways using the
casters without lifting
it up.
■Do not pull on the power
cord when carrying or
storing away the unit.
(It may cause
a damage the
wires inside the
cord, and fire or
electric shocks
may occur.)
● Near furniture or walls (If air circulation
is poor, the temperature will rise and
operating problems may occur, or the
Humidity indicator may not illuminate
correctly [page 16].)
→Leave a gap of 20 cm or more (70
cm or more at the top, 40 cm or more
at the back).
Leave a gap of
1 m or more
Leave a gap of
20 cm or more
Avoid direct
sunlight.
● Near TVs and radios
(Video or sound
distortion may occur.)
If the louver and flap have been removed Do not use the dehumidifier in the
following places.
■ Installing the dehumidifying louver and flap
■ Installing the cool air louver
■ Do not sit anything on top of the unit.
■ Do not use the dehumidifier with the filter
removed.
● Dehumidifying louver
● Flap
Dehumidifying louver
Insert the projection at the right end into the hole in
the main unit.
● Places exposed to direct sunlight or near heaters
(The unit may become warped, discolored or damaged.)
● Places where the air inlet or air outlets may be
covered by items such as curtains
(They may cause problems with poor air circulation.)
● On unstable surfaces (Water leaks may occur.)
(Operating problems or damage may occur.)
● In particular, do not place
magnets or metallic objects on
top of the unit.
(The magnet inside the unit
which stops operation
automatically if the unit tips over
might not function correctly and
the [Power Off/On] button might
not work.)
● The air filtering effects will be lost.
● Dust may collect inside the unit and result in a
breakdown.
Insert the projection at the right end into the hole in
the main unit.
Insert the projection
at the right end
into the hole in the
dehumidifying louver.
Set the louver so that
it is horizontal, and
then bend it out slightly
at the middle.
Bend the flap out
slightly at the middle.
Bend the louver out
slightly at the middle.
Insert the left end in
the same way.
Insert the left end in
the same way.
Insert the left end in
the same way.
D-shaped projection
D-shaped
hole
Turn the louver to
align it correctly.
Dehumidifying louver
This part should
be at the
bottom-right.
Bend out the middle slightly.
Bend out the middle slightly.
Large projection
“Push” should be at the bottom.
Flap
Cool air louver
● The display indicators only illuminate when the corresponding item is selected.
Do not cover
the air inlet and air
outlets.
WARNING

 Loading...