Do you have a question about the Panasonic FV-08-11VFL5 and is the answer not in the manual?
Explains hazard levels and types of instructions indicated by symbols for safe operation.
Crucial safety warnings regarding electrical shock, fire, and proper installation procedures.
Additional warnings about product limitations, disposal, installation methods, and electrical safety.
Important cautions regarding operating temperature, voltage, wiring, and installation locations.
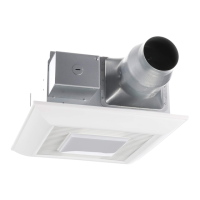
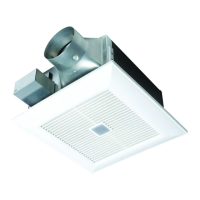
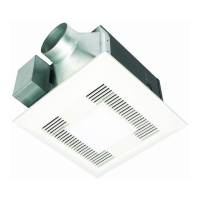
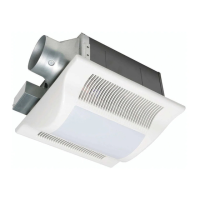
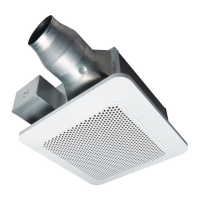
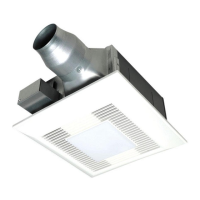
Details about the ventilating fan model, its components, features, and performance characteristics.
Instructions for unpacking the unit and verifying all supplied accessories are present.
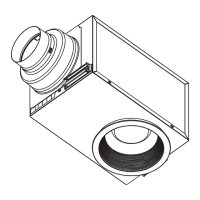
A list of all parts included with the ventilating fan for installation and operation.
Detailed measurements of the ventilating fan unit, including overall size and component dimensions.
Schematic illustrating electrical connections for the fan motor, lighting, and night light.
Explanation of the Pick-A-Flow speed option allowing selection between 80 and 110 CFM.
Step-by-step instructions for installing the fan in new construction.
Removing junction box, duct adaptor, and machine screw before fan installation.
Positioning and securing the Flex-Z Fast bracket to ceiling joists using tapping screws.
Adjusting bracket length for joist spacing and securing with additional tapping screws.
Securing conduit or stress relief to the junction box knock-out hole.
Installing the exhaust duct and sealing it with mastic or approved foil tape.
Attaching the adaptor to the Flex-Z Fast bracket using self-drilling screws.
Connecting house power wires to fan wires following safety codes and wiring diagram.
Precautions for safely mounting the junction box cover and enclosing wires.
Inserting fan body into adaptor assembly and securing it with screws and plug connector.
Ensuring the duct adaptor is securely screwed to the housing without damaging threads or bracket.
Aligning the ceiling hole with the fan flange and sealing any gaps to prevent air leakage.
Removing tapes and screws to prepare for grille and light cover installation.
Installing the fluorescent lamps and the night light into the lighting unit.
Attaching the light cover to the lighting unit.
Connecting the grille mounting spring and the lighting unit plug connector.
Verify the lighting unit plug connector is correctly seated for the light to function.
Adjusting the Pick-A-Flow switch to select the desired air volume (80 or 110 CFM).
Ensure the speed switch is not in the middle position to guarantee fan operation.
Attaching the grille to the fan body by inserting the mounting spring into the slot.
Carefully mount the grille to avoid pinching lead wires of the lighting unit.
Step-by-step instructions for installing the fan in existing construction.
Removing the old fan, cutting the ceiling opening, and installing the Flex-Z Fast bracket.
Following previous steps for duct connection and electrical wiring.
Attaching the adaptor to the Flex-Z Fast bracket using self-drilling screws.
Securing the fan body to the bracket and adaptor with screws and plug connector.
Following remaining installation steps from page 7.
Instructions for routine annual cleaning of the ventilating fan components.
How to clean the grille using mild detergent and a soft cloth.
Removing dust and dirt from the fan body using a vacuum cleaner or damp cloth.
Procedure for safely replacing the fluorescent lamps and night light.
Steps to remove the grille, plug connector, and light cover for lamp access.
Instructions for replacing fluorescent lamps and the 4W night light bulb.
Re-installing the light cover after lamp replacement.
Tips for optimizing airflow, reducing heat loss, and ducting for best performance.
Technical data including model number, voltage, airflow, noise, power consumption, and weight.
Information regarding servicing by qualified technicians and contact details for support.