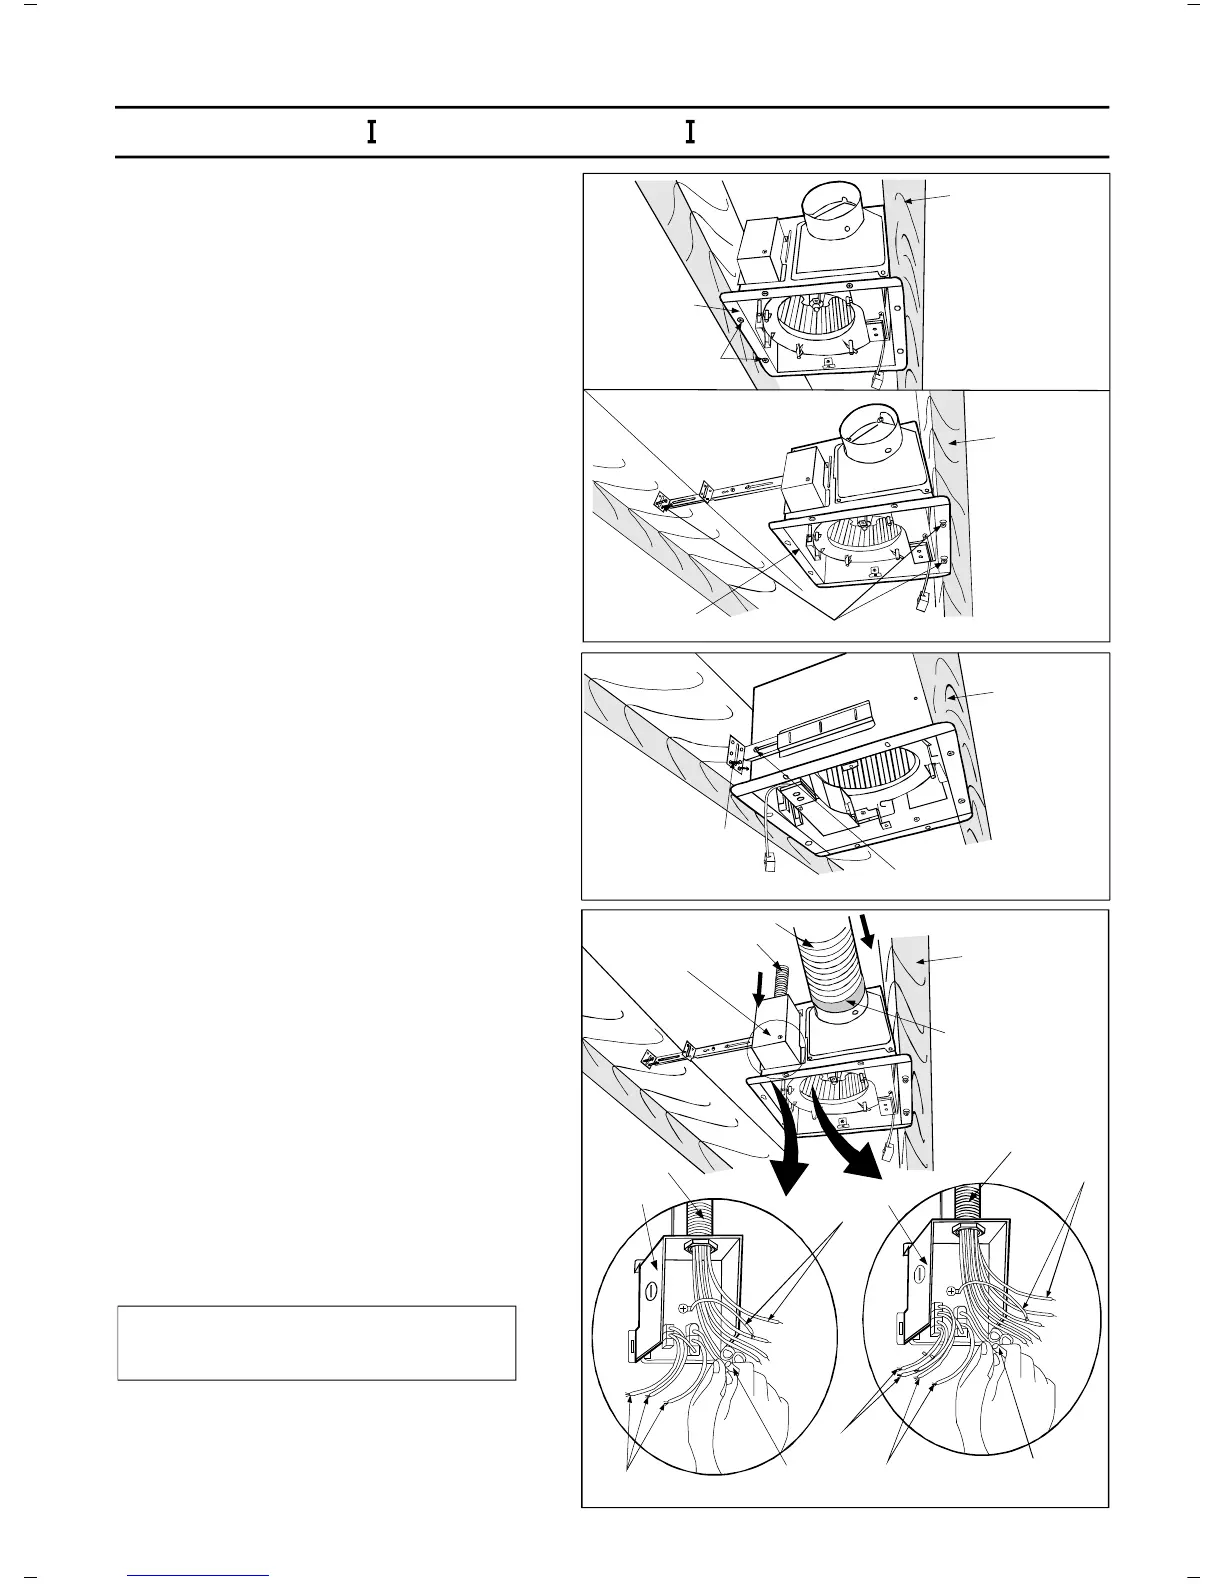
INSTALLATION(JOISTMOUNTING-)CONTINUED
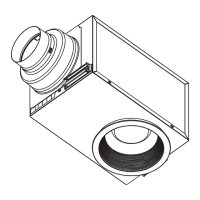
2.Installthesuspensionbracketandtheflangeof
fanbodytojoistsbyusinglongscrews(ST4.2X20)
(IfspacingAbetweenjoistsis12inches,installthe
flangeoffanbodyaccordingtoFig.2-1,others
accordingtoFig.2-2toinstalltheproduct)
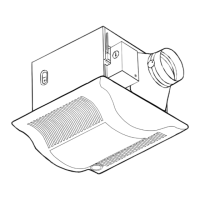
3.Installthesuspensionbrackettojoistsbyusing
longscrews(ST4.2X20)andsecureittothefan
bodybyusingscrew(ST4.2X12)(Fig.3)II
4.Removejunctionboxcoverandsecureconduit
orstressrelieftojunctionboxknock-outhole.
(Fig.4)
6.Installacircularductandsecureitwith
ducttapeorclamps.
5.Refertowiringdiagramofpage5.
Followallthelocalelectricalsafetycodesas
wellastheNationalElectricalCode(NEC).
UsingULapprovedwirenuts,connecthouse
powerwirestoventilatingfanwires:
blacktoblack;whitetowhite;greentogreen;
FormodelFV-08VKSL2connectthetwo
redwirestotheswitchforthespeedcontrol.
Replacethejunctionboxcover.(Fig.4)
Mountjunctionboxcovercarefullysothat
leadwiresarenotpinched.
CAUTION:
Joist
Joist
Joist
Ducttape
orclamps
Circularduct
Conduit
(FV-08VKML2)
(FV-08VKSL2)
Junctionboxcover
Fig.2-1
Fig.2-2
Fig.3
Fig.4
Fanbody
Fanbody
2Longscrews
(ST4.2X20)
2Longscrews
(ST4.2X20)
Screws(ST4.2X12)II
4Longscrews(ST4.2X20)
Joist
9
Conduit
Redwires
Greenwires
Leadwires
Wirenut
Junctionbox
Greenwires
Leadwires
Wirenut
Junctionbox
Conduit
PDF created with pdfFactory Pro trial version www.pdffactory.com