EasyManua.ls Logo

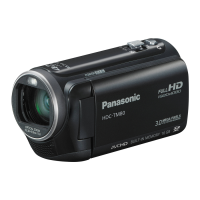
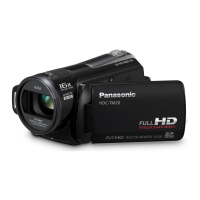
Panasonic HDC-TM80 User Manual

Panasonic HDC-TM80
148 pages
To Next Page IconTo Next Page
Page #1 background imageLoading...
Page #1 background image
Operating Instructions
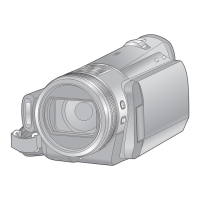
High Definition Video Camera
Model No. HDC-SD80
HDC-TM80
HDC-HS80
Before use, please read these instructions completely.
VQT3J26
until
2011/1/24
Model number suffix “EB” denotes UK model.
HDCSD80&TM80&HS80EB-VQT3J26_mst.book 1 ページ 2011年1月11日 火曜日 午前11時44分

Table of Contents

Questions and Answers:

Panasonic HDC-TM80 Specifications

General IconGeneral
Digital zoom2000 x
Optical zoom34 x
Image stabilizerYes
Focal length range33.7 - 1415 mm
Sensor typeMOS
Total megapixels1.5 MP
Optical sensor size1/5.8 \
Effective megapixels (movie)1.3 MP
InterfaceUSB 2.0
Video out1
Display diagonal2.7 \
Maximum video resolution1920 x 1080 pixels
Image formats supportedJPG
Still image resolution(s)2304 x 1296
Audio systemDolby Digital
Audio formats supportedAAC
Camera shutter speed1/25 - 1/8000 s
Shutter speed (photo)1/25 s
Shutter speed (video)1/8000 s
USB 2.0 ports quantityUSB 2.0 ports have a data transmission speed of 480 Mbps, and are backwards compatible with USB 1.1 ports. You can connect all kinds of peripheral devices to them.
Compatible memory cardsSD, SDHC, SDXC
Internal storage capacity16 GB
Product colorBlack
Bundled softwareHD Writer AE 3.0
Weight and Dimensions IconWeight and Dimensions
Depth109 mm
Width52 mm
Height59 mm
Weight193 g

Summary

Information for Your Safety

Caution for AC mains lead

Safety instructions for the AC mains lead, including fuse replacement and wiring guidelines.

How to replace the fuse

Concerning the battery

Safety precautions and handling advice related to the unit's battery.

EMC Electric and magnetic compatibility

Product identification marking

Details on product identification markings and their locations on the camera and adaptor.

About the recording format for recording motion pictures

Handling of built-in memory [HDC-TM80]

Important points for using the built-in memory, including data backup and access precautions.

Handling of HDD [HDC-HS80]

Key considerations for using the built-in HDD, such as vibration, temperature, and data backup.

Cards that you can use with this unit

For the purposes of these operating instructions

Explains symbols and references used throughout the operating instructions.

Preparation

Parts identification and handling

Identifies and explains the various parts and controls of the video camera.

Power supply

Information on battery usage, charging, and power connection for the unit.

Recording to a card

Details on using SD memory cards for recording, including compatibility and insertion.

Advanced (Playback)

Playback Operations

Explains how to control video playback using on-screen operation icons.

Deleting scenes/still pictures

Step-by-step guide on how to delete recorded scenes and still pictures.

Watching Video/Pictures on your TV

Instructions on connecting the camera to a TV for video playback.

Sales and Support Information

Accessories

Parts identification and handling

Power supply

About batteries that you can use with this unit

Lists compatible battery models and warns against counterfeit packs.

Inserting/removing the battery

Step-by-step instructions for installing and removing the camera's battery.

Charging the battery

Connecting to the AC outlet

How to use the unit while connected to the AC adaptor for continuous power.

Charging and recording time

HDC-HS80

Battery capacity indication

Explains how the battery capacity is displayed and what indicators mean.

Recording to a card

Cards that you can use with this unit

Details compatible SD card types, capacities, and speed ratings for motion and still picture recording.

Inserting/removing an SD card

Access lamp [ACCESS]

Explains the function of the access lamp when the SD card or built-in memory is being accessed.

Turning the unit on/off

Turning the unit on and off with the power button

Instructions for powering the unit on/off using the dedicated power button.

Turning the unit on and off with the LCD monitor

How to conveniently turn the unit on/off by opening/closing the LCD monitor.

Selecting a mode

How to use the touch screen

Touch

How to select icons or pictures by touching the screen.

Slide while touching

Method for moving finger while pressing on the touch screen for operations.

About the touch menu

To display the touch menu

Instructions on how to make the touch menu appear on the screen.

Setting date and time

WARNING

Warning regarding the replacement of the lithium battery by qualified personnel only.

Before recording

Basic camera positioning

Guidance on holding the unit correctly for stable recording.

Basic motion picture recording

Tips for steady motion picture recording and smooth zoom operation.

Recording yourself

How to rotate the LCD monitor to record yourself.

Selecting a media to record [HDC-TM80/HDC-HS80]

Recording motion pictures

Screen indications in the motion picture recording mode

Explanation of the indicators displayed on screen during motion picture recording.

Recording formats

About the compatibility of the recorded motion pictures

Information on AVCHD and iFrame format compatibility for playback on different devices.

Recording still pictures

Focus indication

Explains the focus indicators and their meanings during still picture recording.

Recording still pictures in motion picture recording mode

How to capture still pictures while recording motion pictures.

About the screen indications in still picture recording

About the focus indication

Details on what the focus indication signifies and when it does not appear.

About the focusing area

Explanation of the focusing area and conditions where it is not displayed.

Intelligent auto mode

Mode Scene Effect

Table detailing various modes, scenes, and their effects for automatic recording.

Intelligent auto mode

Automatic white balance

Explains the range of automatic white balance functions and manual adjustment.

Auto focus

Describes how auto focus works and situations where it may not function correctly.

Motion picture/Still picture playback

Touch the scene or the still picture to be played back.

Steps to select and play back specific scenes or still pictures.

Select the playback operation by touching the operation icon.

Change the thumbnail display

How to alter the thumbnail display format using the zoom lever.

Speaker volume adjustment

Instructions for adjusting speaker volume during motion picture playback.

Motion picture compatibility

Still picture compatibility

Information on the unit's compliance with DCF standards and supported JPEG file formats.

Using the menu screen

About guide display

Explanation of the guide display feature that provides descriptions and confirmation messages.

Using the Setup Menu

SET WORLD TIME

How to set the time for travel destinations, including home region and daylight saving.

To return the display to the home setting

Change the date and time display mode

Options for changing how date and time are displayed.

Change the date format

Options for altering the date format display.

[QUICK POWER ON]

[QUICK START]

[LCD SET]

BRIGHTNESS

Adjusts the brightness of the LCD monitor.

COLOUR

Adjusts the colour level and density of the LCD monitor.

[FORMAT CARD]

Use this unit to format media.

Instructions for formatting SD cards, built-in memory, or HDD using the unit.

[FORMAT MEDIA]

[CARD STATUS]

[CALIBRATION]

[DEMO MODE]

[O.I.S. DEMO]

Zoom in/out function

Extra optical zoom

Enables higher zoom magnification in still picture mode without degrading image quality.

Extra optical zoom mechanism

Explains how extra optical zoom works by cropping the image.

Image stabilizer function

Optical image stabilizer button

Instructions on how to turn the optical image stabilizer on/off using a dedicated button.

Recording with the Touch function

Touch function icons

Lists and explains the various touch function icons available for recording.

Touch zoom

AF/AE tracking

About target frame

Explains the target frame's behavior and limitations during AF/AE tracking.

Optical image stabilizer lock

Touch shutter

Allows focusing and recording a still picture by touching the subject on the screen.

Recording functions of operation icons

Operation icons

Lists various operation icons and their corresponding functions for image effects.

Fade

Intelligent contrast control

Adjusts contrast to brighten shadows and suppress bright saturation for clearer images.

PRE-REC

Allows recording of up to 3 seconds of footage before the record button is pressed.

Smile shot

Video light

Photo light

Enables the photo light to flash for taking pictures in dark places.

To adjust the brightness of the photo light

Options for adjusting the brightness level of the photo light.

Red eye reduction

Intelligent exposure

Brightens dark parts of the image for clearer recording.

Backlight compensation

Makes the image brighter to prevent darkening of backlit subjects.

Self-timer

Tele macro

Colour night view

Enables recording of colour images in very low light situations.

Guideline

Recording functions of menus

[SCENE MODE]

Automatically sets optimum shutter speeds and apertures based on different recording situations.

[ZOOM MODE]

[REC MODE]

[RELAY REC]

[FACE RECOG.]

Function to find, register, and prioritize faces for focus and exposure.

Registering a face for face recognition

Entering the person’s name.

Instructions for entering the name of the person to be registered.

Changing the information of a registered person

Canceling a registered person

Steps to cancel or delete registered people from face recognition.

[NAME DISPLAY]

[FACE FRAMING]

Prioritised face framing

Displays prioritized face framing in orange, with focus adjustments for portrait mode.

[AGS]

[AUTO SLOW SHTR]

[Digital Cinema Colour]

[SHOOTING GUIDE]

[WIND NOISE CANCELLER]

[ZOOM MIC]

Adjusts microphone directivity based on zoom operation for clearer sound recording.

[MIC LEVEL]

Microphone input level meter

Displays the input level meter for the built-in microphones.

[PICTURE ADJUST]

SHARPNESS

Adjusts the sharpness of the image edges.

COLOUR

Adjusts the depth of the colour in the image.

EXPOSURE

Adjusts the brightness of the image.

[PICTURE SIZE]

Picture size and Maximum zoom ratio

Table showing picture sizes, aspect ratios, and maximum zoom ratios.

Picture size in motion picture recording mode

Settings for picture size when recording motion pictures.

[QUALITY]

[HI-SPEED BURST]

Select the menu.

Instructions to select the menu for hi-speed burst recording settings.

[AF ASSIST LAMP]

[SHTR SOUND]

Manual recording

Manual icons

Displays icons for manual focus, white balance, shutter speed, and iris adjustment.

White balance

To set the white balance manually

Step-by-step guide for manually setting the white balance using a white subject.

Manual shutter speed/iris adjustment

Manual shutter speed adjustment

Guidance on adjusting shutter speed for fast-moving subjects and in low light.

Manual iris/gain adjustment

Instructions for adjusting iris and gain values to control screen brightness.

Manual focus adjustment

Adjust the focus by touching / .

How to manually adjust focus by touching the screen or using directional buttons.

Motion picture playback using operation icon

Fast forward/rewind playback

How to fast forward or rewind motion picture playback using on-screen controls.

Skip playback (to the start of a scene)

Method for skipping playback to the beginning of a scene.

Slow-motion playback

How to play back motion pictures in slow motion.

Creating still picture from motion picture

Highlight&Time frame index

Repeat playback

Enables playback of the first scene to start after the last scene finishes.

Resuming the previous playback

Zooming in on a still picture during playback (Playback zoom)

Zooming out from the zoomed still picture

Instructions on how to zoom out from a magnified still picture.

Playing back motion pictures/still pictures by date

Highlight playback

Scene setting

Options for selecting scenes or dates to be included in highlight playback.

Priority settings

Playback time setting

Allows setting the playback duration for highlight sequences.

Effect setting

Touch the desired effect.

Select desired effects like fade, slow-motion, or digest playback to insert into highlights.

Music setting

Changing the playback settings and playing back the slide show

How to change playback settings like date, effect, interval, and music for slide shows.

(When [SLIDES INTERVAL] is selected)

(When [MUSIC SELECT] is selected)

To test the music audio

How to test music options before playback.

Deleting scenes/still pictures

To delete the scene or still picture being played back

How to delete scenes or still pictures while they are being played back.

To delete scenes or still pictures from the thumbnail display

Steps to delete scenes/pictures from the thumbnail display using ALL, MULTI, or SINGLE options.

When you stop deleting halfway

To complete editing

Dividing a scene (AVCHD)

To delete all the divided points

Instructions for cancelling all divided points of a scene.

Dividing a scene to partially delete (iFrame)

To complete editing

Steps to complete the editing process after dividing and deleting scene parts.

Deleting personal information

Protecting scenes/still pictures

DPOF setting

To cancel all DPOF settings

Procedure to clear all previously set DPOF print order settings.

Relay scene combining [HDC-TM80]

To cancel relay information

How to cancel relay recording information, preventing future scene combining.

Watching Video/Pictures on your TV

Picture quality

Explains how picture quality varies based on the connection terminals used.

To select the video input on the TV.

Cables Reference items

Lists reference items for connecting HDMI and AV multi cables.

Change the mode to to play back.

To watch images on a regular TV (4:3) or when both sides of the images do not appear on the screen

To display the on-screen information on the TV

Connecting with a HDMI mini cable

Changing the component output setting

Options for changing the component video output settings for TVs compatible with 576i or 1080i.

Connecting with the AV multi cable

Playback using VIERA Link

What is the VIERA Link (HDAVI Control™)?

Explains VIERA Link functionality for linked operations with Panasonic TVs via HDMI.

Operate with the remote control for the TV.

∫ Other linked operations

Describes other linked operations like turning the unit off and automatic input switching.

Copying between SD card and Built-in Memory/HDD [HDC-TM80/HDC-HS80]

Check the used space of the copy destination

How to check the available space on SD cards, built-in memory, or HDD before copying.

Copying

Instructions for copying motion or still pictures between storage media.

Touch desired items following the screen display.

Approximate time for copying

Provides estimated times for copying motion pictures and still pictures to discs.

Connecting a DVD burner to copy to/ play back a disc

About discs that can be used for copying

Lists disc types compatible with copying and formatting, along with usage notes.

5 Touch the desired item.

[BURN DISC]

Option to initiate the process of copying data onto a disc.

[PLAY DISC]

Option to play back discs that have been copied or created.

Copying to discs

About recording formats when copying motion pictures

Explains the recording formats like High Definition and Standard for copying motion pictures.

Important Notice

Approximate time for copying to a disc

Provides estimated times for copying motion pictures and still pictures to discs based on disc type and format.

Playing back the copied disc

Managing the copied disc

Formatting discs

Process for initializing DVD-RAM, DVD-RW, and +RW discs.

Auto protect

Enables automatic write protection for DVD-RAM and DVD-RW discs after copying.

Dubbing with a Blu-ray disc recorder, video, etc.

Check before dubbing

Check the equipment used for dubbing, including compatibility and connections.

Dubbing in high-definition picture quality

Information on dubbing in high-definition AVCHD quality using Blu-ray or DVD recorders.

To dub using equipment with an SD card slot

To dub using equipment with a USB terminal

Dubbing through operations on the Blu-ray disc recorder or high-definition (AVCHD) compatible DVD recorder.

Performing dubbing operations via the Blu-ray or DVD recorder interface.

About the screen indication of the unit

Dubbing in standard picture quality

Change the video input on the video device and TV that this unit is connected to.

Adjusting video input settings on the connected TV and video device.

What you can do with a PC

Copying data to a PC

Instructions for copying motion and still picture data to a PC's HDD using HD Writer AE 3.0.

Copy to disc

Options for copying data to discs in high definition or standard picture quality.

Important Notice

About Conversion assist function

Explains the linking function between the unit and HD Writer AE 3.0 for faster media writing.

End User License Agreement

Operating environment

Operating environment for HD Writer AE 3.0

System requirements for installing and running the HD Writer AE 3.0 software.

Sound

Interface

Details on the USB port interface for PC connectivity.

Other requirements

Lists other requirements like mouse and internet connection for software operation.

Operating environment for the card reader function (mass storage)

Installation

Select the country or region where you live, then click [Next].

Prompts user to select their country or region for installation.

When installation is complete, some notes will appear.

Uninstalling HD Writer AE 3.0

Select [Start] # [Control Panel] # [Uninstall a program].

Steps to access the program uninstaller via the Control Panel.

Connecting to a PC

Connect this unit to the AC adaptor.

Instructions for connecting the unit to the AC adaptor for power.

Turn on the unit.

Steps to power on the unit before connecting to a PC.

Connect this unit to a PC.

Procedure for connecting the unit to a computer using a USB cable.

To disconnect USB cable safely

Charging the battery by connecting it to different devices

About the screen indication of the unit

Explains screen indicators and access lamps related to media access.

About the PC display

The following data will be recorded.

Lists the types of data that are recorded and stored on the unit.

Copying your still pictures to your PC

Instructions for copying still pictures from the camera to a PC using Windows Explorer.

Starting HD Writer AE 3.0

Reading the operating instructions of the software applications

Guidance on how to access and read the PDF operating instructions for the software.

If using Mac

Operating environment

System requirements for using the unit with a Mac computer.

Copying still pictures on PC

Steps for copying still pictures from the unit to a Mac PC via USB.

Indications

Motion picture recording mode

Explains indications shown during motion picture recording.

Still picture recording mode

Explains indications shown during still picture recording.

Troubleshooting

Power

Troubleshooting steps for power-related issues like the unit not turning on or running out of battery.

Recording

The unit arbitrarily stops recording.

Steps to resolve issues where the unit stops recording unexpectedly.

Auto focus function does not work.

Troubleshooting steps when the auto focus function is not operating correctly.

Playback

Any scenes/still pictures cannot be played back.

Steps to resolve issues where recorded scenes or pictures cannot be played back.

Scenes cannot be deleted.

Troubleshooting steps for problems encountered when trying to delete scenes or pictures.

With other products

Although this unit is correctly connected to a TV, images cannot be seen.

Troubleshooting steps when no images are displayed on the TV despite correct connection.

When connected by the USB cable, this unit is not detected by the other devices.

VIERA Link does not work.

When connected by the USB cable, this unit is not detected by the PC.

When the USB cable is disconnected, an error message will appear on the PC.

If AVCHD scenes do not change smoothly when played back on another device

Principal reasons for not playing back smoothly

Lists common reasons why AVCHD scenes may not play back smoothly on other devices.

Cautions for use

About this unit

General precautions for using the unit, including avoiding electromagnetic interference.

Cleaning

Instructions on how to clean the unit safely and effectively.

Do not use the unit for surveillance purposes or other business uses.

When you are not going to use the unit for an extended time

When disposing of or giving away this unit, note that:

To physically format the built-in memory, connect the unit via the AC adaptor...

Steps to physically format the built-in memory before disposing of the unit.

To physically format the HDD, connect the unit via the AC adaptor...

Steps to physically format the HDD before disposing of the unit.

About the battery

Be sure to detach the battery after use.

Instructions for detaching the battery after use to prevent over-discharge.

About the AC adaptor

About status indicator during charging

About the SD card

To physically format the SD card, connect the unit via the AC adaptor...

Steps to physically format the SD card before disposing of or giving away the card.

LCD monitor

About personal information

Information related to personal data stored with face recognition, and its deletion.

Indemnity

About condensation

Causes of condensation

Explains the conditions under which condensation forms on the unit.

Helpful hint

Provides a tip for preventing condensation when moving the unit between different temperatures.

About copyright

Carefully observe copyright laws

Warning about infringing copyright laws when recording or using pre-recorded material.

Licenses

Lists trademarks and licenses related to the product's technologies and software.

Recording modes/approximate recordable time

Approximate number of recordable pictures

Optional accessories

Specifications

Power source:

Specifies the power sources for the unit, including AC adapter and battery.

Recording format:

Lists the supported recording formats: AVCHD and iFrame.

Image sensor:

Details the type and specifications of the image sensor used in the camera.

Lens:

Provides specifications for the camera's lens, including zoom and aperture.

Related product manuals