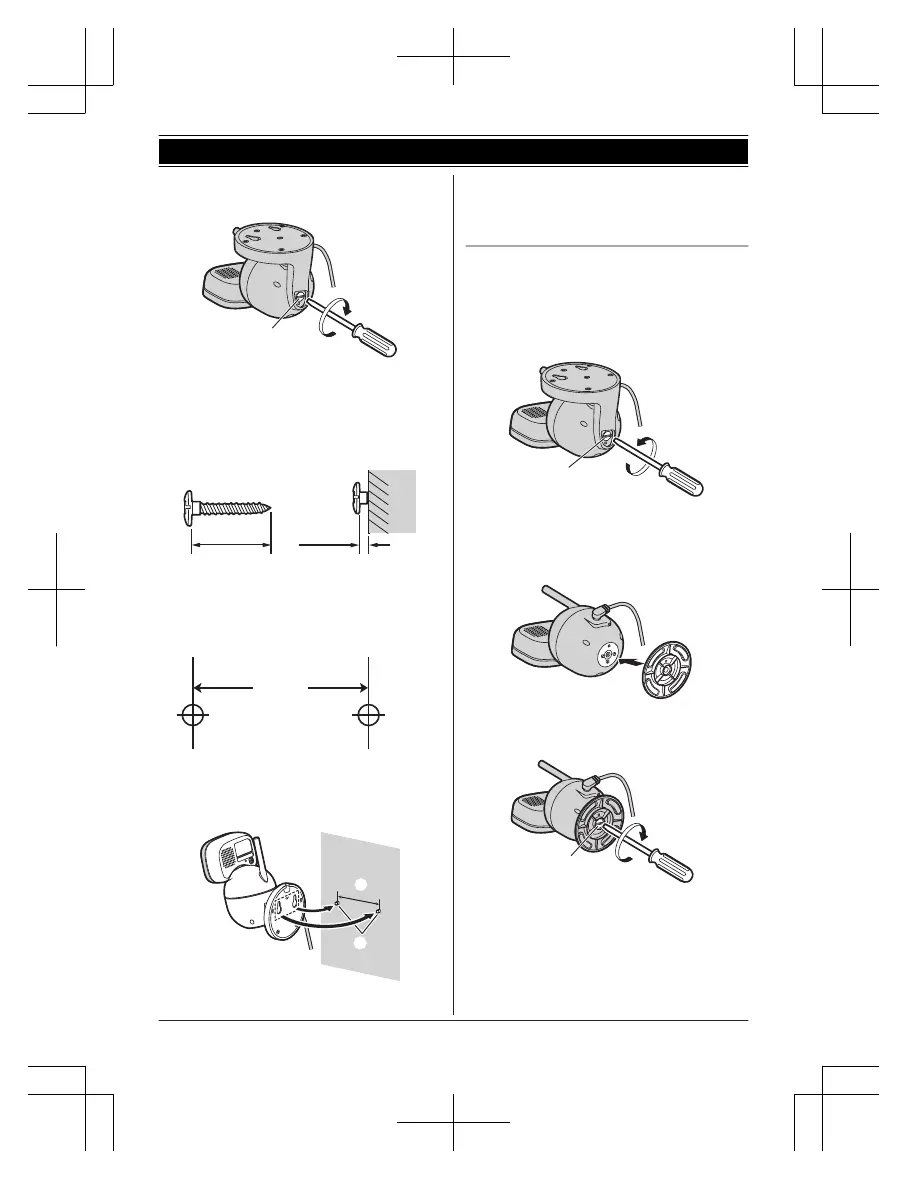
3 Drive the supplied screw into the camera
unit.
Supplied screw (page 9)
4 Drive the screws (not supplied) into the
wall.
Longer than 20 mm (
25
/32 inches)
Space 1.3 mm (
1
/32 inches)
Note:
R Use the following template when
determining the location of the screw
holes.
5 Mount the camera unit to the wall.
6 Adjust the angle of the camera unit by
using MFN, MEN, MDN, or MCN on the monitor
unit.
Reattaching the camera base
1 Take the camera unit off from the wall.
2 Remove the screw and then remove the
wall mounting adaptor from the camera
unit.
Supplied screw (page 9)
3 Attach the camera base to the camera
unit.
4 Drive the supplied screw into the camera
unit.
Supplied screw (page 9)
For assistance, visit www.panasonic.ca/english/support
13
Getting Started
HN3051C(enen)0228ver.040.pdf132018/02/2816:25:28
 Loading...