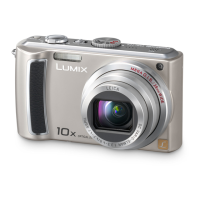
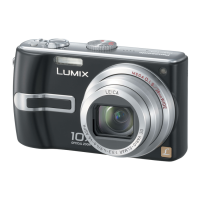
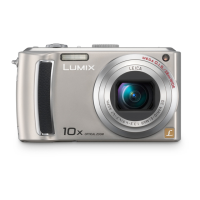
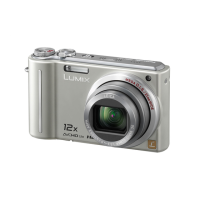
Do you have a question about the Panasonic Lumix DMC-TZ15 and is the answer not in the manual?
Process of charging the camera's battery before initial use.
Steps for inserting the battery and memory card into the camera.
Instructions on how to power on the camera for the first time.
Guidance on setting the REC/PLAY switch to the correct position.
Instructions for setting the mode dial to the 'A' (Auto) mode.
Procedure for taking a picture by pressing the shutter button.
Steps to access and view recorded pictures on the camera.
Capturing close-up images of distant people using optical zoom.
Recording moving scenes using the MOTION PICTURE Mode.
Connecting directly to a PictBridge-compatible printer for home printing.
Providing memory cards to a shop assistant for picture printing.
Transferring pictures to a computer for saving, email, or printing.
Saving pictures to a DVD or hard disk.
Initial checks and precautions before operating the camera.
Guidelines to avoid physical damage and ensure proper camera function.
Information on the nature and limitations of the LCD monitor display.
Notes on camera warmth during operation.
Care and handling instructions for the camera lens.
Precautions for attaching and using a tripod with the camera.
Recommendations for safely transporting the camera.
Description and functions of the camera's mode dial.
Explanation of the cursor button's directional and selection functions.
Instructions on how to properly remove the battery and memory card.
Explanation of where pictures are saved, whether on card or internal memory.
Procedure for adjusting the camera's date and time settings.
Setting the camera for different time zones for travel.
Overview of the different menu types available for camera settings.
Setting the camera's date, time, and travel date.
Adjusting LCD brightness, monitor mode, beep, and volume settings.
Using histogram and guide lines for better recording and information.
Configuring power saving modes and automatic picture review.
Resetting settings and selecting USB connection mode.
Adjusting video output format, TV aspect ratio, and dial display.
Managing scene menus, language, and demonstration modes.
Procedures for formatting memory cards and initializing settings.
Brightening subjects against backlighting for better exposure.
Guidance on selecting and using the camera's flash modes.
Adjusting focus on a subject not in the center before composing the shot.
Returning to the original composition after initial focus alignment.
Instructions for using the zoom lever to enlarge or reduce the subject.
Method for quickly zooming to the maximum ratio using the EASY ZOOM function.
Using digital zoom to further enlarge images beyond optical zoom.
Navigating and selecting recorded pictures using the zoom lever.
Magnifying pictures during playback using the zoom lever.
Accessing various playback modes like dual display or slideshow.
Rotating pictures for proper viewing orientation.
Viewing recorded pictures in a list format.
Procedure for deleting multiple or all pictures from the camera.
Displaying brightness distribution of pictures to check exposure.
Using visual guides for composition and balance.
Using TELE MACRO function for close-up shots from a distance.
Adjusting exposure compensation to correct picture brightness.
Taking multiple pictures with varying exposure settings.
Scene modes for capturing people with improved skin tones and self-portraits.
Modes for landscapes, fast action, and night portraits.
Modes for low-light scenes, food photography, and parties.
Modes for specific subjects like candlelight, babies, and pets.
Modes for sunsets, low light, and capturing rapid movement.
Modes for night skies, fireworks, and beach scenes.
Modes for snowy scenes, aerial views, and underwater photography.
Modes for low light situations and capturing rapid movement with high sensitivity.
Modes for capturing starry skies and fireworks in low light conditions.
Modes for capturing natural colors on beaches and in snowy environments.
Instructions on how to play back recorded motion pictures.
Selecting the size of pictures to be recorded.
Choosing between 'Fine' and 'Standard' quality settings.
Changing the picture aspect ratio for printing or playback.
Manually setting ISO sensitivity for different lighting conditions.
Automatically adjusting ISO sensitivity and shutter speed to prevent blur.
Adjusting colors to suit light sources for natural-looking pictures.
Changing the position for measuring brightness when correcting exposure.
Selecting the method for aligning focus based on subject position.
Enabling rapid succession of photographs while holding the shutter button.
Automatically adjusting contrast for lifelike colors in high-contrast scenes.
Adjusting digital zoom and color modes for picture enhancement.
Controlling image stabilization and minimum shutter speed settings.
Enabling audio recording and using the AF assist lamp.
Setting the camera's clock, similar to the SETUP menu function.
Enlarging and saving specific parts of maps or pictures.
Method for marking and saving a zoomed area of a picture.
Accessing pictures that have registered zoom marks.
Displaying multiple pictures simultaneously on the screen.
Switching between multi-screen and single-screen views.
Selecting and playing motion pictures or pictures with audio.
Extracting still images from recorded motion pictures.
Normal and dual picture display modes.
Slide show, category, and favorite picture playback options.
Viewing pictures taken on a specific day using a calendar interface.
Editing picture titles, names, or destinations.
Adding recorded date or text information to pictures.
Instructions for entering text using the camera's input method.
Reducing picture size for email or web use.
Enlarging and cutting unwanted areas from pictures.
Converting picture aspect ratios (e.g., 16:9 to 3:2 or 4:3) for printing.
Manually rotating pictures by 90 degrees.
Automatically rotating portrait pictures for display.
Marking pictures as favorites to enable specific functions.
Setting picture/date printing options for DPOF print-compatible shops or printers.
Setting protection to prevent accidental deletion of important pictures.
Adding or overwriting audio to previously recorded pictures.
Copying pictures between built-in memory, memory card, or clipboard folder.
Information on folder and file naming conventions for computer transfer.
Selecting and printing multiple pictures at once.
Configuring print settings like paper size and number of copies.
Printing pictures with embedded text stamp information.
Options for printing dates on pictures without using TEXT STAMP.
Connecting via component cable for high-definition viewing.
Messages related to memory card access, parameters, and writing errors.
Messages indicating issues with motion recording or folder creation.
Messages related to picture display format on TV or when connecting to other devices.
Information on compatible memory cards and transferring pictures to computer.
Tips for resolving dark, poorly colored, white, or blurred pictures.
Solutions for incorrect focus alignment and exposure problems.
Guidance on enabling and printing dates on pictures.
Troubleshooting coarse pictures, interference, and color issues.
Resolving issues with motion recording, monitor display, flash, and rotation.
Troubleshooting playback, TV display, and computer connectivity problems.
Resolving issues with sending pictures to computer or printing.
Addressing issues like language, camera noise, clock, and file numbering.
Precautions to protect memory cards and data from damage.
Table showing estimated number of still pictures recordable based on settings.
Table showing estimated recording time for motion pictures based on settings.
Details on sensor, lens, zoom, focus, shutter, and recording modes like burst.
Specifications for ISO, white balance, exposure, LCD, flash, and recording media.
Information on interfaces, power sources, dimensions, mass, and operating conditions.
| Brand | Panasonic |
|---|---|
| Model | Lumix DMC-TZ15 |
| Category | Digital Camera |
| Language | English |
