53
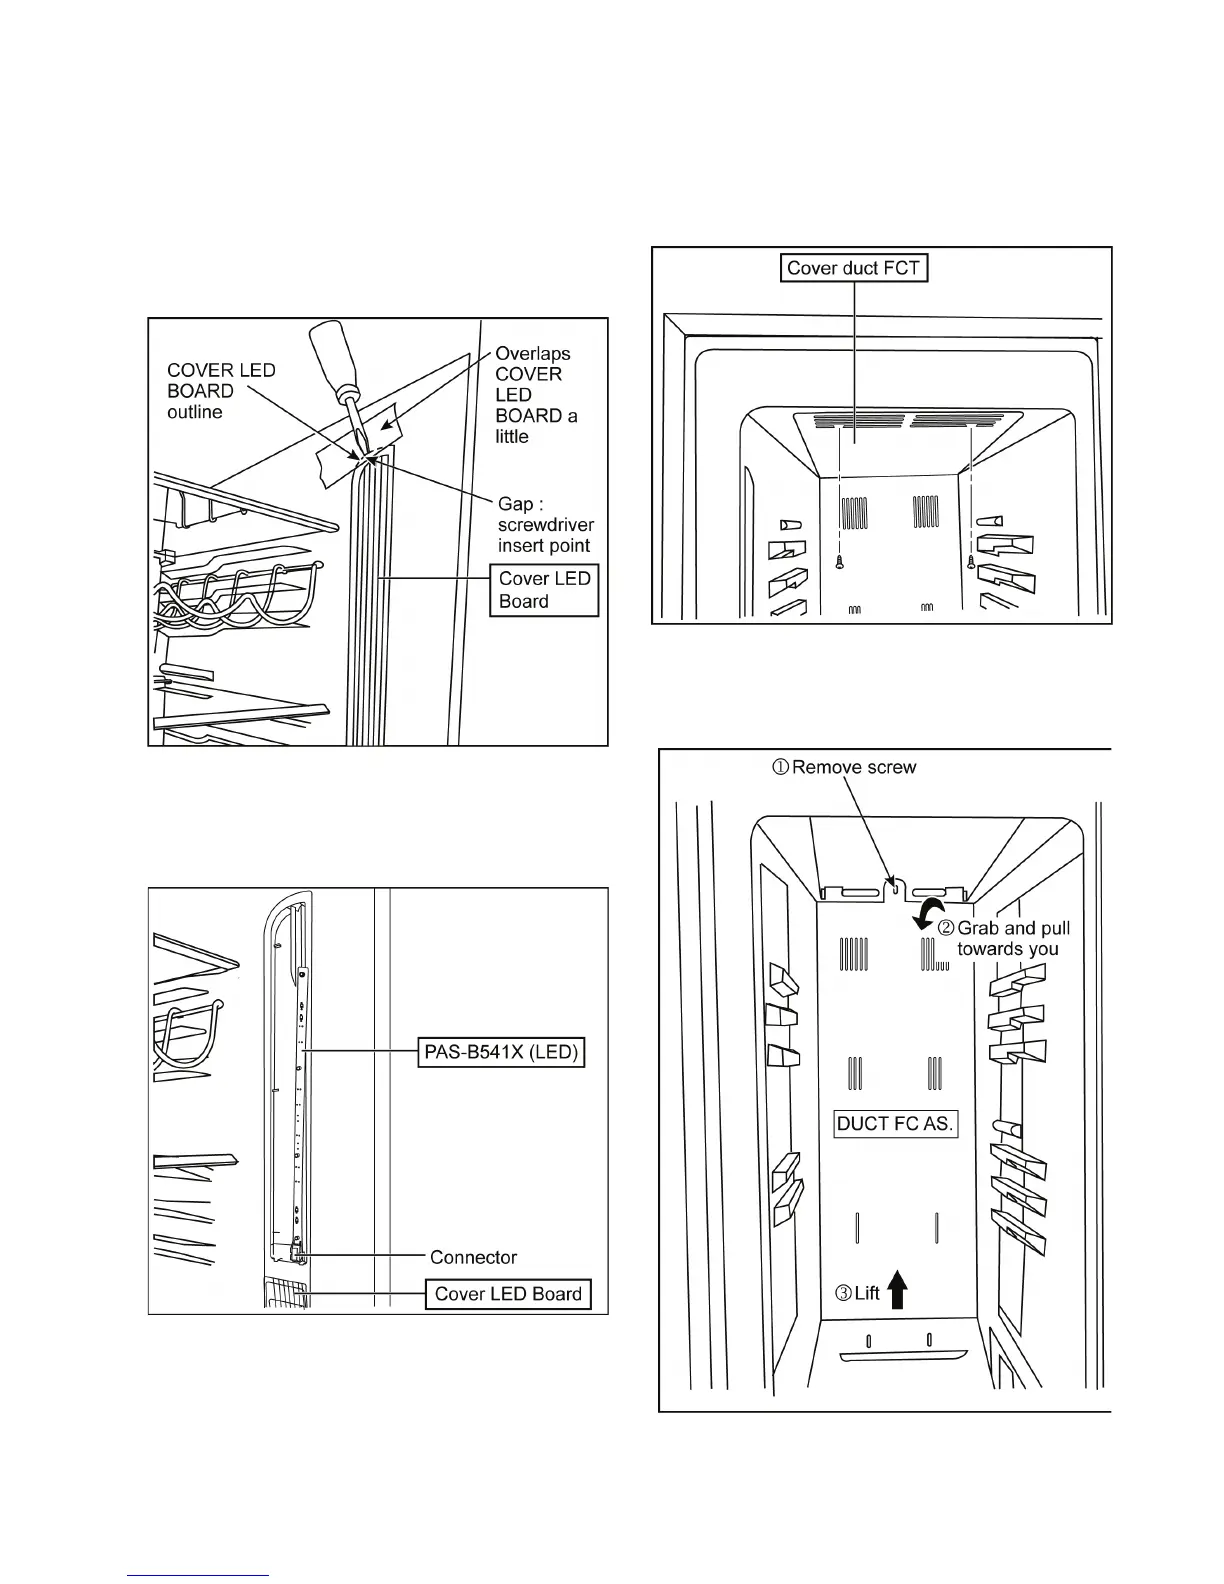
11.3. Disassembly of PAS-B541X
(LED)
1. Insert screwdriver(-) which is a little smaller one
better, into the gap between body inside and COVER
LED BOARD. Then pry strongly off because that parts
fitting is very tight adjusting. Many cases will happen
COVER LED BOARD broken, when pry it off. But this
is the reason that parts to prevent invasion of the
moisture.
NOTICE
• Please put a tape on the part where a screwdriver(-)
touch, to protect inner body damaged.
• The tape location overlaps a little is better.
2. Disconnect the connector to remove the PAS-B541X
(LED).
There 6 PCBs (LED) in PC and 3 PCBs (LED) in FC. All
can be removed using the above procedures.
NOTES
• The PCB (LED) cover can be damaged easily.
• Be careful not to break the PCB (LED) when removing
and installing them.
11.4. Disassembly of FC (Freezer
Compartment)
11.4.1. Fan Motor FC A’ssy, Sensor FC
1. Unscrew 2 screws on the upper cover duct FCT to
remove this cover.
2. Remove the DUCT FC AS.
a. Remove a screw.
b. Grab and pull the upper edge of the DUCT FC AS.
towards you, then lift to remove the DUCT FC AS.
 Loading...