EasyManua.ls Logo

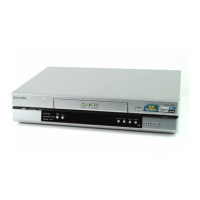
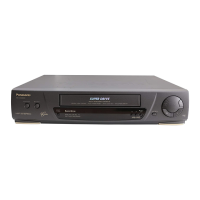
Panasonic NV-HV60 Series User Manual

Panasonic NV-HV60 Series
24 pages
To Next Page IconTo Next Page
Page #1 background imageLoading...
Page #1 background image
Warning and Important Information 2
Controls and Components 3
Connections 5
Tuning the TV to Your VCR 6
Storing TV Broadcasts in Your VCR 7
Setting the Clock of Your VCR 9
Settings Using the On Screen Display 10
Option Setting 11
Playback 12
Recording 13
Timer Recording 16
Search Functions 19
Before Requesting Service 21
Specifications 23
Model No.
NV-HV60 Series
VQT0B18
Video Cassette Recorder
Before attempting to connect, operate or adjust this product, please read
the instructions completely
Contents Page
Operating Instructions
NV-HV60GL_GN.book 1 ージ 2003年2月3日 月曜日 午後3時32分
Question and Answer IconNeed help?

Do you have a question about the Panasonic NV-HV60 Series and is the answer not in the manual?

Panasonic NV-HV60 Series Specifications

General IconGeneral
Tape FormatVHS
Number of Heads4
Hi-Fi AudioYes
Remote ControlYes
ShowViewYes
TunerYes
Playback SpeedSP, LP
InputsAntenna
Power SupplyAC 220-240V, 50Hz

Summary

Warning and Important Information

Cautions before you operate this VCR

Lists precautions to avoid damage or hazards, such as humidity, heat, magnets, and water.

Inserting Remote Control Batteries

Instructions on how to insert batteries, including polarity and battery types.

Plug in Auto Tuning (NV-HV60GN only)

Steps for connecting the VCR and initiating the automatic tuning process.

Controls and Components

VCR Operation

TV Operation using the remote control

Explains how to use the VCR's remote control to operate a connected TV.

Setting the Remote Control to Operate Your TV

Connections

Basic Connections

Details the essential connections for recording and playback through a TV.

Connection to a TV using the Audio/Video Input Socket

Explains how to connect the VCR to a TV using AV cables.

Connection to a Stereo Amplifier

Instructions for connecting the VCR to a stereo amplifier for audio output.

Tuning the TV to Your VCR

To Change the RF output Channel

Storing TV Broadcasts in Your VCR

Pre-programmed TV Channels (NV-HV60GL/Australia)

Describes factory-preset channels and how to cancel/retune them.

Plug in Auto Tuning (NV-HV60GN/New Zealand)

Explains the automatic channel tuning process for a specific model.

Auto Tuning Using the On Screen Display

How to perform auto-tuning via the VCR's on-screen display menu.

To Restart Plug in Auto Tuning

Steps to re-initiate the auto-tuning process if it was interrupted.

Manual Tuning Procedure

Direct Tuning

Fine Tuning Procedure

Blanking of Unused Programme Positions

Setting the Clock of Your VCR

Time Reset Function

Settings Using the On Screen Display

To Set the Colour TV System

Guides on selecting the appropriate colour system (PAL, NTSC, B/W).

To Make Various Indicators Appear On Screen Display

How to display various status indicators like audio mode and tape speed.

Option Setting

TAPE SELECT

Setting the tape length for accurate remaining time display.

NTSC INPUT SELECT

Selecting the NTSC signal type for recording.

NTSC PB SELECT

Selecting NTSC system for playback on a PAL TV.

JET NAVIGATOR

Enabling or disabling the Jet Navigator search function.

DELETE NAVIDATA

Deleting all stored Jet Navigator data.

OSD REC

Setting the On Screen Display for recording function.

OSD

Selecting the display mode for on-screen indicators.

MONAURAL

Selecting the sound mode for NICAM broadcasts.

Playback

For Normal Playback

Basic steps to play a video cassette.

For Cue or Review Playback

How to fast forward or rewind to find specific points.

For High speed Cue or Review Playback (JET SEARCH)

Using JET SEARCH for faster cueing and reviewing.

For Still Playback

How to pause playback.

For Slow Playback

How to play the tape in slow motion.

Fast-forwarding or Rewinding the Tape

Basic controls for fast forwarding and rewinding.

To Obtain a Higher Speed Rewind (Jet Rewind)

Using JET REW for faster rewinding.

To Stop Playback

How to stop the playback.

To Play Back a Recorded Part Repeatedly

How to set the VCR to repeat a recorded section.

NTSC Playback

Playing NTSC tapes on a PAL TV.

To Playback in the Desired Picture Quality (Picture Mode)

Convenient Automatic Functions

VCR Auto Power On

The VCR automatically turns on when a cassette is inserted.

Auto Playback Start

Playback starts automatically for cassettes with broken tabs.

VCR-off Playback

Playback can be initiated even when the VCR is off.

Auto Rewind

The VCR automatically rewinds the tape to the beginning.

Automatic Switching Off and Ejection

Ejecting cassette and turning off the VCR when it's off.

To Eject Video Cassette Using the Remote Control

How to eject the cassette using the remote.

Recording

To Select the Desired Tape Speed

Setting the recording speed (SP, LP, EP).

To Pause Recording

How to pause the recording process.

To View One TV Programme while Recording Another TV Programme

Watching one channel while recording another.

To Prevent Accidental Erasure of Recorded Contents

How to protect recorded tapes from accidental erasure.

To Display the Approximate Remaining Tape Time

To reset the tape counter

Recording of Stereo or Bilingual Programmes (NV-HV60GL only)

The NICAM Broadcast System (NV-HV60GN only)

Important Note for the NICAM System

To Record the Present Date and Time (OSD Recording) on the same screen as the picture

To Select the Recording Duration and Perform Timer Recording (OTR Recording)

Recording from an external source

Recording VCR

Instructions for recording from another VCR or video camera.

To Delete all of a Cassette's Contents (Tape Refresh Function)

Erasing all data on a cassette using the tape refresh function.

Timer Recording

4-Key Programming

Guide to setting up to 16 timer programmes.

Example (In case of [JET NAVIGATOR] is set to [ON].)

An example of setting up a timer recording with Jet Navigator.

To Suspend the Timer Recording Standby Mode

Temporarily pausing the timer recording standby.

Procedure of Easy Timer Programming on OSD (Easy Programming Guide)

Using the on-screen display for easy timer programming.

Weekly Timer Recording

Setting timer recordings for specific days of the week.

Daily Timer Recording

Setting timer recordings for weekdays or specific days.

Timer Recording from an External Signal Source

Setting timer recordings from external AV sources.

Setting other Programmes in Succession

Programming a Timer Recording of a TV Programme Until its End (Tape Speed Auto Change Function)

To Activate the Tape Speed Auto Change Function

Checking a Timer Programme

Cancelling a Timer Programme

Search Functions

Jet Navigator

Navigating recorded programmes on the tape.

To Set the Category

Assigning categories to recorded programmes for easier searching.

To Delete the Jet Navigator Data of a Single Video Cassette Tape

Removing Jet Navigator data for a specific cassette.

When Recording Over the Same Location on a Tape

To Find the Beginning of Each Recording (VHS Index Search System)

To Demonstrate the Jet Navigator Function

To Check the Recorded Programming Data (Time Stamp Function)

Finding a Timer-recorded programme for viewing (Easy Programme Playback)

Before Requesting Service

Message of On Screen Display

Explains common error messages shown on screen.

Playback will not operate correctly

Recording will not operate correctly

Crystal View Control

Adjusting the Playback Picture

Dirt on the video heads

Specifications

Related product manuals