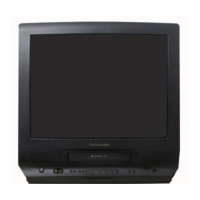
1-10
Extension Cable -1:
Extension Cable -2:
Mode Select SW. Ass'y:
Full Erase Head Connector on the
Mechanism Chassis Unit ~ P4001
on the Main C.B.A.
Note: No change in performance if
pins are reversed.
P3501 on the Head Amp C.B.A.
~ P3003 on the Main C.B.A.
a) 3 Clip-on Wires ~ Mode Select SW.
Connector on the Main C.B.A.
1 Pin (Not Used)
Red Wire ~ 2 pin
Orange Wire ~ 3 pin
Yellow Wire ~ 4 pin
b) 8 Pin Connector ~ P6002 on the
Main C.B.A.
c) 14 Pin Connector ~ P6201 on the
Main C.B.A.
d) Set Mode Select SW. on the Mode
Select SW. Ass'y to EJECT position
and install onto Mechanism Chassis.
P2531
P2552
P3501
Head Amp C.B.A.
Shaft of Main
Cam Gear
Extension Cable -2
Extension Cable -1
Full Erase
Head Connector
Mode Select SW. Ass'y
See 3 Clip-on
Wires connection
Alignment
Projection
EJECT
Position
Mode Select SW.
on Mode Select
SW. Ass'y
SERVICE
Rotate
IC6001
Main C.B.A.
(Component Side)
3 Clip-on Wires connection
(Foil Side)
Mode Select SW.
Red
Orange
2
134
Yellow
Not Used
Extension Cable -2
(VUVS0005)
for 2 Head Model
Mode Select SW. Ass'y
(VUVS0001)
8 pin
3 clip-on
wires
14 pin
2 pin
12 pin
15 pin
20 pin
Extension Cable -2
(VUVS0004)
for 4 Head Model
Extension Cable -2
(VUVS0003)
for Hi-Fi Model
Extension Cable -1
(VUVS0002)
How to place the unit into Service Position with
Extension Cables
1. Remove Rear Cover, VCR Unit, (Stereo Amp C.B.A.:
Model I), Top Shield Plate Ass'y, Mechanism Chassis, and
Cassette Up Ass'y.
2. Connect the Extension Cables as follows:
Extension Cable Kit (VUZS0002)
Fig. 3-2
Note:
3 types of Extension Cable -2 are included in this kit. Since
there is a difference in the number of P3501 Head Amp C.B.A.
pins between 2 Head, 4 Head, and Hi-Fi models, be sure to use
the proper cable.
3. Place the VCR Unit as shown in Fig. 3-1.
4. Secure the Extension Cables with tape as shown
in Fig. 3-1. When recording, cover the Safety Tab SW. with
masking tape to turn this SW. on.
Note:
To avoid damaging the connectors on Main C.B.A., it is
necessary to secure connectors with tape as shown in
Fig. 3-1.
5. Set Mode Select SW. on the Main C.B.A. to Service
Position.
6. Plug the AC plug into an AC outlet.
7. Insert a cassette.
The power comes on, the tape is fully loaded, and the unit
goes into the STOP Mode.
8. Place a jumper between TP6001 and GND to place the unit
in Service Mode.
9. Check and/or repair the unit.
10. Press the STOP/EJECT button to eject the cassette.
Note:
When inserting a cassette again, remove the jumper
between TP6001 and GND and insert the cassette. Then,
reconnect the jumper.
11. After servicing, remove the jumper between TP6001 and
GND to release the unit from Service Mode.
Note:
When disassembling/assembling, refer to "Disassembly/
Assembly Procedures of Cabinet" section.
Fig. 3-3
 Loading...