3 - 19
2WAY SYSTEM
Outdoor Unit Repair Procedures
3
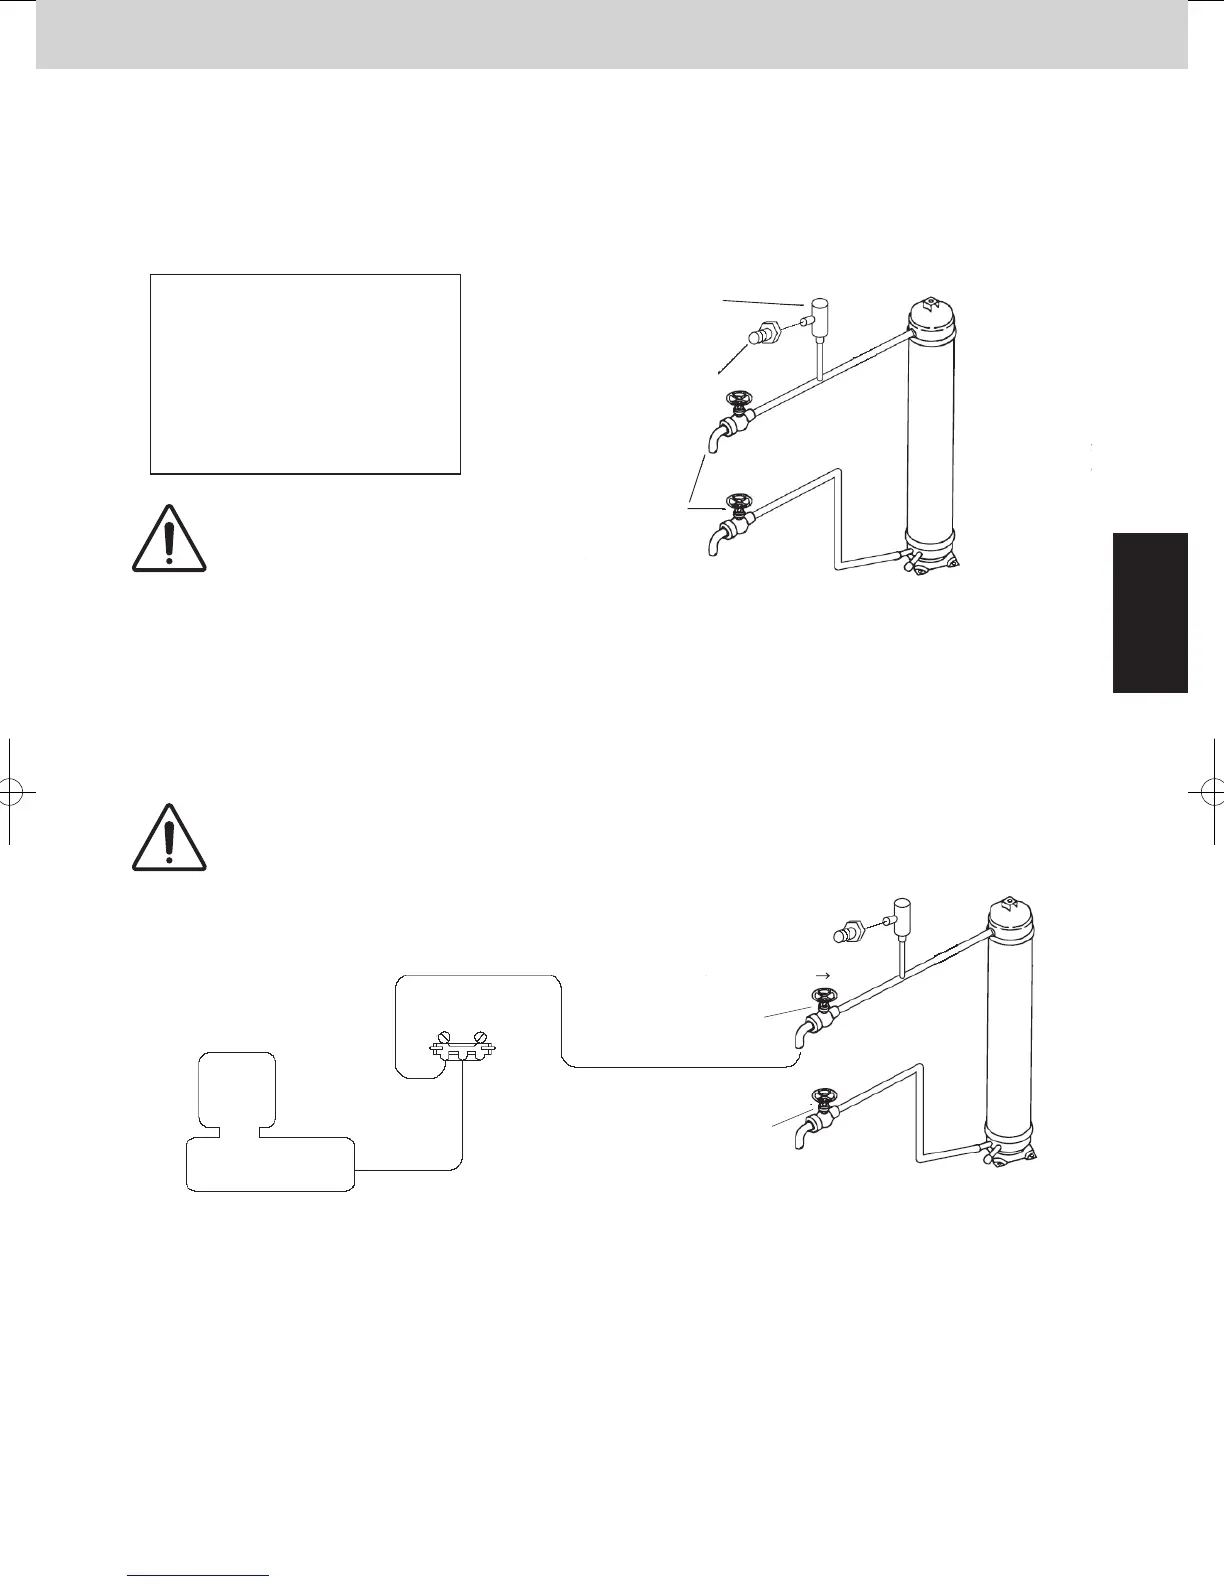
7. Charging Compressor Oil
(DPR : CV6230817937)
Nipple
Packless valve
(Receiver-tank:
CV6380152988)
Fig. 8
7-1. If Refrigerant Has Already Been Charged to Outdoor Unit
Be sure to use an exclusive oil-charging tank for charging compressor oil. Prior to charging, carry out vacuum drying
inside the tank and take care that no air (in the form of bubbles) is permitted to enter the tank.
The oil charging procedures are given below.
*The receiver tank used for maintenance may be used as an exclusive oil-charging tank.
When installing the oil-charging
tank to the refrigerant system to
serve as a safety bypass circuit
for refrigerant, connect it to the
gas tube service port carefully to
avoid releasing refrigerant into the
atmosphere.
Perform oil charging
work carefully so that no
liquid refrigerant enters
the charging tank.
CAUTION
(1) Evacuation drying in oil-charging tank
With the lower side valve fully closed, open the upper side valve and connect it to the vacuum pump via the
manifold gauge valves as shown below. Run the vacuum pump and evacuate the tank until the pressure falls to
below –101kPa {–755mmHg, 5 Torr} for the evacuation drying. After the evacuation drying is finished, fully close
the upper valve. Next, fully close the manifold gauge valves and stop the vacuum pump.
To ensure proper evacuation, refer to the operating instructions that came with the
vacuum pump.
CAUTION
Lo
Hi
Manifold gauge
Open Close
Vacuum pump
Upper side
valve
Lower side
valve
Close
Fig. 9
(2) Charging compressor oil into oil-charging tank
Connect a piece of pipe to the lower valve and then insert the other end deeply into the bottom of the oil con-
tainer. Make sure you avoid letting any air be sucked into the tube. Next, run the vacuum pump and open the
manifold gauge valves, then open the upper and lower valves to begin charging oil into the charging tank.
SM830204-05_2WAY SYS_new.indb 19 15/01/05 15:31:35
 Loading...


