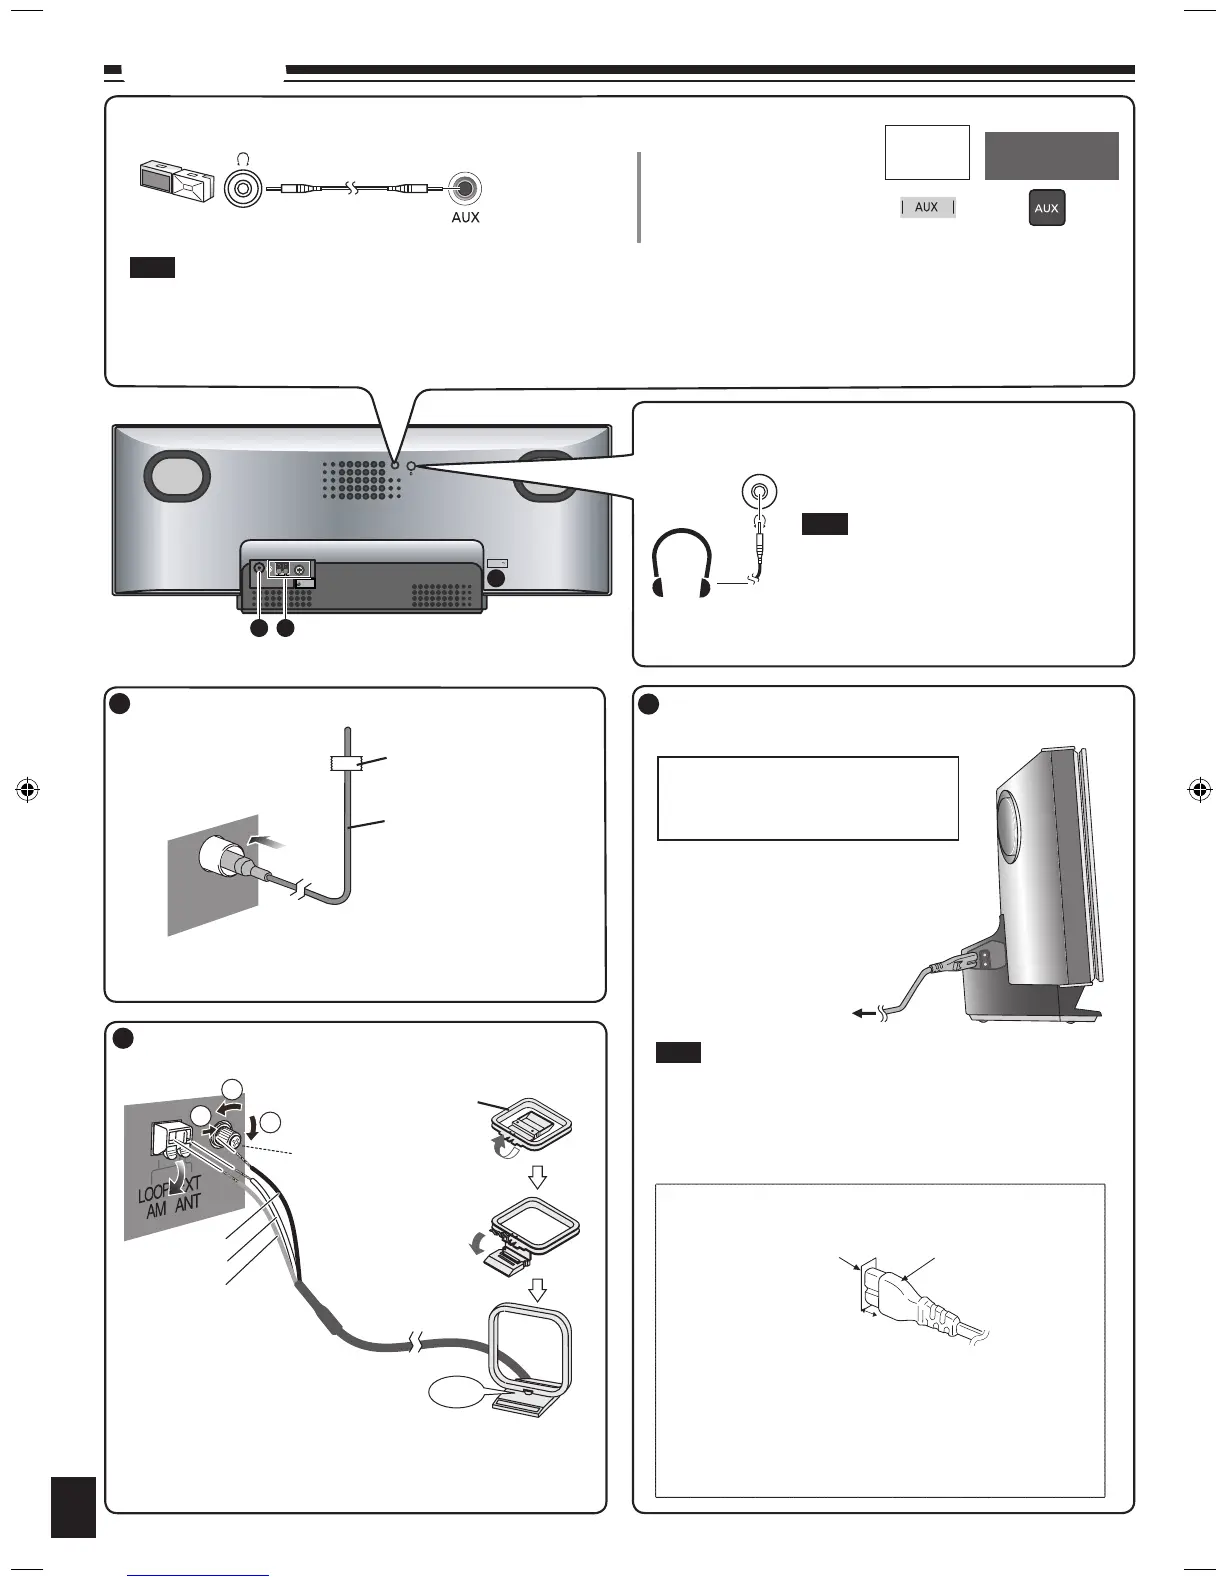
AUX
EXT
75Ω
LOOP
AM ANTFM ANT
LOOP ANT
GROUND
1
3
2
AC IN
Headphones (not included)
Portable audio equipment (Cords and equipment not included)
Connections
Plug type:
Ø3.5 mm stereo
Connect the FM indoor antenna.
Tape the antenna to a wall or column, in a position
with least amount of interference.
1
Adhesive tape
FM indoor antenna
Note
Avoid listening for prolonged periods
of time to prevent hearing damage.
Excessive sound pressure from
earphones and headphones can
cause hearing loss.
•
•
Adjust the volume and sound quality of this unit and the other equipment. Reduce the level of input signal
(for example, by switching off the equalizer or reducing the volume) of the other equipment before connection.
High levels of input signal will distort the sound.
For details, refer to the instruction manual of the other equipment.
•
•
➡
MAIN
UNIT
REMOTE
CONTROL
Start playback from
the portable audio
source.
Note
Reduce the volume level and
connect the headphones.
Plug type: Ø3.5 mm stereo.
Connect the AM loop antenna.
Keep the loose antenna cord away from other wires
and cords. Do not screw too tightly. Otherwise, the
screwdriver goes around in circle and cannot be fixed.
2
Stand the antenna
up on its base.
Click!
Use a Phillips-head
screwdriver, etc.
Black
Red
White
Connect the AC mains lead.
To household
AC mains socket
To save power when the unit is not to be used for
a long time, unplug it from the household AC mains
socket. You will need to reset some memory items
after plugging in the unit.
3
Insertion of connector
Appliance inlet
Connector
Approx. 6 mm
Even when the connector is perfectly inserted,
depending on the type of inlet used, the front
part of the connector may jut out as shown in
the drawing. However there is no problem using
the unit.
Note
Portable audio player
Connect the AC mains lead after
all other connections are complete.
AM loop antenna
READ THE CAUTION FOR THE
AC MAINS LEAD ON PAGE 2
BEFORE CONNECTION.
SC-HC3_EB (RQTX0261-2B).indd 4 3/25/2009 10:27:22 AM