ADJUSTMENTS
7
٨
٨
Adjust the sensitivity, observing the
operation indicator (red). However,
since the condition for lighting up of
the indicator depends on the com-
bination of the sensing condition
and the selected operation Light-
ON / Dark-ON, verify if from the ta-
ble on the light.
For the sensor with timer, be sure to adjust in the state where
the timer function is not operating. As shown in the figure right,
set the timer operation mode switches to '3' and '4' respectively.
Operation mode switch
Light
Dark
Sensing
condition
Light-ON
(LIGHT ON)
Dark-ON
(DARK ON)
Lights up
Lights upLights off
Lights off
12
3 4
Timer
operation
mode switch
٨ Beam alignment
Retroreflective type sensor
Ԙ
ԙ
Ԛ
ԛ
Set the operation mode switch to the Light-ON mode position (LIGHT ON side).
Placing the sensor and the reflector face to face along a straight line, move the
reflector in the up, down, left and right
directions, in order to determine the
range of the light received condition
with the help of the operation indicator
(red). Then, set the reflector at the cen-
ter of this range.
Similarly, adjust for up, down, left and
right angular movement of the reflector.
Further, perform the angular adjustment
for the sensor also.
Reflector
Sensor
Operation
indicator
(Red)
Sensing
object
Ԙ
ԙ
Ԛ
ԛ
Set the operation mode switch to the Light-ON mode position (LIGHT ON side).
Placing the emitter and the receiver face to face along a straight line, move the
emitter in the up, down, left and right di-
rections, in order to determine the range
of the light received condition with the
help of the operation indicator (red).
Then, set the emitter at the center of
this range.
Similarly, adjust for up, down, left and
right angular movement of the emitter.
Further, perform the angular adjustment
for the receiver also.
Thru-beam type sensor
Emitter
Receiver
Operation
indicator
(Red)
Sensing
object
Diffuse reflective type sensor
Operation indicator (Red)
Operation
mode switch
Sensitivity
adjuster
MIN MAX
MIN MAX
12
34
٨ Sensitivity adjustment
Optimum
position
Sensing range
MAXMIN
Not
sensing
range
Sensor
Operation
indicator
(Red)
Sensing
object
Ԙ
ԙ
Ԛ
ԛ
Turn the sensitivity adjuster fully counterclockwise to
the minimum sensing range position, MIN.
Place an object at the required distance from the sen-
sor, turn the sensitivity adjuster gradually clockwise,
and find out point where the sensor changes to the
light received condition.
Remove the object, turn the sensitivity adjuster fur-
ther clockwise, and find out point where the sensor
changes to the light received condition again with on-
ly the background.
When the sensor does not go to the light received
condition even if the adjuster is fully turned clock-
wise, point is this extreme point.
The optimum position to stably detect objects is the
center point between and .
RETROREFLECTIVE TYPE SENSOR WITH
POLARIZING FILTERS
9
٨ If a shiny object is covered or wrapped with a transparent film, such as those
described below, the retroreflective type sensor with polarizing filters may not be
able to detect it.
In that case, take the following measures given below.
<Example of sensing objects>
Can wrapped by clear film
Aluminum sheet covered by plastic film
Gold or silver color (glossy) label or wrapping paper
<Measures>
Tilt the sensor with respect to the sensing object while fitting.
Reduce the sensitivity.
Increase the distance between the sensor and the sensing object.
TIMER FUNCTION (Only timer incorporated models)
10
٨ The timer incorporated models have three types of convenient timer functions in
addition to the normal operation.
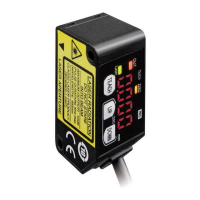
Operation indicator
lights up when the
output is ON.
Timer operation
mode switch
Sensitivity adjuster
(Diffuse reflective type sensor only)
Timer
adjuster
Operation
mode switch
MIN MAX
MIN MAX
12
34
1
3
2
4
1
3
2
4
1
3
2
4
1
3
2
4
1
3
2
4
1
3
2
4
1
3
2
4
1
3
2
4
12
3
4
Output
mode
selection
Timer
mode
selection
Sensing
condition
LIGHT ON
Light-ON
mode
DARK ON
Dark-ON
mode
Operation
Light-received
normal
operation
Light-interrupted
normal
operation
Light-received
ON-delay
Light-interrupted
ON-delay
Light-received
OFF-delay
Light-interrupted
OFF-delay
Light-received
ONE SHOT
Light-interrupted
ONE SHOT
ON
OFF
Beam-
received
Beam-
interrupted
ON
OFF
ON
OFF
ON
OFF
ON
OFF
ON
OFF
ON
OFF
ON
OFF
T
T
T
T
T
T T T
T T
T T
T T
Timer period: T = 0.1 to 5 sec. (variable)
How to mount
SLIT MASK (OPTIONAL)
(Exclusively for thru-beam type sensor)
11
٨ With the slit mask (OS-VF-غ), the sensor can detect a small object.
However, the sensing range is reduced when the slit mask is mounted.
Check the directions of the slit mask and press it to the
lens surface till you feel a click.
1m36mm
2mǾ20mm
Slit on both sides
Slit on both sides
3m612mm
Slit on one side
Slit on one side
4mǾ20mm
OS-VF-6g12
(612mm)
OS-VF-3g6
(36mm)
Without slit mask
㧙
10mǾ20mm
Slit mask applied Assembly
Sensing range
Min. sensing object
* Retroreflective type sensor with polarizing
filters do not need the above adjustment.
RETROREFLECTIVE TYPE SENSOR
8
٨ Please take care of the following points when
detecting materials having a gloss.
Ԙ
ԙ
Make L, shown in the diagram, sufficiently
long.
Install at an angle of 10 to 30 degrees to
the sensing object.
L
10 to 30q
Sensing
object
Reflector
Glossy
surface
Make L sufficiently
long
INTENDED PRODUCTS FOR CE MARKING
12
٨
The models listed under ' SPECIFICATIONS' come with CE Marking.
As for all other models, please contact our office.
1
Overseas Sales Division (Head Office)
2431-1 Ushiyama-cho, Kasugai-shi, Aichi, 486-0901, Japan
Phone: +81-568-33-7861 FAX: +81-568-33-8591
Europe Headquarter: Panasonic Electric Works Europe AG
Rudolf-Diesel-Ring 2, D-83607 Holzkirchen, Germany
Phone: +49-8024-648-0
US Headquarter: Panasonic Electric Works Corporation of America
629 Central Avenue New Providence, New Jersey 07974 USA
Phone: +1-908-464-3550
PRINTED IN CHINA © Panasonic Electric Works SUNX Co., Ltd. 2011
http://panasonic-electric-works.net/sunx
 Loading...