X-Rite eXact 2
29
NOTE: Your own jobs appear indented below the menu item Jobs. Refer to the Jobs section that follows for
information on Jobs.
3. Review or edit the settings (3) if required. See Density Settings section earlier for additional information.
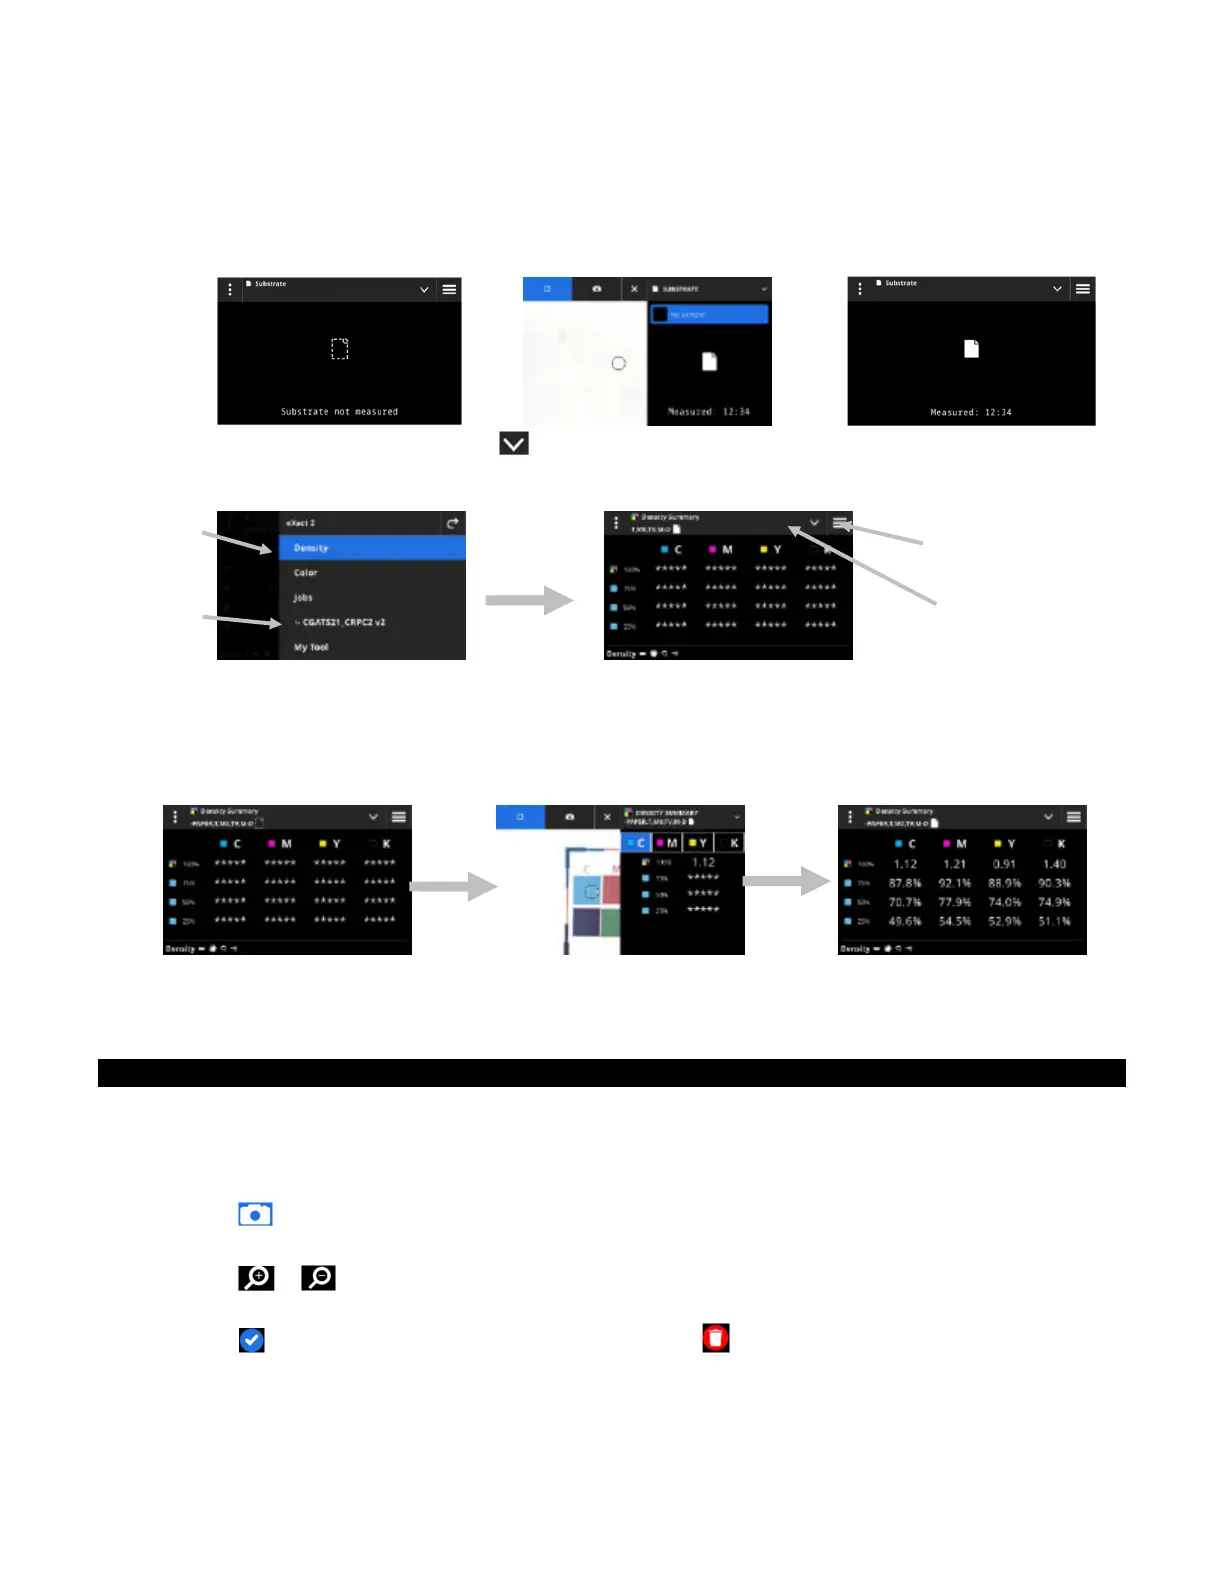
4. Select Paper from the Density View Options screen if a substrate measurement is required. Position the
device on the substrate and take a measurement.
5. After substrate measurement, tap the icon (4) to select the density function from the Density View
Options screen for measuring and viewing data. See the Density Functions section earlier for additional
information.
NOTE: You can continue with solid patch, tint, overprint, etc. measurements while in targeting mode without
selecting the type of patch. If you would like to select the individual patches before measuring, follow steps 6
through 13.
6. Position the device on the first solid patch (cyan), take a measurement and view data.
7. Position the device on the 2nd solid patch and take a measurement and view data.
8. Continue with measurements of the 3rd and 4th solid patches.
9. Measure the tint patches.
Digital Loupe
This function is used to capture a high resolution image of the targeting area. Once an image is captured, you
can view and enlarge the area. The device can store up to 20 total images for Color and Density.
To capture an image:
1. Activate targeting mode by pressing the Measure button once
2. Tap the icon (1) to open the Loupe Mode.
3. Position the device on sample and press the Measure button again to capture the image.
4. Tap the or icons (2) to zoom in and out of the image. You can also use your finger to pan around
the image.
5. Tap the icon (3) to save the image to the device. Tap the icon (4) to delete the image.
(4)
(1)
(3)
(2)