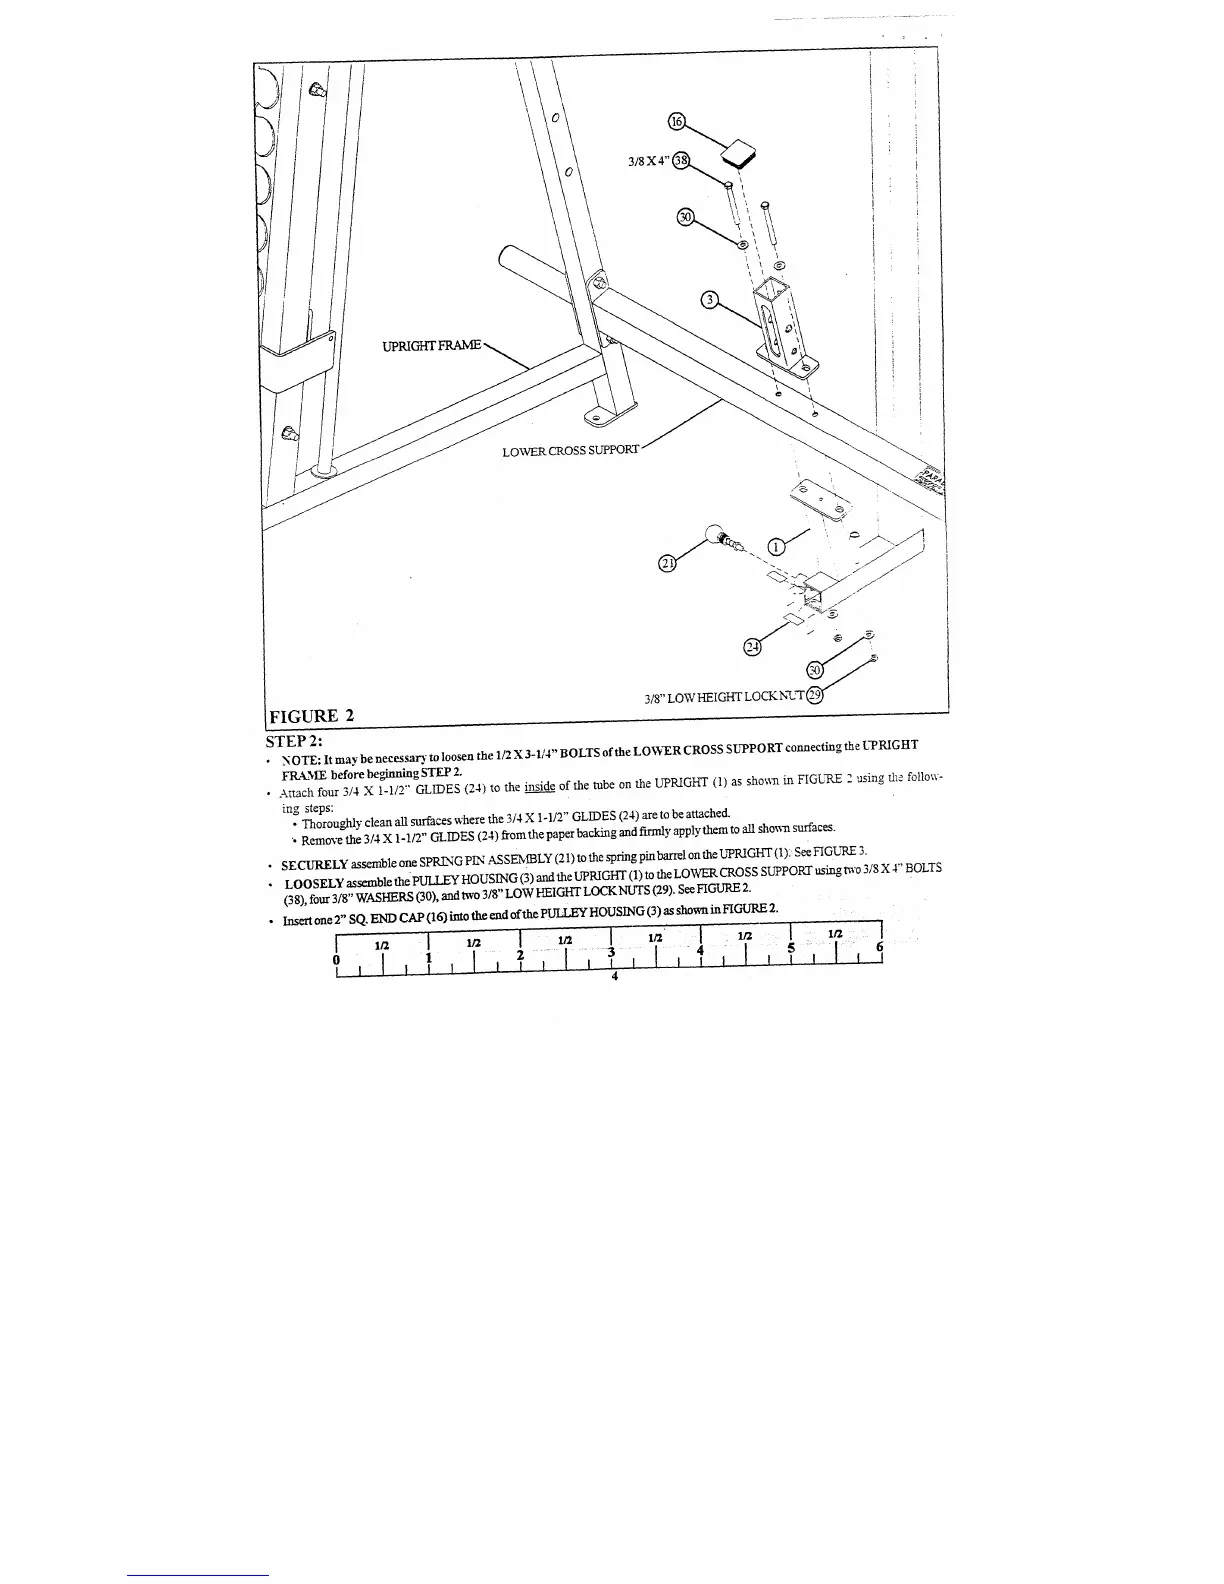
FIGURE 2
LOWER CROSS SUPPORT
3/8" LOW HEIGHT LOCK N-U’T ~
STEP 2:
¯
NOTE: It may be necessar.~. to loosen the 1/2 X 3-1/4" BOLTS of the LOWER CROSS SUPPORT connecting the UPRIGHT
FIL~.ME before beginning STEP 2.
¯ Attach four 314 X 1-1/T’ GLIDES (24) to the inside_ of the tube on the UPRIGHT (1) as sho~ in FIGURE 2 using tI~e follow-
~ng steps:
¯
Thoroughly clean all surfaces where the 3/4 X 1-1/2" GLIDES (24) are to be attached.
"- Remo’,~ the 3/4 X 1 - 1/2" GL IDES ( 24 ) from the paper backing and firmly apply them to all sho~aa surfaces.
¯ SE CURELY assemble one SPRLNG P~q AS SENfl3LY (21) to the spring pin barrel on the UPRIGHT (1): See FIGI~q~E
¯
LOOSELY assemble thePU! I EY HOUSING (3) and the UPRIGHT (1) to the LOWER CROSS SUPPORT using m-o 318 X 4" BOLTS
(38), four 3/8" WASHERS (30), and two 3/8" LOW P~IGHT LOCKNUTS (29). See FIGURE
¯
SQ. END CAP (16) into the end of the PULLEY HOUSING (3) as shown in FIGURE Insert one 2"
¯ ..... I-, .....
,,, I,
:,
 Loading...