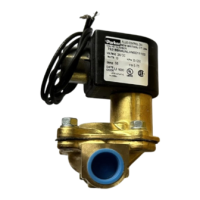
1.
Check electrical supply with voltmeter.
Voltage must agree with
nameplate rating.
2.
Check coil with ohmmeter for shorted or open coil.
3.
Make sure that pressure complies with nameplate rating.
Valve is
sluggish
or in operative - electrical supply and
pressure conditions are verified.
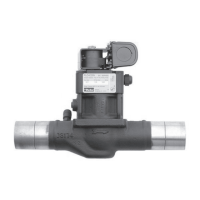
1.
Disassemble valve as per the Disassembly Instructions. Clean out
all extraneous matter ensuring passages are clear.
2.
The plunger must be free to move without binding.
The plunger
spring must not be broken. Replace spring if necessary.
3.
The diaphragm must also be free to move without binding.
Check
diaphragm bleed hole and pilot orifice for clogging or tearing.
Damaged bleed hole may require replacing the diaphragm. Examine
diaphragm return spring(s) and replace if broken.
External leakage at sleeve flange to cover joint
1.
Check that sleeves torques at 130-150 in-lbs.
2.
If leakage persists, remove sleeve and check flange seal for damage.
Replace if defective.
External leakage at flange joint between body and
cover
1.
Retighten cover screws with an input torque of 65-85 in-lbs. For the
3/8" through 3/4" NPT port size valves, and 110-150 in-lbs. For the
1" through 1-1/2" NPT port size valves.
2.
If leakage persists, diaphragm, O-
ring, and/or body or cover with
damaged sealing surfaces may have to be repaired or replaced.
Internal leakage
1. Disassemble valve as per the Disassembly Instructions. Remove
extraneous matter. Clean parts in a mild soap and water solution.
2.
Examine surface of the plunger seal and diaphragm.
replace plunger or diaphragm.
3. Inspect orifices in the body, cover, and diaphragm for nicks or dirt.
Clean as
necessary. Damage may require a new
replacement parts.
4. Examine surfaces of diaphragm or seal in contact with the
main
orifice. Clean if dirty or replace if damaged or worn.
5. Check all springs. If broken, replace.
DECLARATION
Parker's Fluid Control Division certifies its valve appliance products complies with the essential requirements of the applicable
European Community Directives. We hereby confirm that the appliance has been manufactured in compliance with the
applicable standards and is intended for installation in a machine or application where commissioning is prohibited until
evidence has been provided that the machine or application is also in compliance with EC directives.
The data supplied in the Parker valve catalogs and general Installation, Operating & Maintenance Instructions are to be
consulted and pertinent accident prevention regulations followed during product installation and use. Any unauthorized work
performed on the product by the purchaser or by third parties can impair its function and relieves Parker Hannifin of all
warranty claims and liability for any misuse and resulting damage.
A separate Declaration of Conformity or
Manufacturer's declaration is available upon request. Please provide valve
identification
numbers and order serial numbers of products concerned
.