8
Collected dust may be hazardous. Consult proper
authorities for handling and disposal.
!
WARNING
6. Service
1. Collected dust may be a potential fire hazard. Refer to Sec-
tion 1 of this manual.
2. Wear appropriate protective clothing.
3. Be environmentally aware of collected dust and its proper
disposal.
4. Press unit function switch to OFF position. Unplug unit from
electrical power source.
5. Disconnect compressed air supply to air manifold inlet and
bleed air supply from manifold.
6.1 Filter Removal and Replacement
As the V Series unit operates and the filter accumulates dust,
the flow rate of the unit will deteriorate. When the pressure drop
across the filter continuously reads between 2”-3” or flow drops
off to the point where the dust generation process cannot ade-
quately be controlled, then it is time to change filters. To change
filters follow these steps:
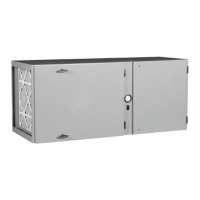
1. Remove filter access cover by unscrewing the retaining knob
(see Figure 8). Tilt cover back away from unit when freed from
the retaining nut to trap any fugitive dust on the inside of the ac-
cess cover. Dump dust into suitable disposal container.
2. Move filter from side to side to break gasket seal between the
filter and the tubesheet. Rotate the filter 180° to allow dust on
top of the cartridge to fall into the dust drawer.
3. Slide filter out along support rods and transfer to suitable dis-
posal container. Empty dust drawer as described in Section 6.2.
4. Inspect tubesheet and make sure the gasket sealing area is
free of dust to ensure a proper seal.
5. Install a new filter element. Clean access cover gaskets and
reinstall cover by tightening the knob securely to the retaining
nut until the gasket is adequately compressed.
6.2 Dust Drawer Removal
1. To access and remove the dust drawer located at the base
of the V Series unit, you must first unseal the drawer by pulling
the drawer release handle (see Figure 8) toward the filter access
side of the cabinet. The drawer will move down and can be
pulled out of the front of the cabinet.
2. Dispose of the collected dust into a suitable container. Any
dust in the cabinet that was not contained in the dust drawer
should be vacuumed out and disposed of.
3. Replace dust drawer by fully inserting into unit, and reseal
the drawer by pushing the drawer release handle toward the
control panel.
The collector should now be ready to operate. Reconnect elec-
trical power and air supply. Go through initial start-up checklist
to ensure proper unit performance.
6.3 After Filter Removal/Installation
If your unit was ordered with a HEPA or carbon after-filter, there
will be an additional filter housing bolted to the discharge side
of the V Series unit. The following steps will allow you to re-
move and replace the after-filter as shown in Figure 9. NOTE:
After-filter housings for portable units (VP) have a push handle
located on the top of the housing.
1. Release the four draw latches located on the filter housing to
release the seal of the after-filter.
2. Remove the exhaust screen.
3. The after-filter will slide out of the housing as shown in Figure 9.
Keep in mind that the filter weight may significantly increase from the
collected material. Dispose of filter properly.
4. Install a new filter element by sliding it into the filter housing with
the gasket of the after-filter leading.
5. Replace the exhaust screen and secure the four draw latches to
seal the filter.
6.4 Servicing Direct Drive Blower
To gain access to the direct drive motor/blower you must first re-
move the discharge air plenum as shown in Figure 7.
NOTE: The blower rotation should be clockwise when looking at the
motor from the discharge side of the cabinet.
See the troubleshooting guide in Section 8 of this manual for clues
on motor/blower problems.
 Loading...