PKHAP 20-Li A1
GB
│
CY
│
7 ■
WARNING!
■ To avoid potential risks, damaged mains
cables should be replaced by the manufac-
turer, their customer service department or
asimilarly qualified person.
Before use
Charging the battery pack
(seefig.A)
CAUTION!
► Always unplug the appliance before you
remove the battery pack5 from or connect
itto the charger.
■ Never charge the battery pack5 when the
ambient temperature is below 10°C or above
40°C.
♦ Connect the battery pack5 to the high-speed
battery chargert (see fig. A).
♦ Insert the power plug into the socket. The
control LEDz lights up red to indicate that the
appliance is charging.
♦ The green LEDu indicates that the charging
process is complete and the battery pack5 is
ready.
♦ Push the battery pack5 into the appliance.
Attaching/disconnecting the battery
pack to/from the appliance
Attaching the battery pack
♦ Push the rotation direction switch3 into the
middle position (lock).
Allow the battery pack5 to click into the
handle.
Removing the battery pack
♦ Press the release button4 and remove the
battery pack5.
Checking the battery charge level
♦ Press the battery charge level button6 to
check the charge level of the battery.
The status/remaining charge will be shown on
the battery display LED7 as follows:
RED/ORANGE/GREEN = maximum charge/
performance
RED/ORANGE = medium charge/performance
RED = low charge – charge the battery
Use
Additional handle
NOTE
► For safety reasons, you should never use this
appliance without the additional handle0
attached.
♦ Remove the additional handle0 by turning it
in a clockwise direction (see fold-out page).
♦ Turn the additional handle0 to the desired
position.
♦ Fix the additional handle0 in the new position
by turning it anticlockwise.
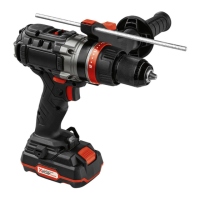
Depth stop
♦ Undo the screw on the depth stop e.
♦ Insert the depth stopr into the additional
handle0.
♦ Ensure that the toothing on the depth stopr
is facing downwards.
♦ Pull the depth stopr out until the distance
between the tip of the drill and the tip of the
depth stop corresponds with the required
drilling depth.
♦ Tighten the screw on the depth stop e to
lock the depth stop r into place.
 Loading...