GB
IE
CY
8
PLS 48 C1
Before first use
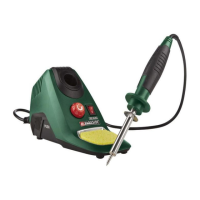
Fitting the coil spring
♦ Push the bracket of the coil spring up to the stop into the slot
provided on the soldering station (see fold out page).
Inserting/replacing the soldering tip
CAUTION! RISK OF BURNS!
► Never heat the soldering iron
without a soldering tip .
■ The soldering tip may only be removed when the appliance is
switched off and the soldering tip is cooled down.
■ The soldering tip has a screw thread and can thus be removed
quickly from the soldering iron.
♦ Unscrew the soldering tip anticlockwise.
♦ Screw the soldering tip in clockwise.
NOTE
► Before use remove the protective cap from the soldering tip
.
► Before using the soldering station for the first time and also
before using a new soldering tip, the soldering tip must be
tinned.
Procedure:
♦ Plug the mains plug into a wall socket and press the ON/OFF
switch
to position “I”.
♦ Set the temperature control
to level 3 and wait until the
appliance has heated up. Allow a little bit of solder to melt
into a thin film on the soldering tip.
 Loading...