2. ASSEMBLY
A. For IH75000 Model only (See Figures 6, 7.)
Tools Required
• Medium Phillips Screwdriver
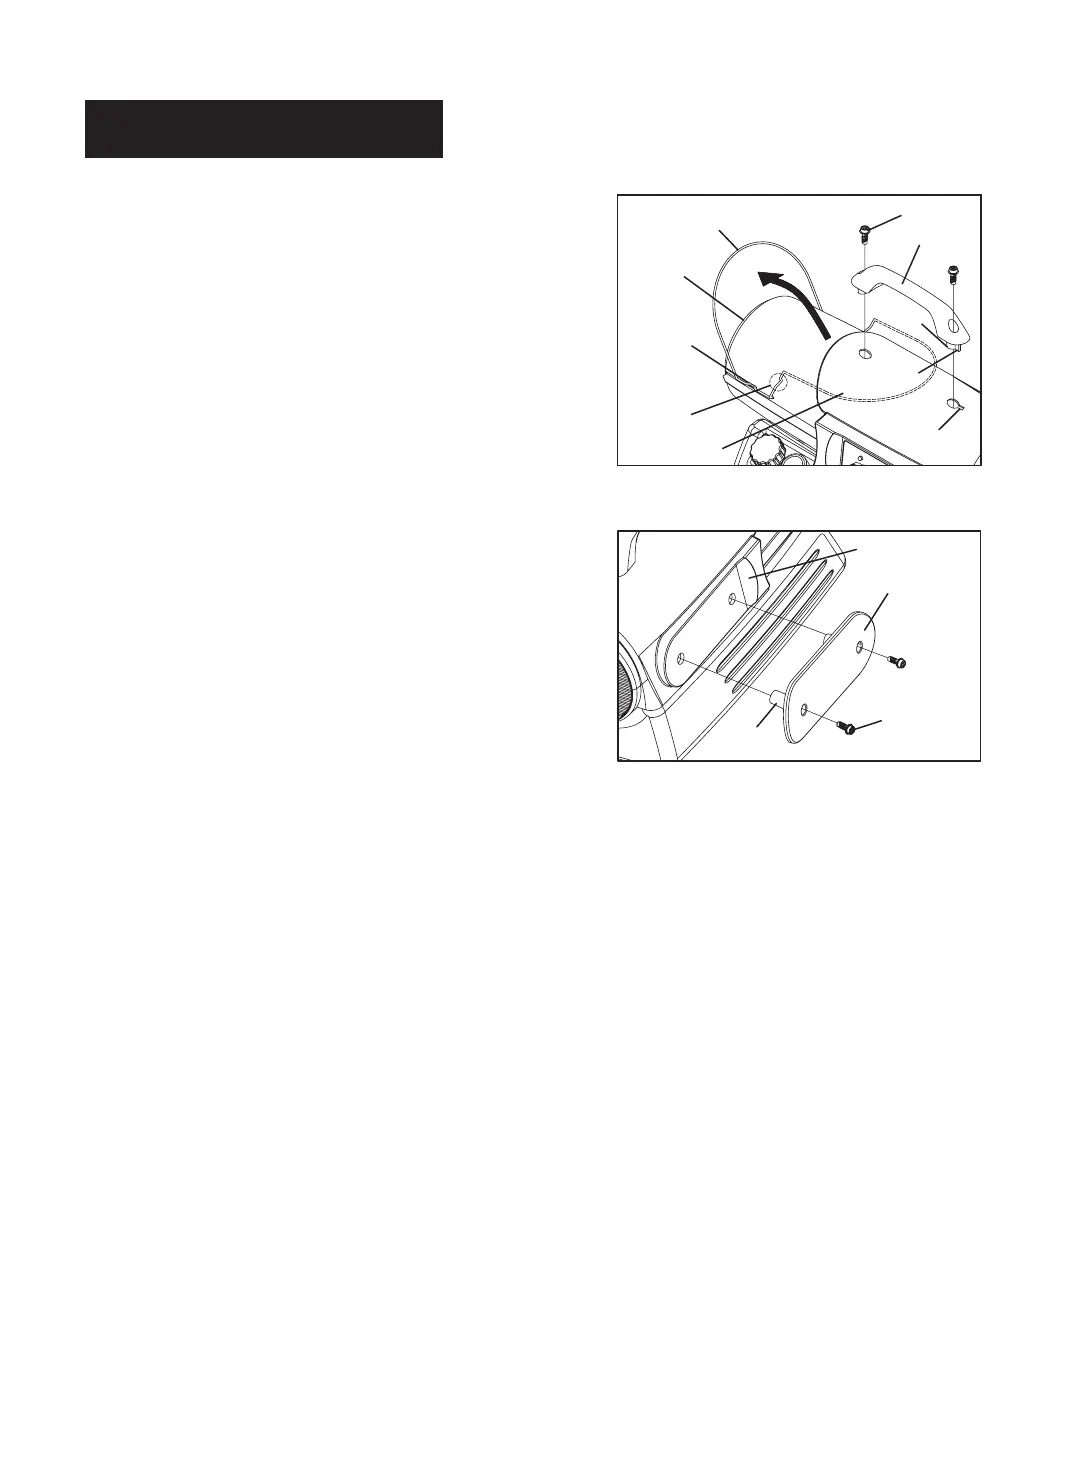
1. Assembling Handle.
1) Lift front guard for arrow direction and make sure that
guard’s wedged portion fits into the slit hole in the
upper shell and faces the hot air outlet.
2) Align boss on bottom of handle with the 2 holes on
the shell cover as shown in Figure 6
NOTE : Be sure to match the tab in the bottom of
the handle with the slot in housing cover.
3) Insert screws into the holes in the handle and tighten
each screw.
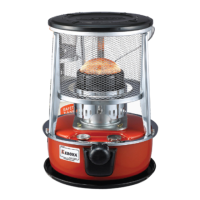
2. Assembling Cord Wrap
1) Align 2 boss on the cordwrap with the 2 holes on the
side cover as shown in Figure 7
2) Insert screws into the holes in the cord wrap and
tighten each screw.
B. For IH125000/IH170000 Models Only
These models are furnished with louver, wheels, front handle,
handle and cord wrap. wheels, handles, cordwraps, louver and
the mounting hardware are found in the shipping carton.
Tools Required
• Medium Phillips Screwdriver
•
3/8"
• Long Nose Pliers
1. Assembling Wheel & Louver and Front Handle
1) Slide one Wheel over the Wheel Axle, making sure that the extended hub of the wheel points towards
the wheel points towards the Wheel Support (See Figure 8, page 6).
2) Slide flat washer over wheel axle end, past the hole in the axle.
Slide cotter pin into the hole in the wheel axle, and using your pliers bend the legs of the Cotter Pin
until it can not be removed.
3) Slide wheel axle through wheel support and assemble the wheel, flat washer and cotter pin as in Steps 1 and 2.
4) Place wheel caps on flat washers until they snap in place securely.
5) Remove two screws in each side fore-end of shell upper.
6) Fit bracket-right & left to each side flange of upper shell and align each hole on the brackets with
the hole on the flanges (See Fighre 8, Page 6).
7) Secure each hole with a screw that removed.
8) Place front handle on shell flange and insert screws through front handle, shell flange and tighten each
screw after each screw is inserted.
2. Assembling handle & cord wrap.
1) Assembling handle : Assemble by method described above for model IH75000.
2) Assembling cord wrap : Assemble by method described above for model IH75000.
6
NEVER LEAVE THE HEATER
UNATTENDED WHILE BURNING!
Boss
Side Cover
Cord wrap
Screw
Screw
Shell cover
Tab
Boss
Handle
Front Guard
Hot Air
Outlet
Slit Hole
Wedged
Portion
Slot
Figure 6. Handle Assembly
Figure 7. Cord Wrap Assembly
Open or Adjustable wrench, Use US(Inch) Screws Nuts