PDA Pro-Range Instructions • Approved Doc. No. DCP0003168 Rev 1 • Page 10
Safety precautions
Ensure the amplifier IS NOT located in areas with high ambient temperatures or high levels
of humidity, moisture or dust. It SHOULD NOT be exposed to direct sunlight or water nor be
placed next to vibrating or heat-generating equipment.
The amplifier should never be covered with any object that could impede the flow of air to
its cooling fan and we recommend there is a gap of at least 50mm (2 inches) to the rear and
sides of the amplifier.
DO NOT dismantle or attempt to modify the amplifier in any way. No user-serviceable fuses or
parts are included inside the amplifier. For repair, consult your distributor/supplier.
Ensure the a.c. power lead, loop cable and all relevant audio/microphone lead(s) are fixed
securely into position before operation. Do not leave any trailing leads.
The a.c. power lead has a moulded plug. If you need to remove the plug, it must be replaced
with one that meets BS1363, or equivalent, fitted with a 3A fuse. As the colours of the wires
in the lead may not correspond to the markings in your plug, connect as follows:-
Green and yellow wire to ‘E’ mark, ‘ ‘ mark, ‘Green’ mark or ‘Green and Yellow’ mark
Blue wire to ‘N’ mark, ‘Black’ mark or ‘Blue’ mark
Brown wire to ‘L’ mark, ‘Red’ mark or ‘Brown’ mark
Please refer to the safety precautions below before attempting
to make any connections or operating your PDA Pro-Range
induction loop amplifier.
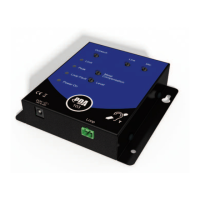
Mounting the amplifier
The amplifier has been designed so it can be left free-standing on a shelf, tabletop or desk,
or, alternatively,
wall or rack mounted using one of our optional PDA/RM 19” rack mounting
kits or PDA/WM wall-mounting kits.
Always refer to the Safety precautions (above) before deciding on a location for the
amplifier and note that more detailed information on wall or rack mounting is supplied
with each optional mounting kit.
Installation