8
Camera Mode
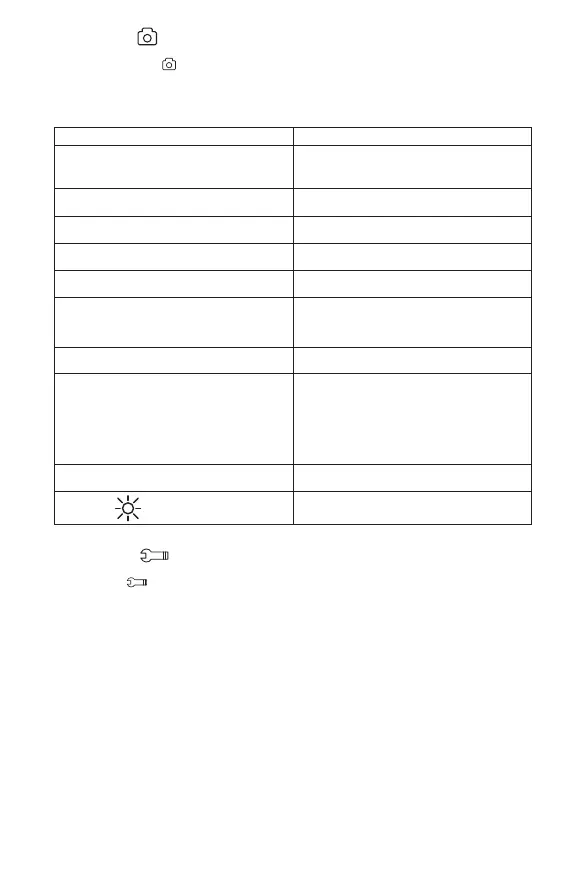
1. To adjust the settings for Camera Mode, press the Settings button and highlight the Camera Mode
Setting Menu Icon
.
2. Use the RW/UP and FW/DOWN Arrow buttons to select the desired feature and use the Select
button to select the feature.
3. Within the selected feature use the RW/UP and FW/DOWN Arrow buttons to select the desired
É»ÊʿĽżʾ»¼»·ÊËÈ»·ÄºÆÈ»ÉÉʾ»»Â»¹Ê¸ËÊÊÅÄÊŹÅÄŰÈÃʾ»É»Â»¹Ê¿ÅÄƔ
Description Function
MP Resolution Setting up resolution of the pictures.
12M (highest), 10M, 8M, 5M, 3M, 2MHD, 1.3M,
VGA (lowest )
Sharpness Choose the sharpness of the pictures taken. Strong,
Normal, Soft.
Quality Choose the quality of the pictures taken. Fine,
Normal, Economy.
White Balance Calibrate the white color on image. Auto, Daylight,
Cloudy, Tungsten, Fluorescent.
ISO Adjust camera sensitivity level setting. Auto, 100,
200.
Exposure Allows the user to manually control the amount of
sunlight penetrating into the sensor. +2.0 (more
bright), +5/3, +4/3, +1.0, +2/3, +1/3, +0.0 (Default),
-1/3, -2/3, -1.0, -4/3, -5/3, -2 (dim image).
Anti-Shaking Allows the camera to take clear pictures under
vibration.
Quick Review ŮƯ·Á»Æ¾ÅÊÅƺËĺ»È¿¹ÊËȻź»ƻÍ¿ÂÂ
immediately return a live picture after taken.
2 seconds - When picture is clicked, the frame will
freeze for 2 seconds before returning to Live Mode.
5 seconds – When picture is clicked the frame will
freeze for approximately 5 seconds before returning
to Live Mode.
Date Stamp Allows user to set up for time and date for video
recording.
Night Vision
Enables the ability to record videos in the dark. To
set up simply turn ON, OFF or set in Auto Mode.
General Setup
1. To adjust settings for General Set Up, press the Settings button and highlight the General Setup
Menu Icon
.
2. Use the RW/UP and FW/ DOWN Arrow buttons to select the desired feature and use the Select
button to select the feature.
3. Within the selected feature, use the RW/UP and FW/DOWN Arrow buttons to select the desired
É»ÊʿĽżʾ»¼»·ÊËÈ»·ÄºËɻʾ»»Â»¹Ê¸ËÊÊÅÄÊŹÅÄŰÈÃʾ»É»Â»¹Ê¿ÅÄƔ