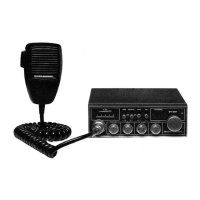
TRANSCEIVER INSTALLATION
Always
mount
where
contro
ls
are
readily accessible, Unit may
be
mounted
to
the
underside
of
the
dashboard
of
a
car,
truck, etc., utilizing special bracket includ-
ed with transceiver.
Attach bracket
to
the underside
of
dashboard
using the
se
lf-tapping screws sup-
plied.
Atta
ch
the
transceiver
to
the bracket using the
two
knurled securing screws
at
the side.
Tilt the unit
to
the
most convenient angle before tightening securing screws.
With
regard
to
the connection
of
the
power cords, it may
be
possible or desirable
to
connect the red lead
(for
negative ground systems)
or
the
black lead
(for
posi-
tive
ground
systems)
to
the ignition switch accessory terminal
so
that
the
radio
is
automatically turned
off
when the ignition switch (key)
is
turned off.
Alternately, the power lead may be connected to an available
t~rminal
on the fuse
block
or
even
to
a point in the wiring harness. Care must be taken, however,
to
guard against a short circuit condition. When in doubt, please contact y
our
vehi-
cle dealer for specific information for your vehicle.
GROUND
INFORMATION
Most newer U.S.
and
foreign made cars
and
small trucks use a negative
ground
system, while some older cars
and
some newer, larger trucks may use a positive
ground
system. A negative ground system
is
generally identified by
the"-"
bat-
tery terminal being connected to the vehicle
motor
block,
but
if
you cannot de-
termine the polarity
of
your vehicle, consult your vehicle dealer for information.
NOTE:
This radio may be installed and used in
12
-v
olt DC negative ground system.
NEGATIVE
GORUND
SYSTEM
Connect the red
DC
power cord from the radio to the positive
"+"
battery ter-
minal
or
other
convenient point
and
connect the black power lead
to
the chassis
or
vehcile frame,
or
the
negative"·"
terminal
of
the battery.