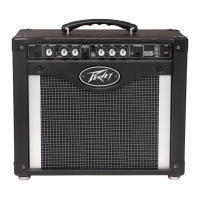
7
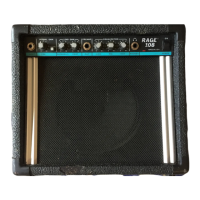
Rage 258
®
- Transtube Series - Guitar Amplifier
Before you begin to play through your amplifier, it is very important to ensure the
product has the proper AC line voltage supplied. You can find the proper voltage for
your amp printed next to the IEC line (power) cord on the rear panel of the unit. Each
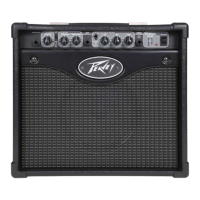
product feature is numbered. Refer to the front panel diagram in this manual to locate
the particular features next to their number.
INPUT
This Input jack will accept signals from all types of guitar pickups. Be sure to use a high quality
shielded instrument cable to connect the guitar to the amplier.
VOLUME
Controls the volume level of the Clean channel and is not affected by the Lead Pre or Post
Gain controls.
CHANNEL SELECT SWITCH
Allows selection of the Lead or Clean channel. The “down” position of the switch selects the
Lead channel and the “up” position selects the Clean channel.
PRE GAIN
Controls the input volume level of the Lead channel. The Pre Gain can be used to control the
distortion level in the Lead channel. To obtain more distortion simply increase the Pre Gain
and set the Post Gain (5) to the desired volume level.
POST GAIN
Controls the overall volume level of the Lead channel. The nal level adjustment should be
made after the desired sound has been achieved.
AUX INPUT/DIRECT OUTPUT
The AUX INPUT can be used to route the headphone out signal of a CD player, tape
player, etc. into your Rage amplier. Connect the CD or tape headphone output using
a shielded cable to the AUX INPUT jack. This jack can also serve as a low-level direct out
for recording devices. This signal is mixed with the guitar signal but is not affected by the EQ.
MODERN/VINTAGE/STACK SWITCH
This switch allows you to instantly change the voicing to reect the tones of modern and
vintage ampliers. The “MODERN” position maintains a warm, standard voicing. The
“VINTAGE” position changes the overall function of the EQ and adds a hint of brightness
to emulate some classic amp designs. The "Stack" setting provides a preset EQ curve to mimic the
tone of a larger amp. Experiment with this switch, along with the EQ (8)
adjustments, to capture your desired tone. You may refer to the Recommended Settings on
page 8 for some creative starting points.
LOW, MID AND HIGH EQ
ENGLISH
1
2
3
4
5
6
7
6
1
2 3 4
5 6 7
8
9
10
11
 Loading...