removethepaddedcushion,unthreadthecrotchstrap.
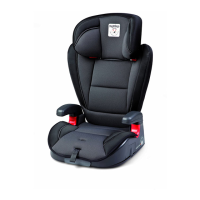
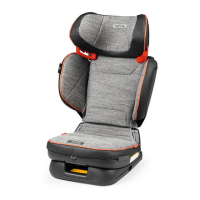
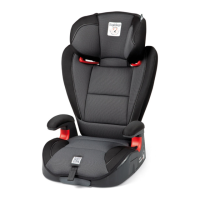
10•The safety seat handle has four fixed positions. To rotate it press
the two round buttons on the handle and simultaneously
moveittotherequiredangle.Ensureitclicksintoposition.
• Position A:thein-carposition;Position B:thepositionfor
transportbyhandandforattachmenttoabase,strolleror
chassis; Position C:allowsthesafetyseattorock;Position D:
stops the safety seat from rocking.
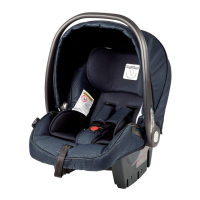
11•Tofitthehood,insertthehoodattachmentsintotheslots
on the safety seat and arrange the rear part of the hood
behind the backrest.
12•The hood has two positions. To raise or lower the hood push it
backorpullitforward.Toremovethehood,pressthebuttons
on its attachment points and at the same time lift it upwards.
• IMPORTANT:thehoodmustnotbeusedtoliftthesafety
seat because it might detach.
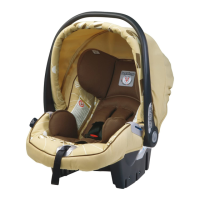
Instructions for in-car use
13•Fitthecarsafetyseatwiththechildonthecarseat,
remembering to secure the child with the safety harness.
• The correct position of the safety seat in the car is parallel
withtheground,andsoifnecessaryusedrolledtowels
under the safety seat to adjust the position.
14•Insert the webbing of the car seat belt into the two lateral
guidesonthesafetyseat,ensuringthatitistaut,andengage
the buckle of the car seat belt as shown in the figure.
15•Take hold of the car seat belt again and pass it behind the
backrestofthesafetyseat,insertingitintotherearguide
as shown in the figure.
16•In the car the handle must be fully lowered forward towards
the car seat backrest as shown in the figure. The correct
forward position is reached when it clicks into position. Check
thattheseatbeltistautandlockedtoensureadequatesafety.
Cover removal
17•Toremovethesafetyseatharness:
• press the metal button in the centre of the seat to extend
the safety harness braces;
• press the red button on the crotch strap buckle to release
the harness;
• release the harness braces from the metal buckle on
the back of the safety seat and unthread them from the
headrest and shoulder covers;
• remove the two plastic covers on the back of the safety seat
byleveringwithastandardtipscrewdriver,andunthread
the two side buckles and the central crotch strap buckle.
18•Toremoveanduncovertheheadrest:
• remove the cover pulling it downwards and slide it
carefully off the two side tabs;
• unscrewthetwoheadrestscrewswithascrewdriver,press
the teeth on the slots and pull the headrest to release it.
19•Toremovethepadding:
• slide off the four padding fixing tabs from the edge of the
safety seat;
• remove the two side guide covers for the car seat belt;
• remove the metal button cover in the centre of the safety
seat,releasingitfromundertheseat;
• remove the padding.
Padding cleaning instructions
• Brushthefabricpartstoremovedustandhandwashata
maximum temperature of 30° without wringing.
• Donotusechlorinebleach.
• Donotiron.
• Donotdryclean.
• Donotremovestainswithsolventsanddonottumbledry.
Refitting
20•Torefitthepadding:
• slide on the padding;
• insert the four padding fixing wings on the edge of the
safety seat;
• reposition the metal button cover in the centre of the
safety chair and engage it from under the chair;
• position the two side guide covers for the car seat belt
with the slots facing the inside of the safety seat and check
that they are correctly engaged in position.
21•Torefittheheadrestandcover:
• from the back of the safety seat insert the headrest height
 Loading...