28
BIOSHIELD
®
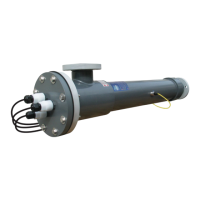
Commercial UV Sterilizer Installation and User's Guide
SECTION 8: MAINTENANCE
5. With the vessel completely drained and the UV
lamps and quartz sleeves removed, loosen the
QSM Faceplate bolts in a diametric sequence.
Continue until all hardware is removed.
6. With fastening hardware removed, pull the QSM
Faceplate from the UV vessel.
7. Clean out the inside of the UV vessel using a mild
dish detergent and rinse thoroughly with clean
freshwater.
8. Thoroughly clean the mating surfaces of both the
QSM Faceplate and the UV Vessel.
IMPORTANT: Use a new QSM Faceplate Rubber
Gasket when re-assembling the
faceplate to the vessel. For replacement
parts please refer to Replacement
Parts list on Page 31 of this manual.
9. Fit the QSM Faceplate Rubber Gasket onto the
alignment posts.
IMPORTANT: To properly align the QSM Faceplate,
set the #1 lamp position (as stamped on
the faceplate, next to the quartz sleeve
module) to the 3 O’ Clock position
when looking at the QSM Faceplate.
10. With the QSM Faceplate loosely aligned, push
the QSM Faceplate, with the rubber gasket, in
place onto the vessel. Next, loosely install (nger
tight) the supplied stainless steel hardware (bolts/
washers/nuts).
11. With the hardware loosely installed (nger tight)
ne tune the alignment of the #1 lamp position to
the 3 O’ Clock position. To verify proper alignment
install the #1 quartz sleeve as outlined on Page
10. The sleeve should go into its respective port
on the quartz sleeve coupler on the opposite end
of the unit without diculty. If when installing
the sleeve you nd it dicult to get the sleeve
to engage in its respective port on the quartz
sleeve coupler this is an indication that the #1
lamp position is not aligned properly in the 3 O’
Clock position. If this is the case, rotate the QSM
Faceplate either clockwise or counterclockwise
until the sleeve freely engages its respective port
on the quartz sleeve coupler.
12. Once the #1 lamp position is conrmed to be
properly aligned, establish uniform pressure over
the QSM Faceplate by tightening the bolts in 5
ft. • lb. increments in a diametrically opposed
(180°) sequence until the recommended torque is
obtained. See recommendations below.
Flange Bolt Torque Recommendations:
0.5” to 1.5” Flange = 12 ft. • lbs.
2.0” to 4.0” Flange = 25 ft. • lbs
5.0” Flange = 30 ft. • lbs.
6.0” to 8.0” Flange = 40 ft. • lbs
10” Flange = 64 ft. • lbs.
12“ Flange = 95 ft. • lbs.