7
BIOSHIELD
®
Commercial UV Sterilizer Installation and User's Guide
Pre-Installation Inspection
Purpose
To familiarize the installer/operator with the UV
Systems
™
Commercial Lines’ components, to assure
proper delivery of all the system’s components and
to inspect each component for shipping damages.
Frequency
To be conducted prior to installation.
Parts and Required Equipment
• Adjustable Wrench or 1.5” Socket
• Box Cutter
• Hammer/Nail Remover
• Flashlight
During pre-installation there is a general risk
due to load.
Quartz Sleeves and UV Lamps are fragile and
potentially dangerous if broken. Handle with care.
Procedure
NOTE: Vessel diameters up to 8” are shipped with
their quartz sleeves assembled. Vessel
diameters 10” and larger are shipped with
their quartz sleeves packaged separately.
NOTE: UV Lamp(s) are shipped in a separate package
either inside the vessel crate or separately.
1. Unpack and inspect vessel for shipping damage. A
box cutter or hammer/nail remover may be needed
to unpack the UV System.
2. Conduct an internal, visual inspection of models
shipped with their quartz sleeves assembled. A
ashlight will help with the internal inspection.
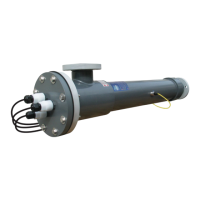
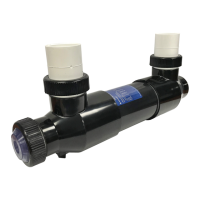
The UV System consists of:
• Quartz Sleeve Module (QSM) Faceplate (assembled
on Vessel)
• QSM Faceplate Gasket (assembled on Vessel)
• UV Intensity Sensor (PLC models only)
• Temperature Sensor
• Quartz Sleeve Retainer Nut (one for each quartz
sleeve)
• Quartz Sleeve Gasket (one for each quartz sleeve
retainer nut)
• Drain Valve Assembly
• Quartz Sleeve (one for each UV Lamp)
• UV Lamp(s)
• Vessel
• Bolt(s) (assembled on Vessel)
• Nut(s) (assembled on Vessel)
• Washer(s) (assembled on Vessel)
• 4-Pin Connector(s) (attached to lamp cables)
SECTION 3: INSTALLATION