A captive portal is a great opportunity to build your brand while providing Wi-Fi service to hotel guests, coee
shop patrons, students, and other users. You can create a customized portal start page using one of two captive
portal modes.
1
Navigate to the Dashboard page. Under WLAN
Information, click Control Panel.
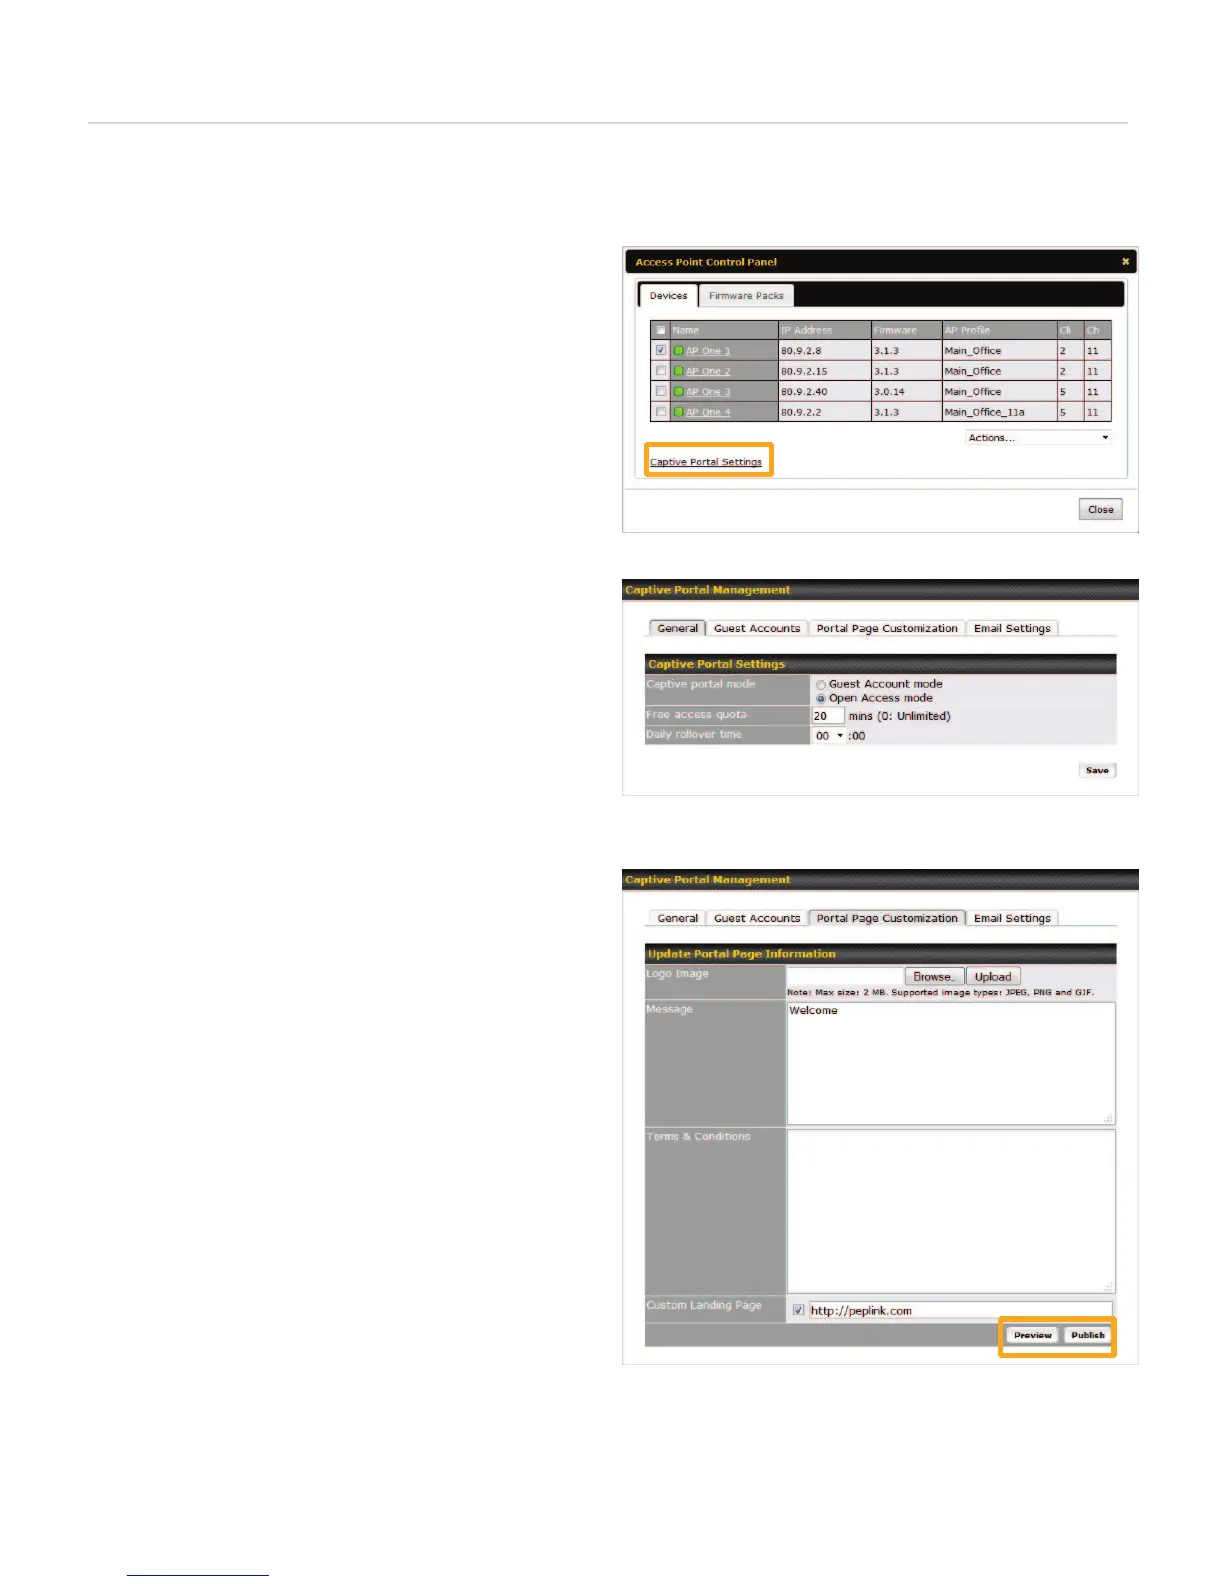
2
In the Access Point Control Panel dialog box,
click Captive Portal Settings, located on the
lower left.
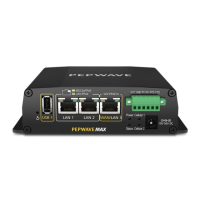
3
Click the General tab and choose a Captive
Portal Mode -
Open Access Mode -- No user name or password
will be required on the portal page. To limit the
amount of time a guest can use the network,
enter the allowed time in Free Access Quota.
Click Save to store your changes.
Guest Account Mode -- The portal page will be
displayed with a login box, and a user name and
password will be required. After selecting Guest
account mode, click Save. Click Guest Accounts
to create accounts.
4
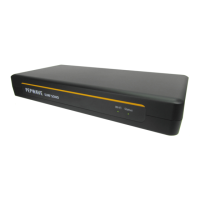
Click the Portal Page Customization tab.
5
To upload an image for the portal page, rst click
Choose File. Select the desired image from your
system and click Upload.
6
Customize your portal page with a Message and
Terms & Conditions.
7
Specify where the customer will be redirected
after successful authentication with Custom
Landing Page.
8
Click Preview to review your design. Click
Publish to save your portal page and make it
available to guests.
D