Creating AP Proles
Applying AP Proles
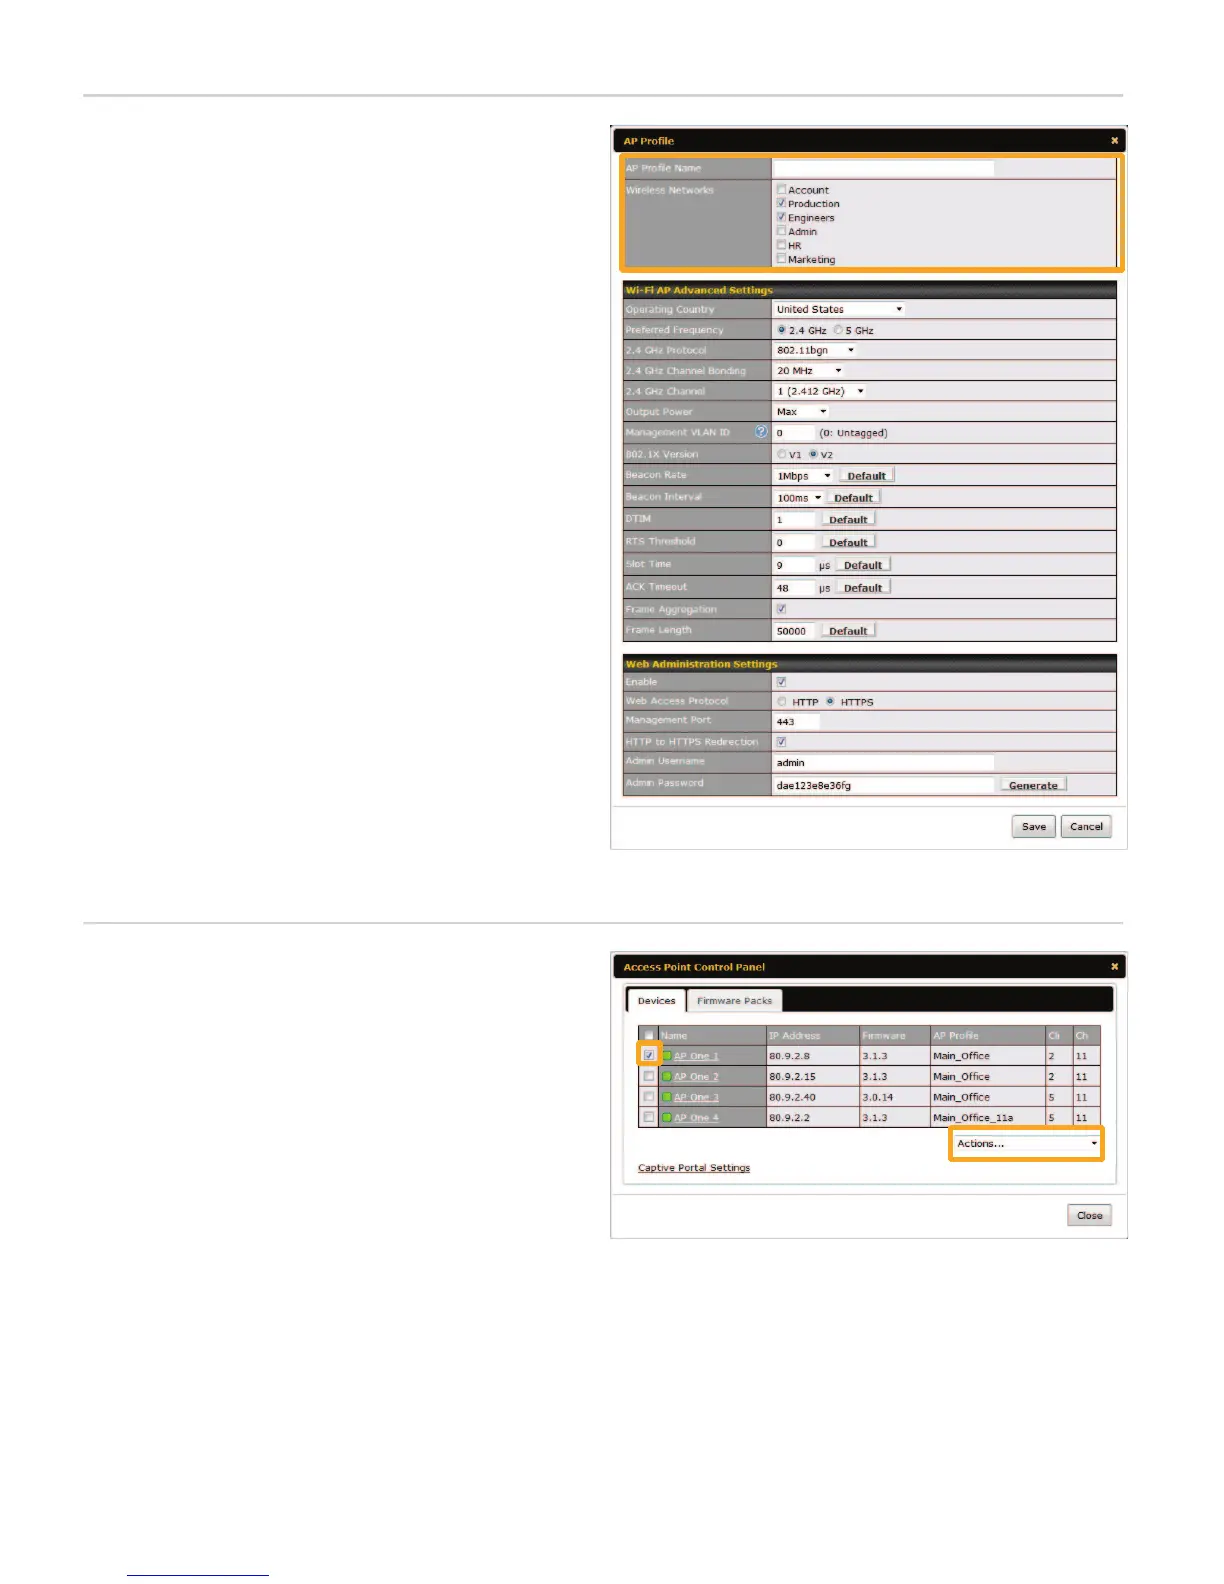
1
Choose AP Proles from the left menu. Click the
New AP Prole button displayed on the bottom
of the page.
2
In the AP Prole dialog box, enter a name for the
device conguration prole.
3
Select up to four wireless networks to include in
the AP prole.
4
Optimize your device’s radio performance by
adjusting the options in AP Advanced Settings.
For example, you can select a dierent 2.4 GHz
Wi-Fi radio channel in order to ensure the best
signal strength and eliminate potential channel
conicts.
5
Change your AP One’s device security settings,
such as passwords, under Web Administration
Settings.
6
Click Save at the bottom of the dialog box, and
then click Apply Changes to store the AP prole.
7
Repeat the above steps to create additional AP
proles for other usage scenarios.
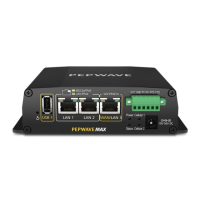
1
Navigate to the Dashboard page. Under WLAN
Information, click Control Panel.
2
Select the check box for the AP One device you
wish to congure.
3
Select AP Prole from the drop-down menu
located in the lower right corner.
4
In the AP Prole dialog box, select a previously
created AP prole. Click OK.
5
The selected AP prole will be sent to your AP
One devices automatically.
B
C